Administration Module
Learn how to add course
-
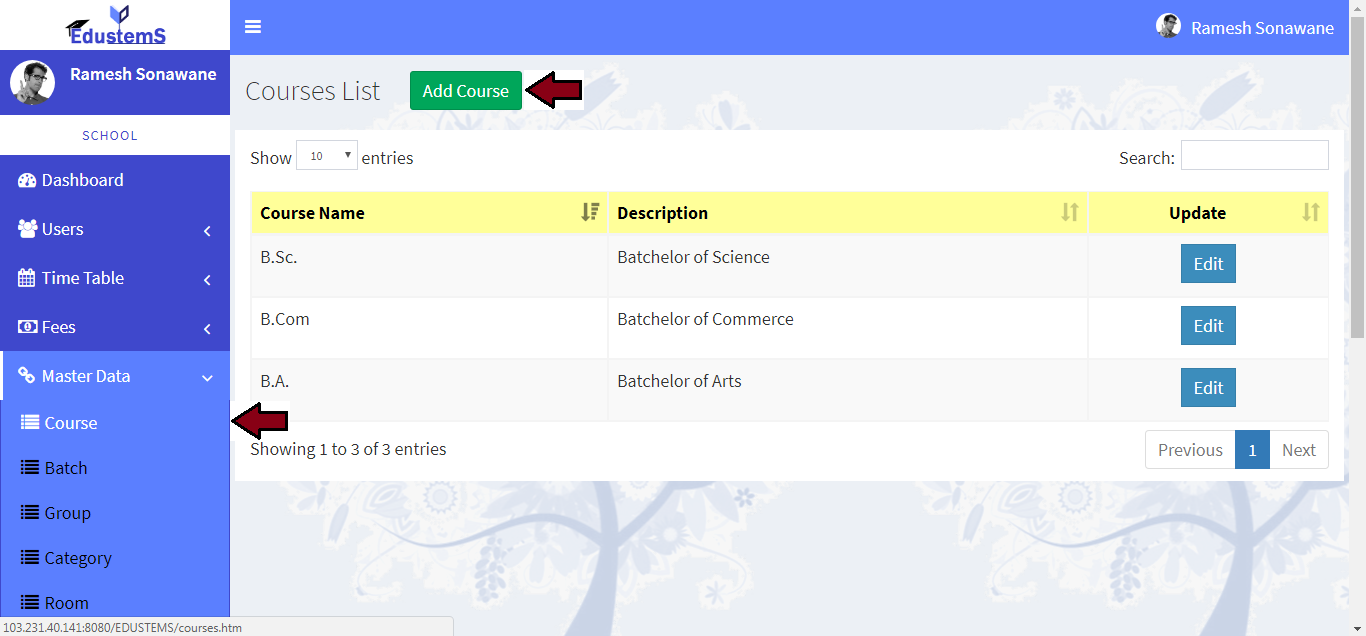
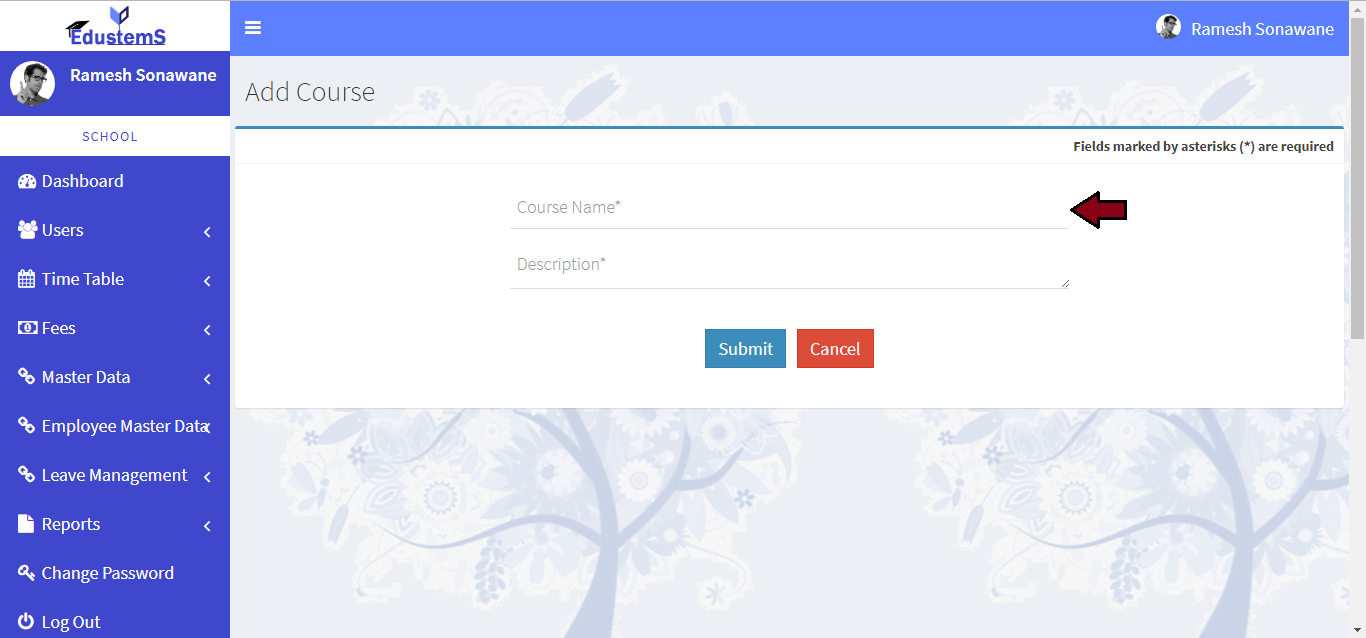
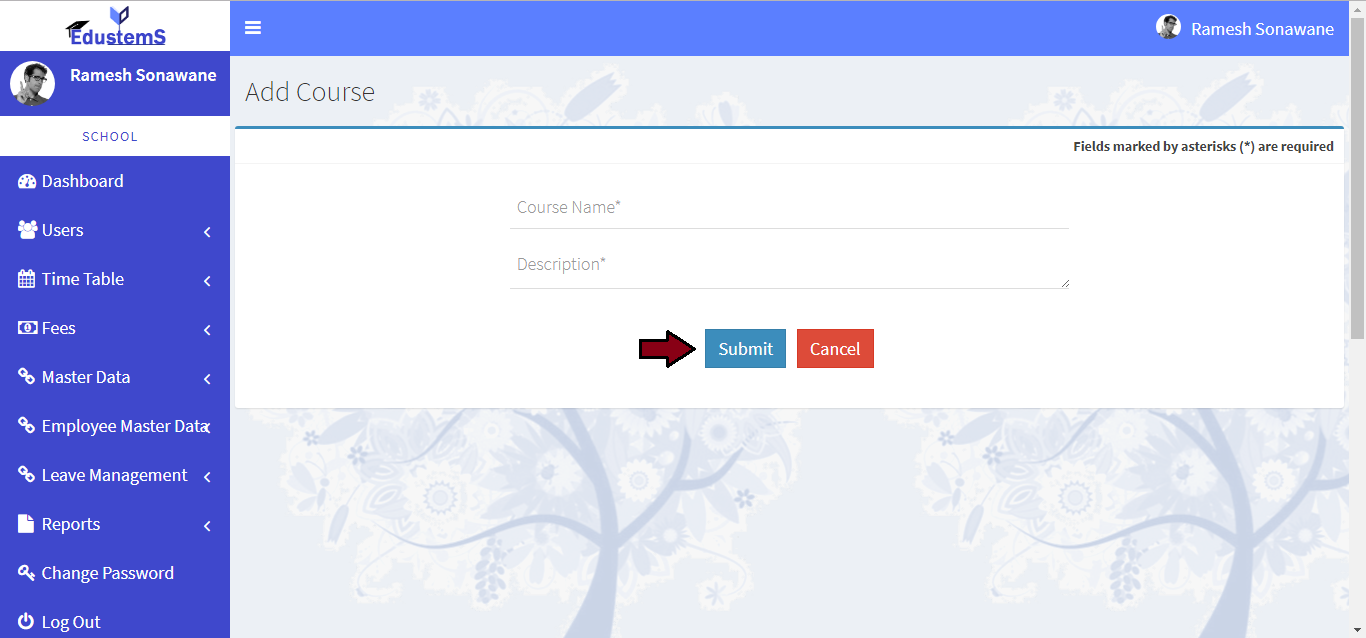
For add new course. Click on Master Data >> Course link from left navigation Panel. Then click on Add Course button
-
Please enter course name
-
Please enter description for course
-
Click on Submit button

Learn how to add batch
-
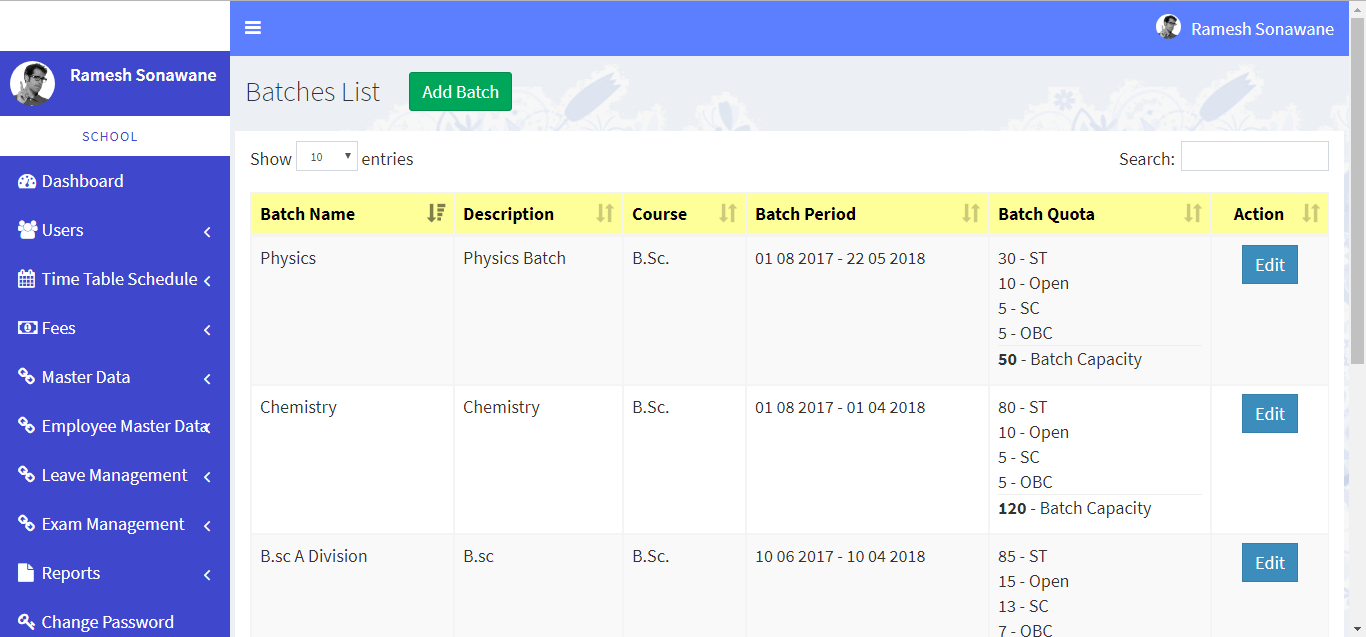
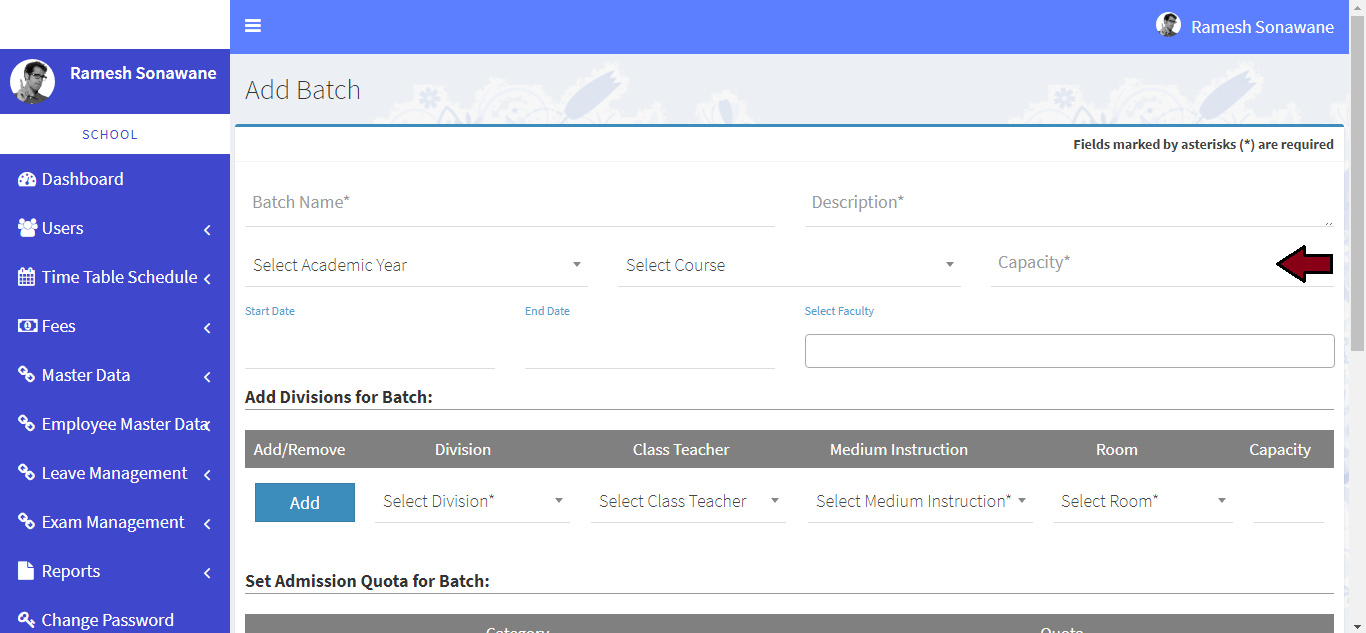
For add new batch. Click on Master Data >> Batch link from left navigation Panel. Then click on Add Batch button
-
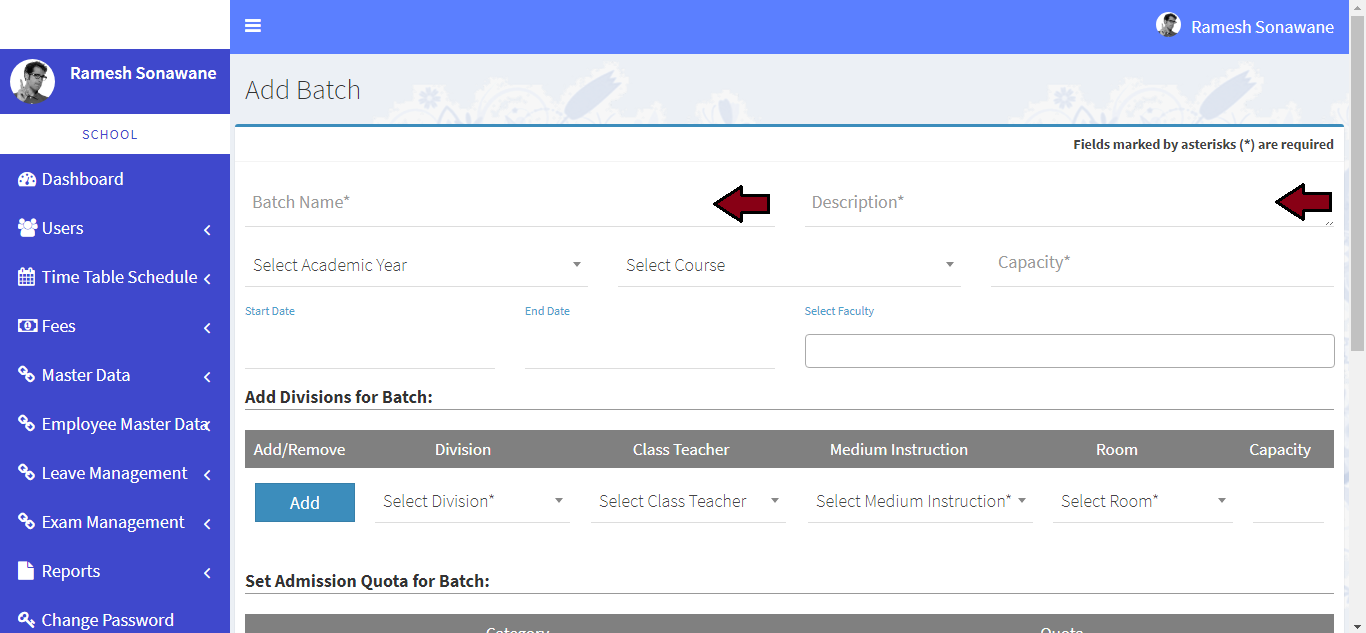
Please enter batch name and description for batch
-
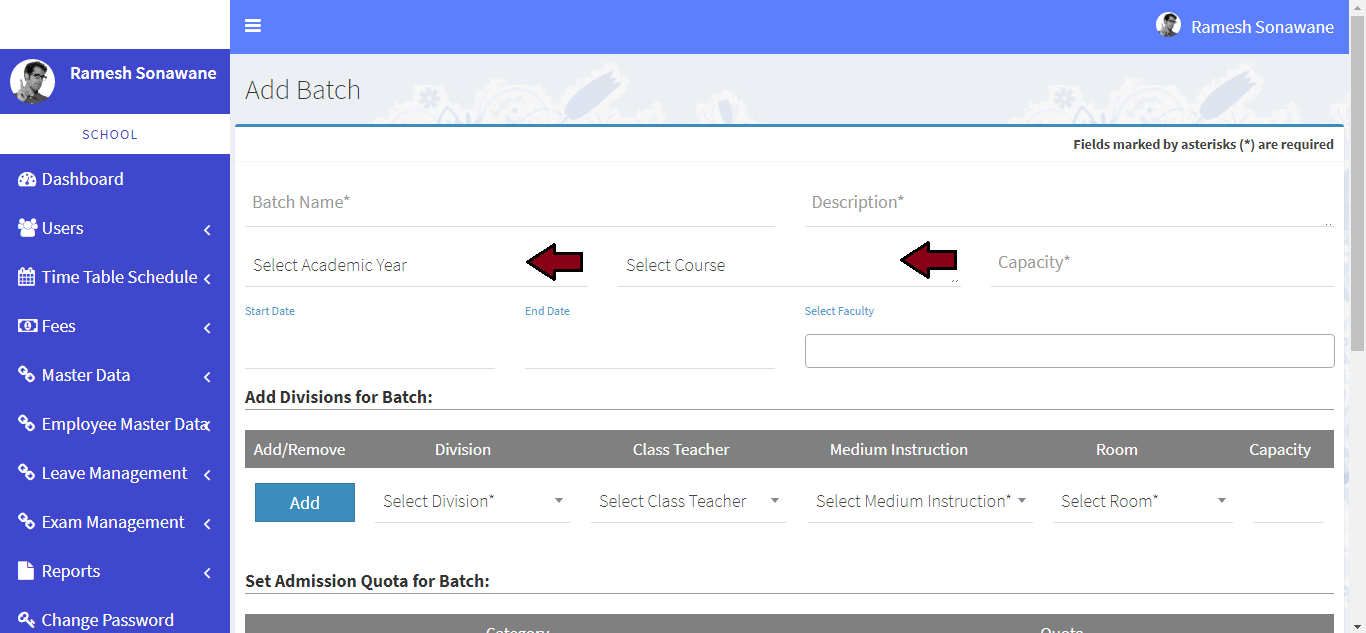
Please select academic year and course
-
Please enter capacity of batch
-
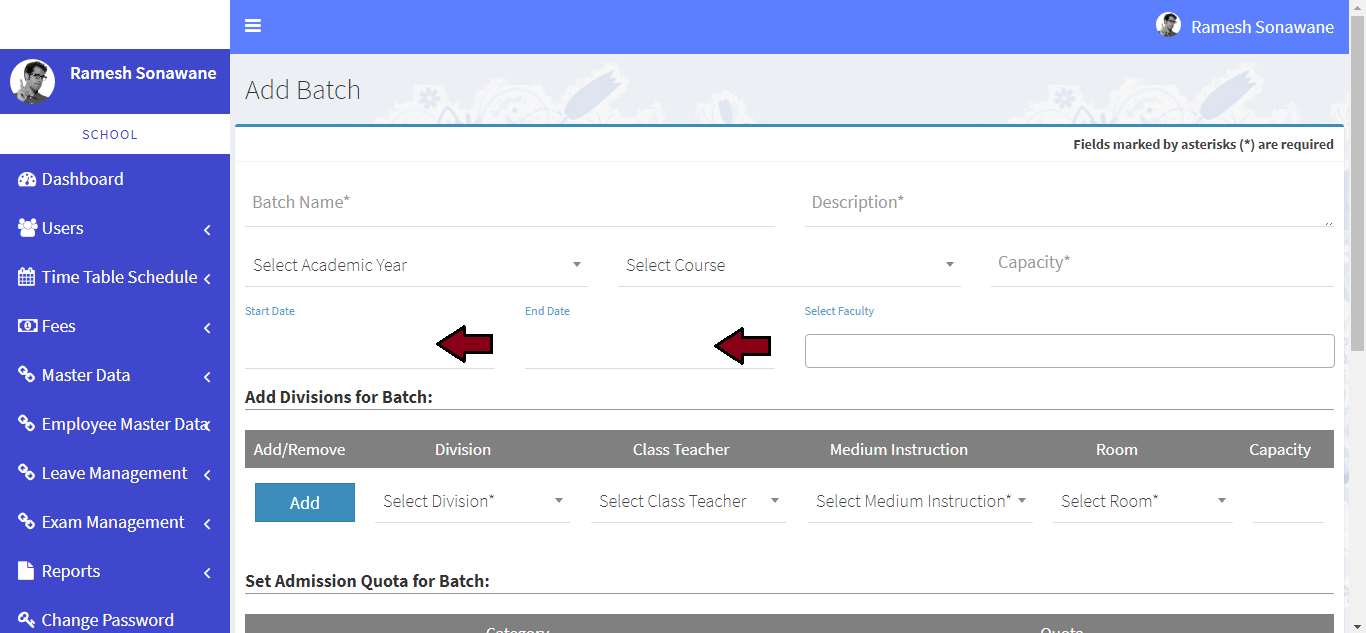
Select start date and end date of batch
-
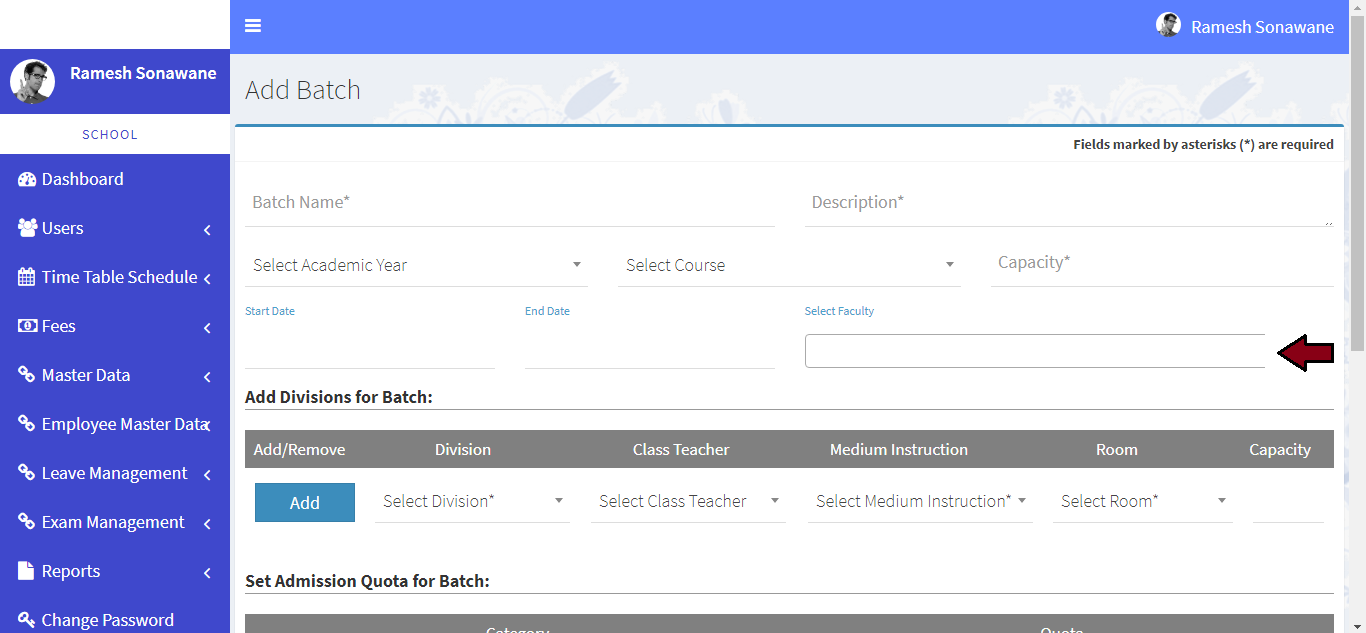
Please select faculties for this batch
-
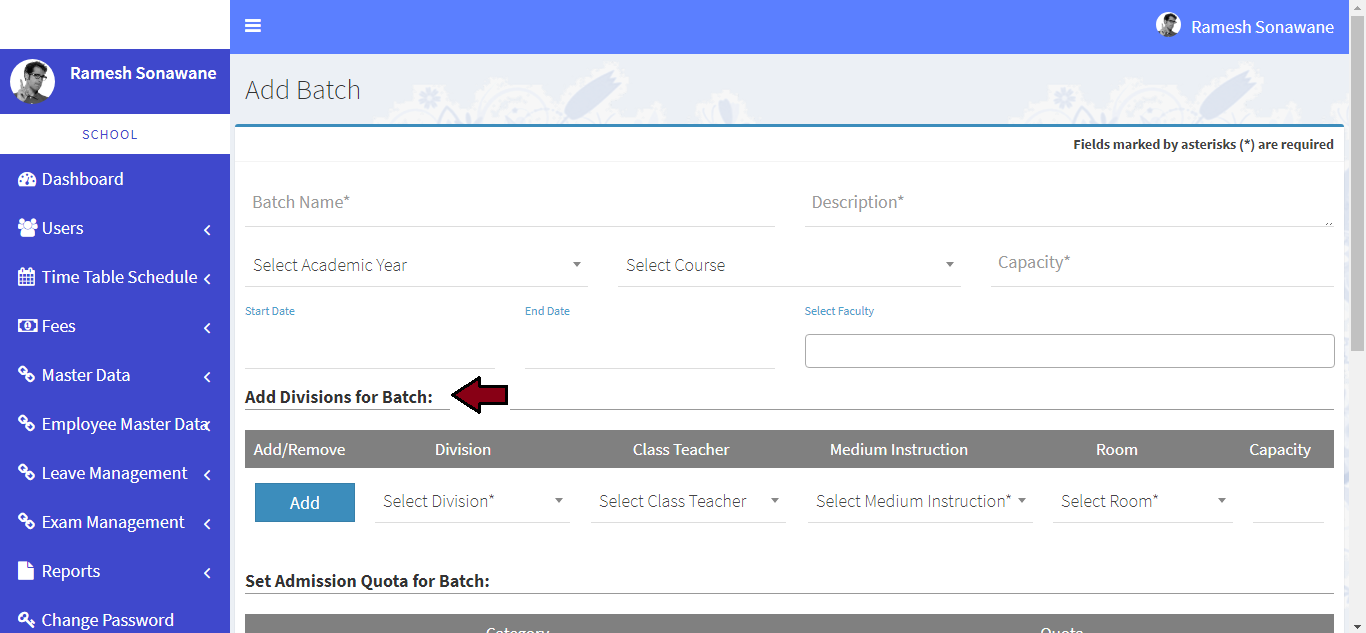
Please add division for batch
-
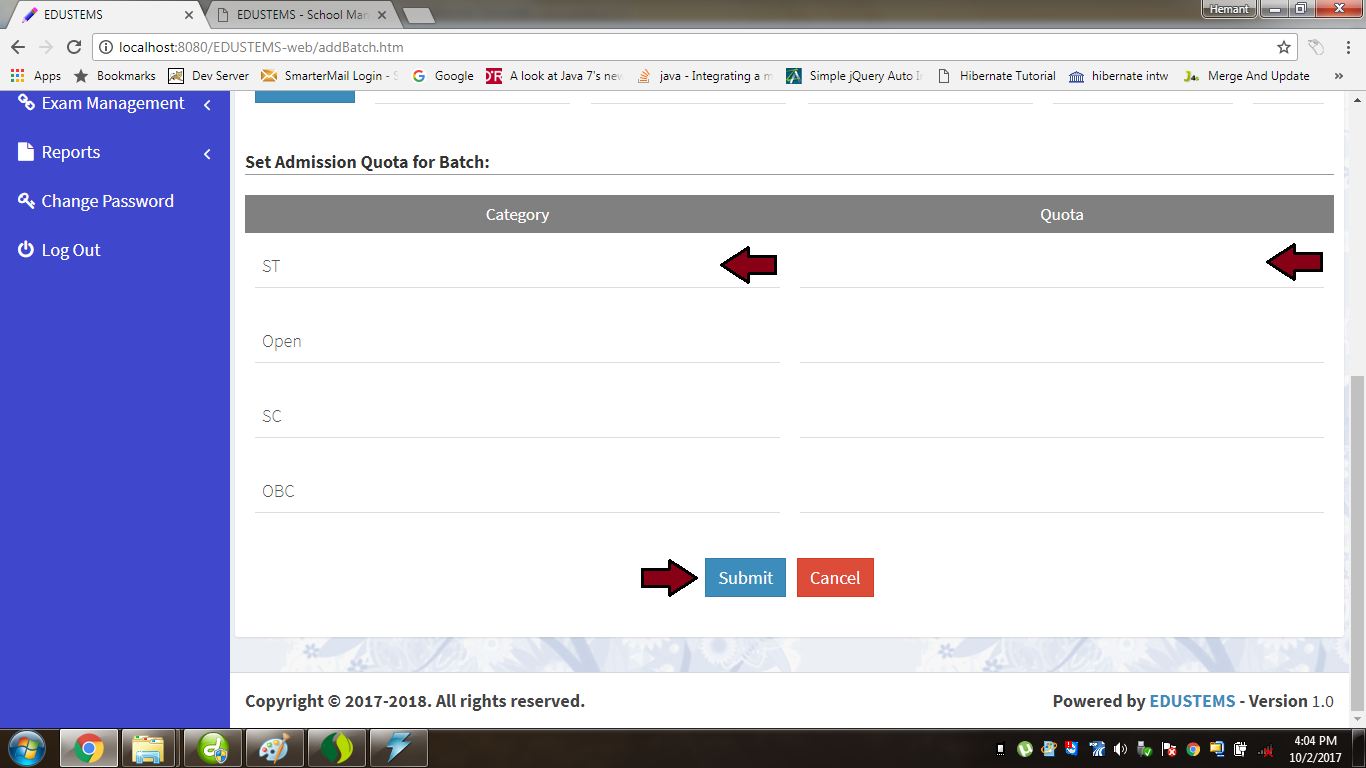
Set quota for batch and click on Submit button
Learn how to add subject
-
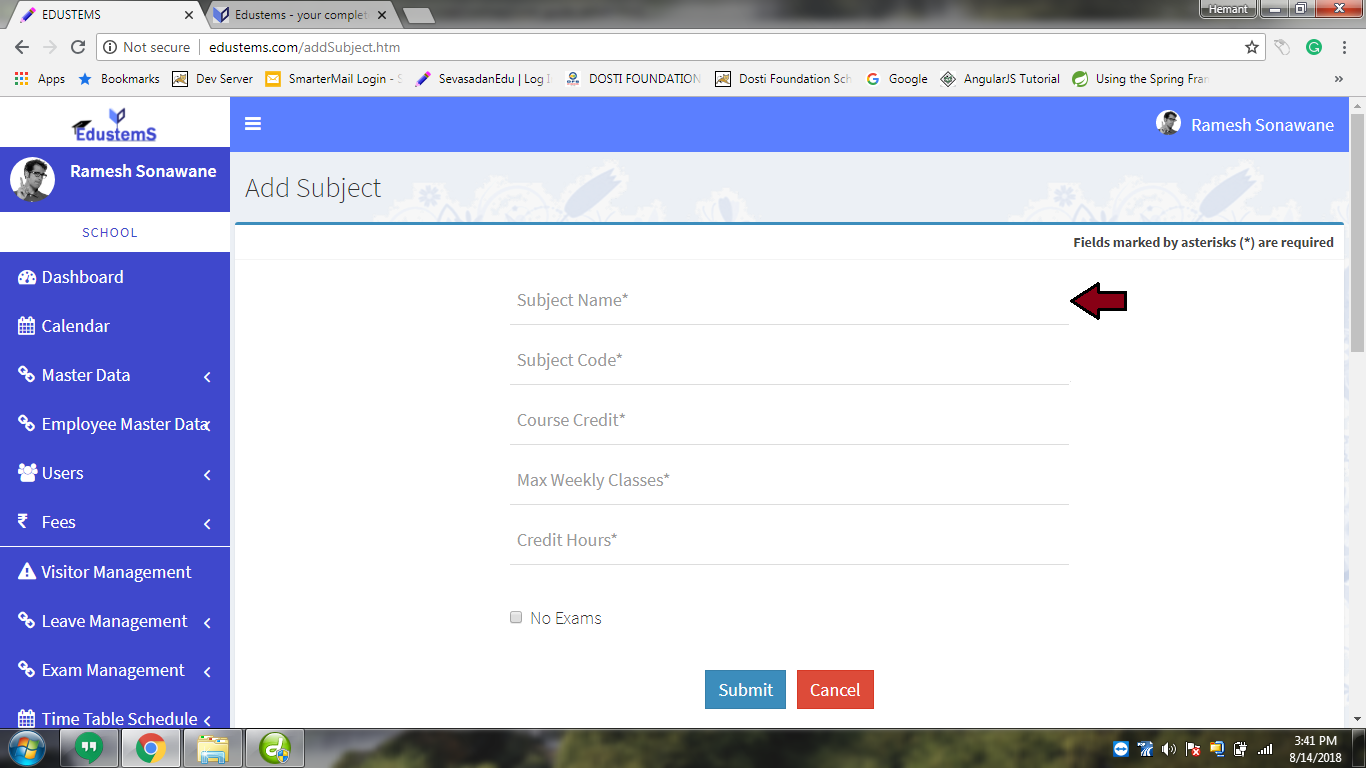
For add new subject. Click on Master Data >> Subject link from left navigation Panel. Then click on Add Subject button
-
Please enter subject name
-
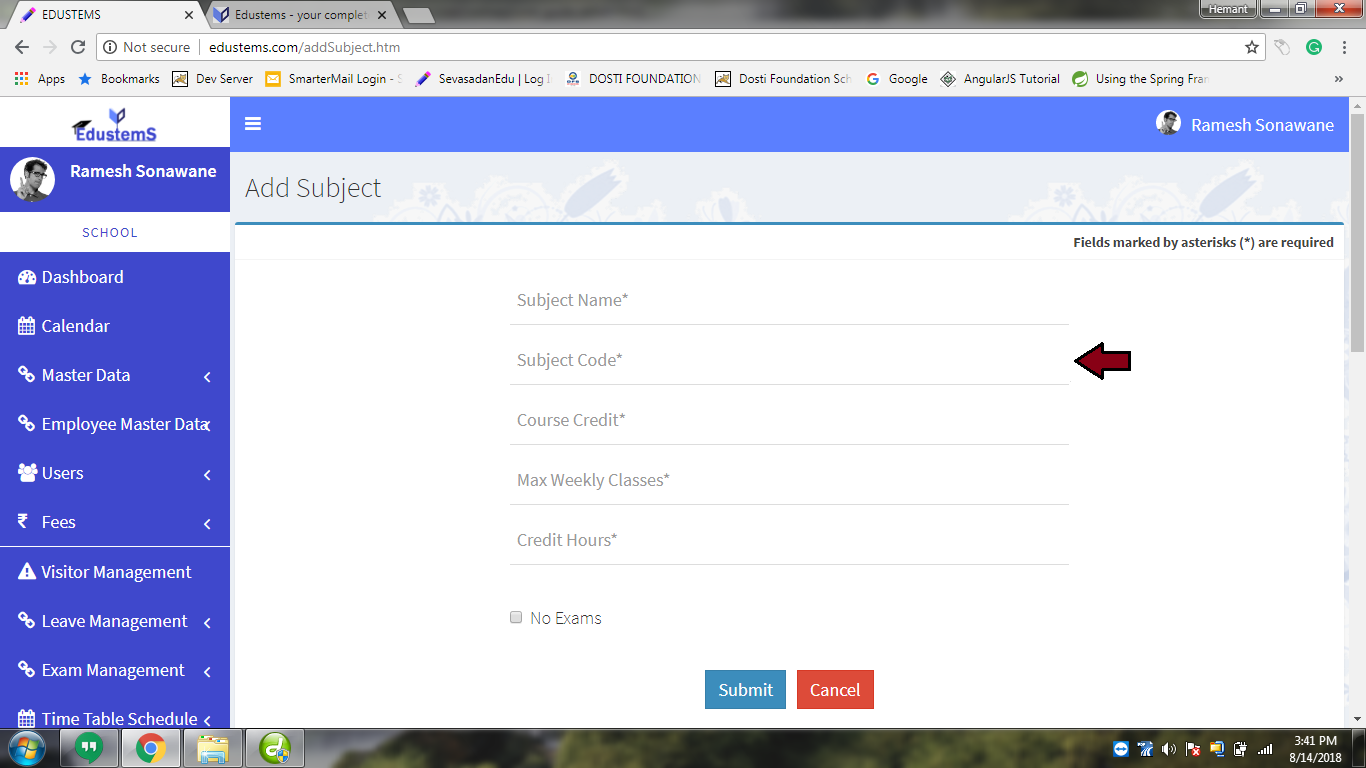
Please enter subject code
-
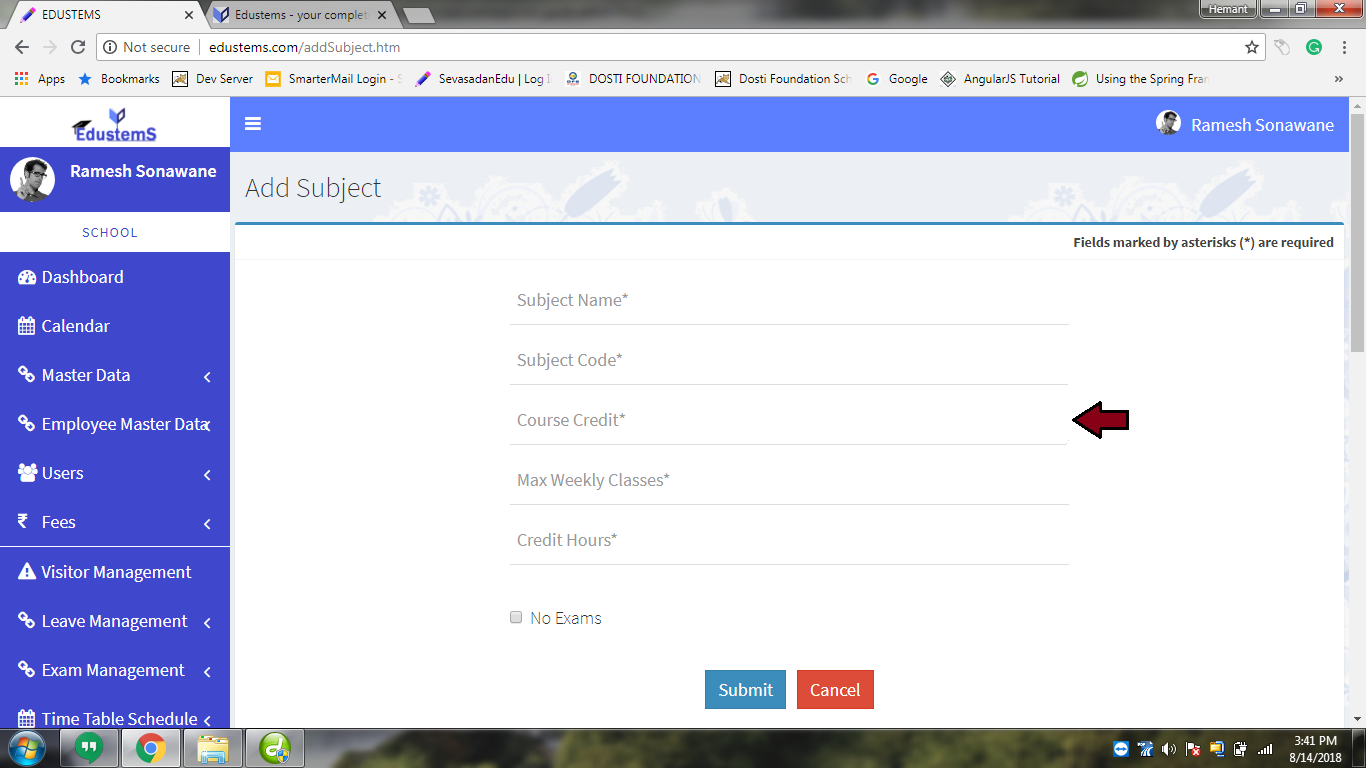
Please enter course credit
-
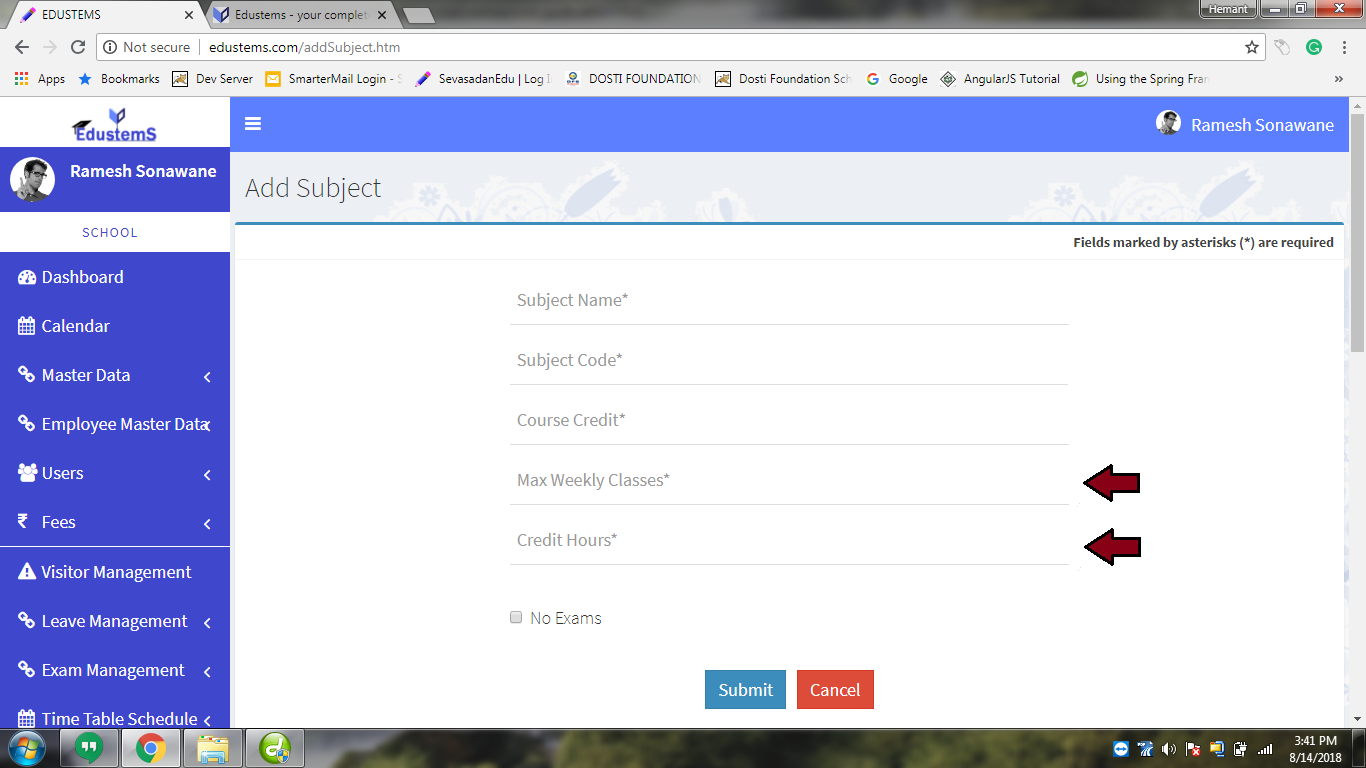
Please max weekly classes and credit hours
-
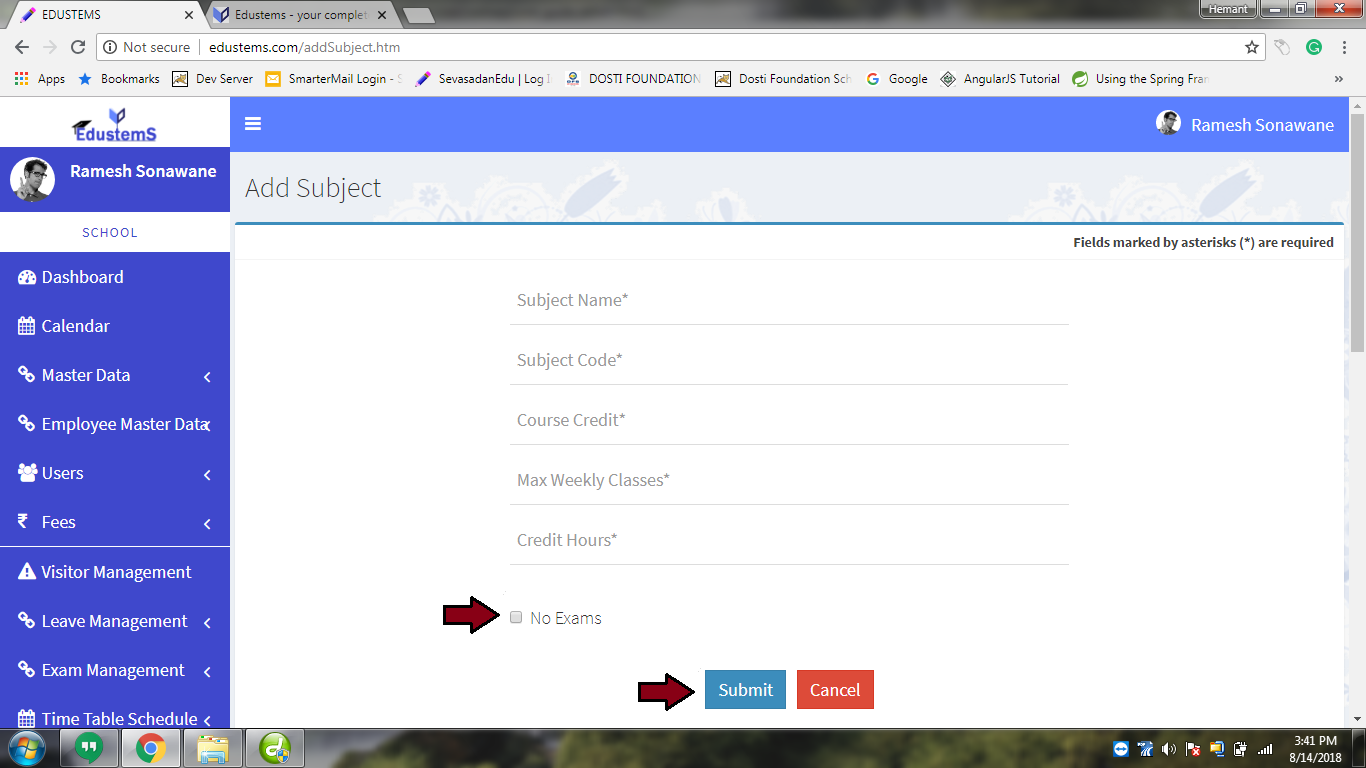
Please click no exams if required. And then click on Submit button
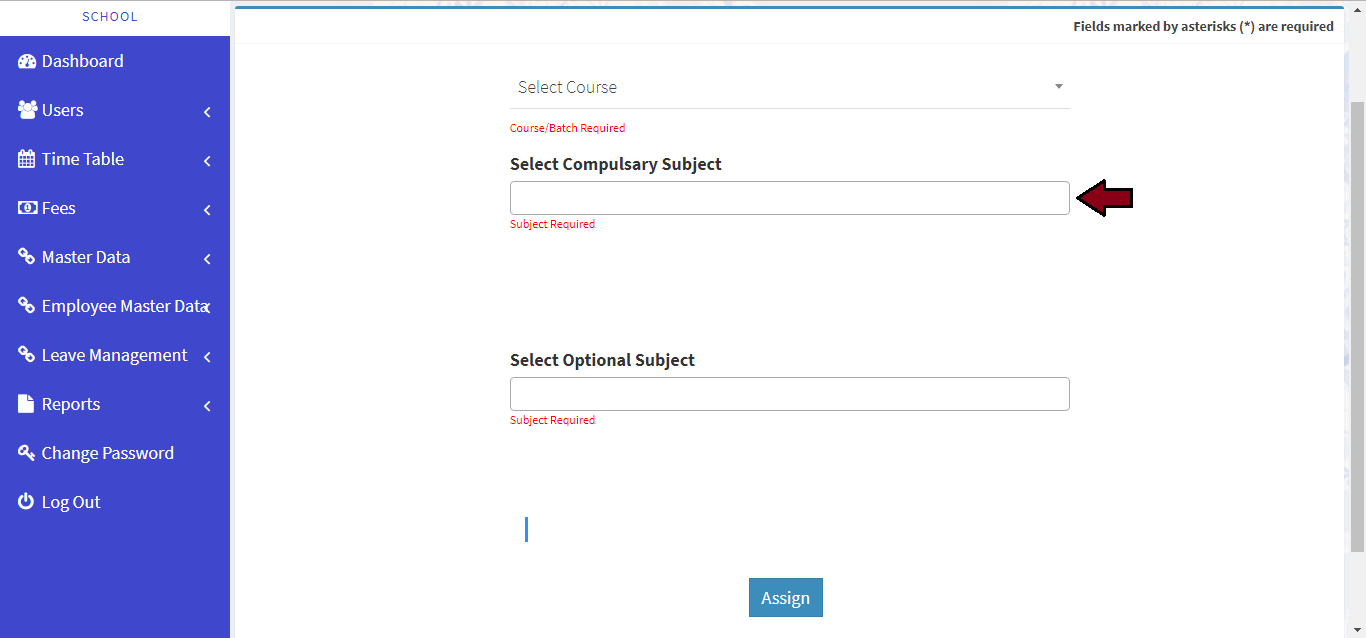
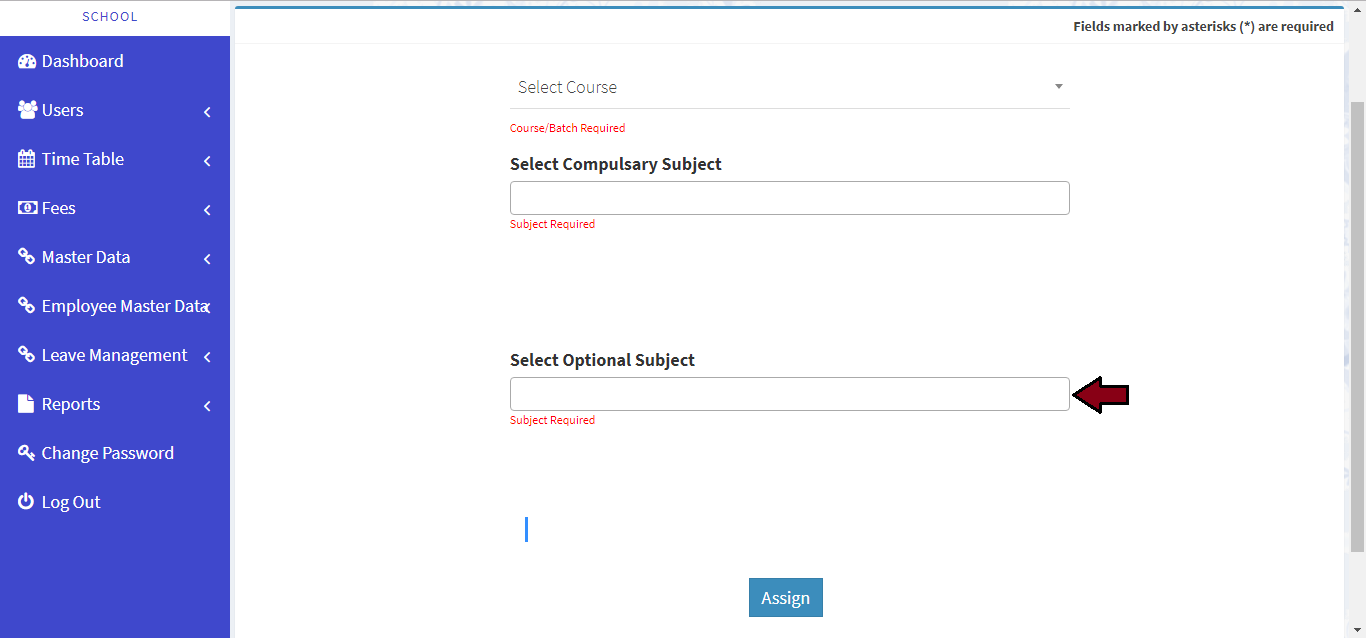
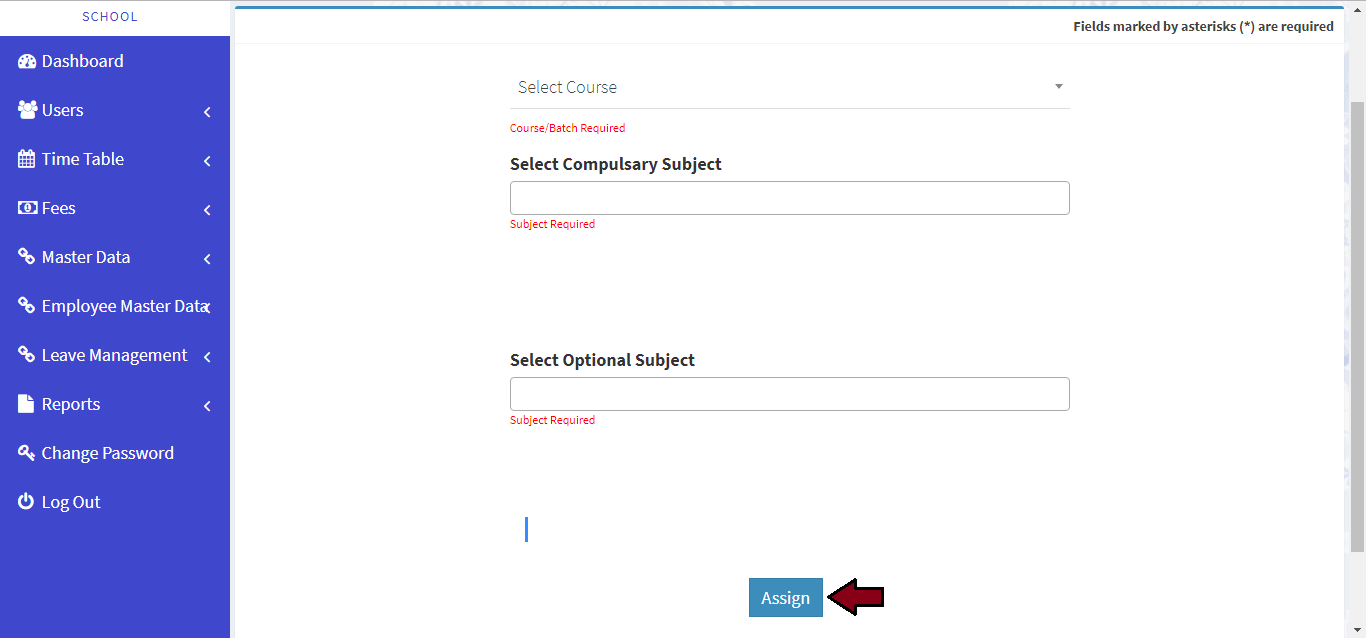
Learn how to assign subject to batch
-
For assign subject to batch. Click on Master Data >> Subjects >> Assign Subjects to Batch button from top. Then click on Assign Subject button
-
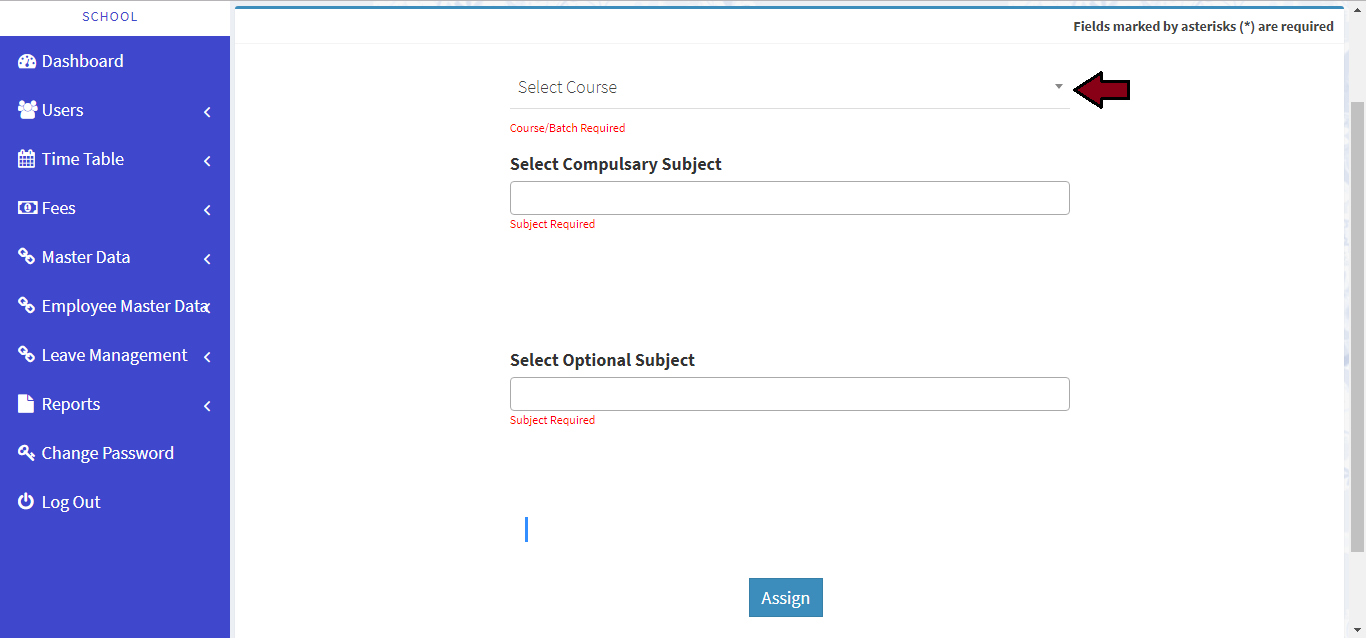
Please select course and batch
-
Please select compulsary subject
-
Please select optional subject
-
Click on Submit button
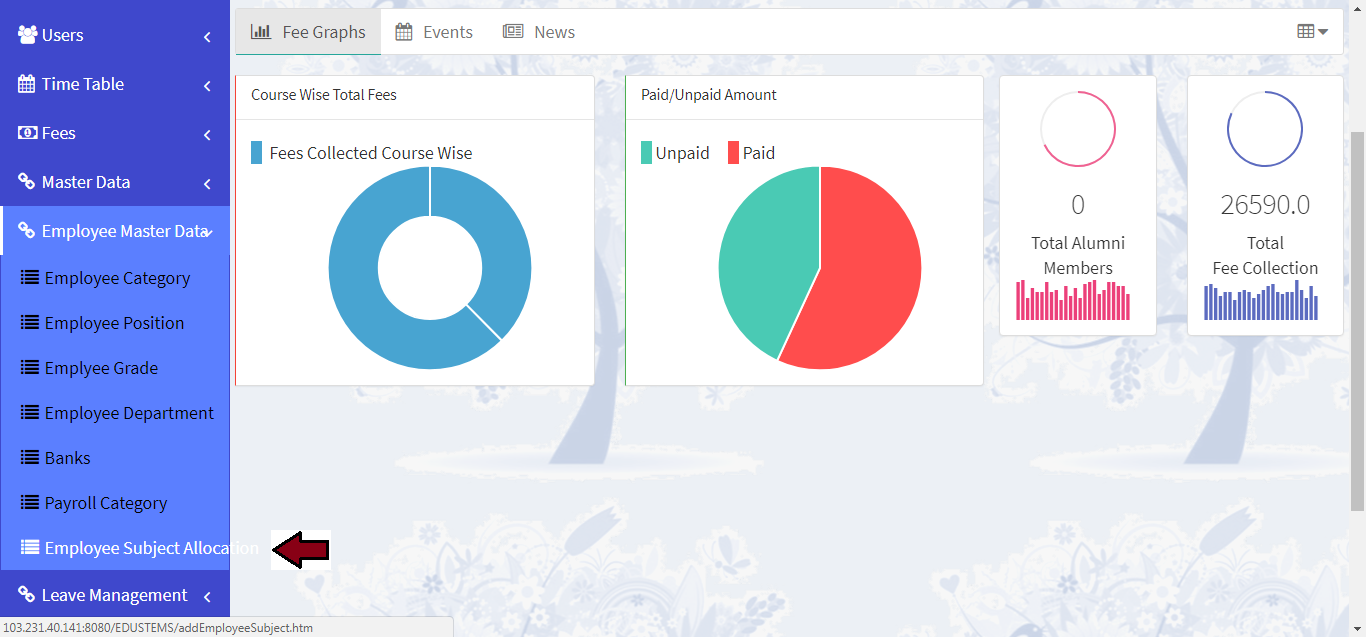
Learn how to assign subject to employee
-
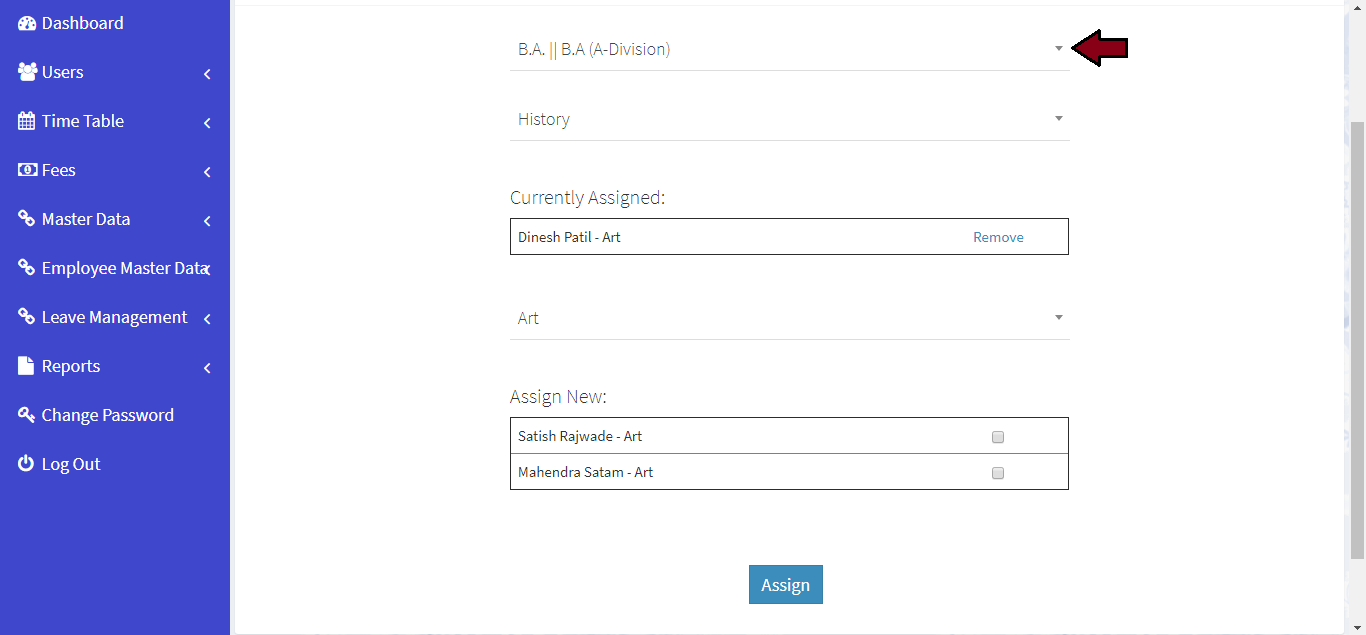
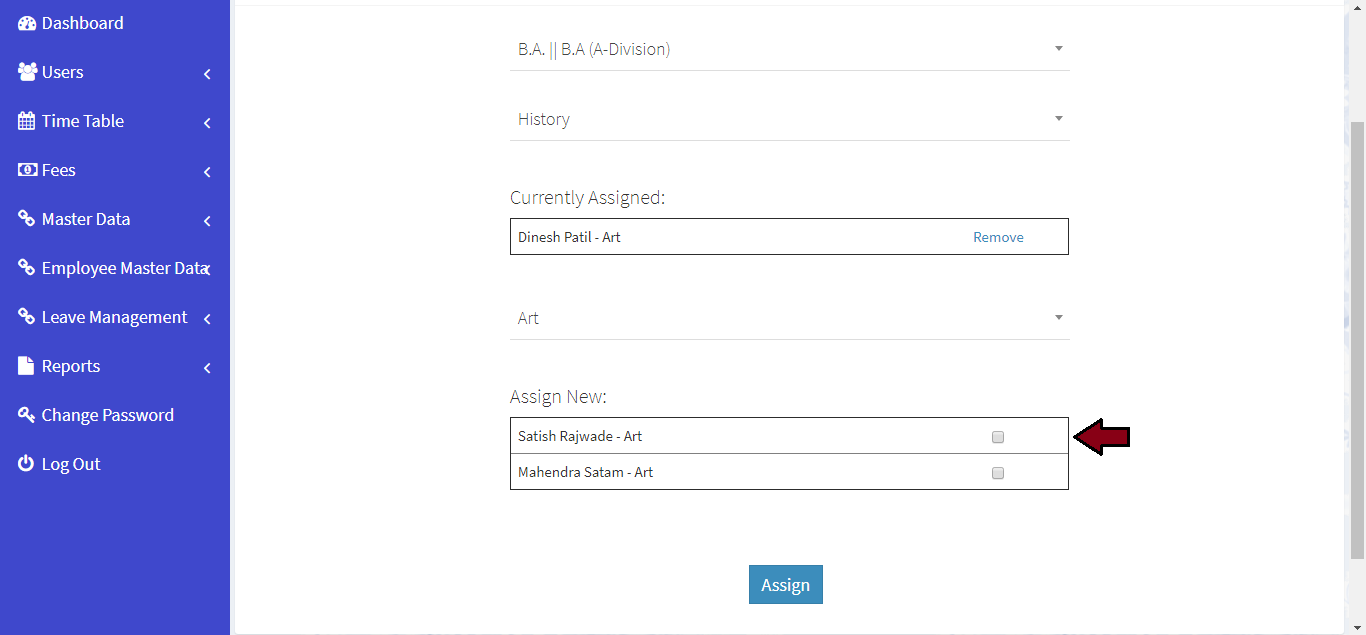
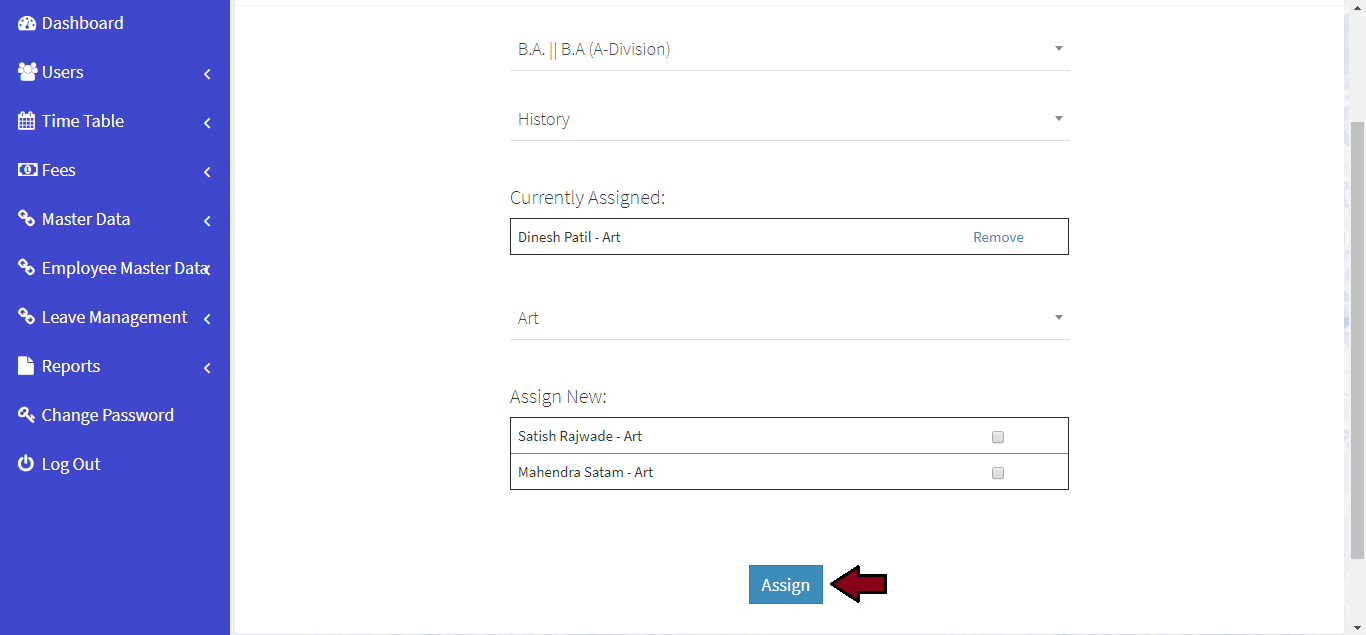
For assign subject to employee. Click on Employee Master Data link from left navigation Panel. Then click on Employee Subject Allocation link
-
Please select course
-
Please select subject, you can see currently assigned employee/teacher to that subject, you can remove by click Remove button
-
Please select department, you can get a list of assigned employee/teacher to that department
-
Please Check the checkboxes if you wish to assign more than one employee/teacher to that subject
-
Click on Submit button


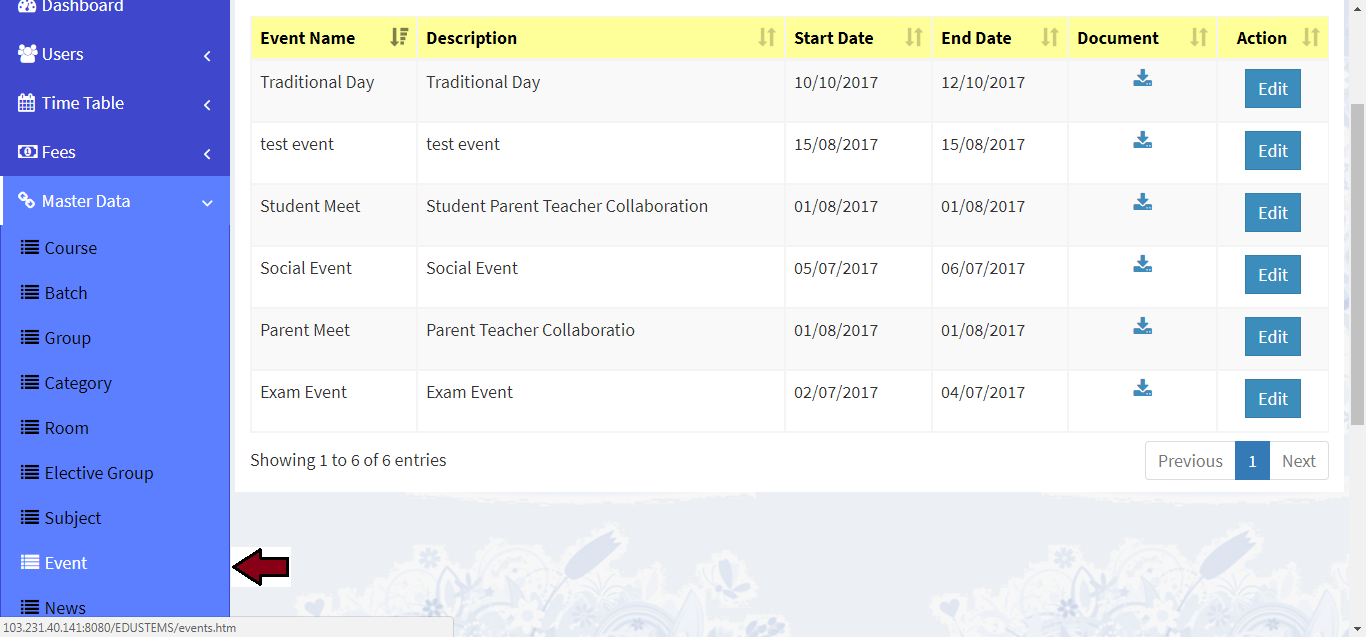
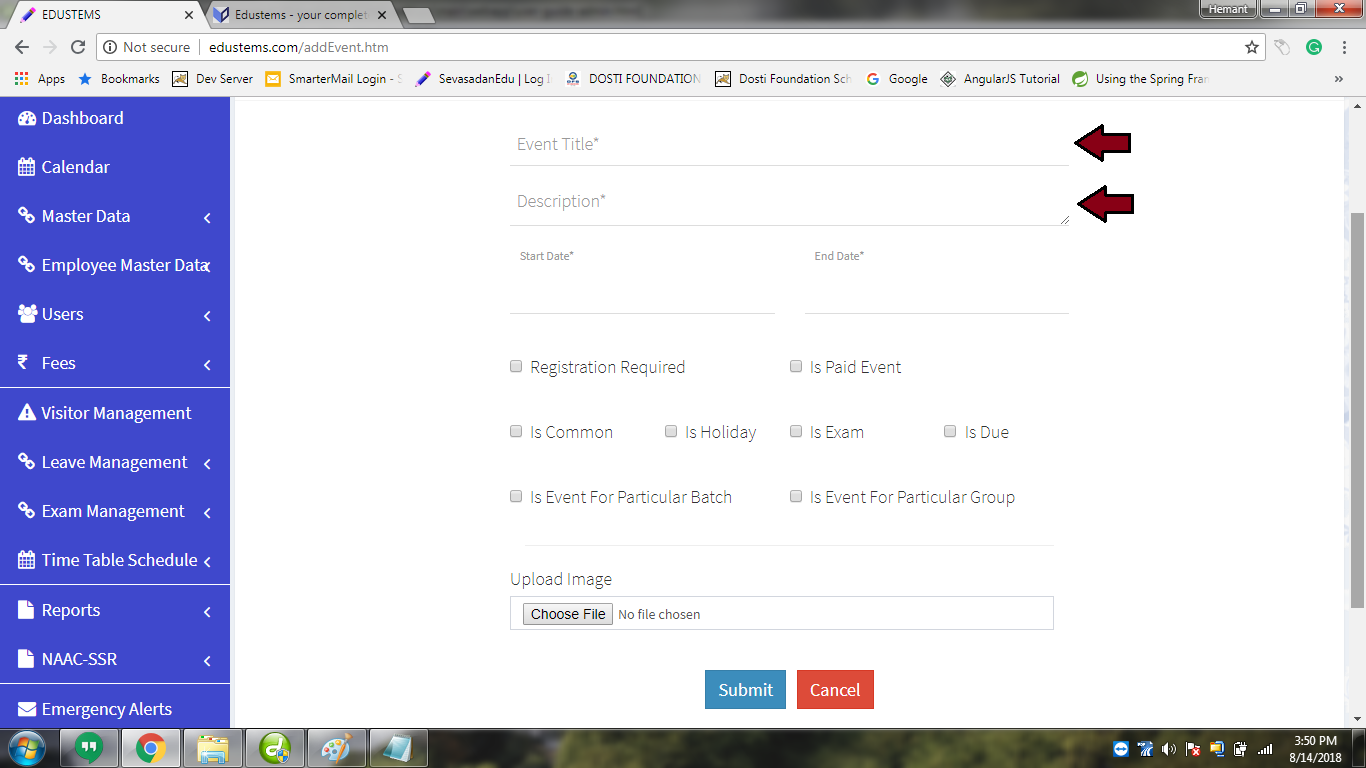
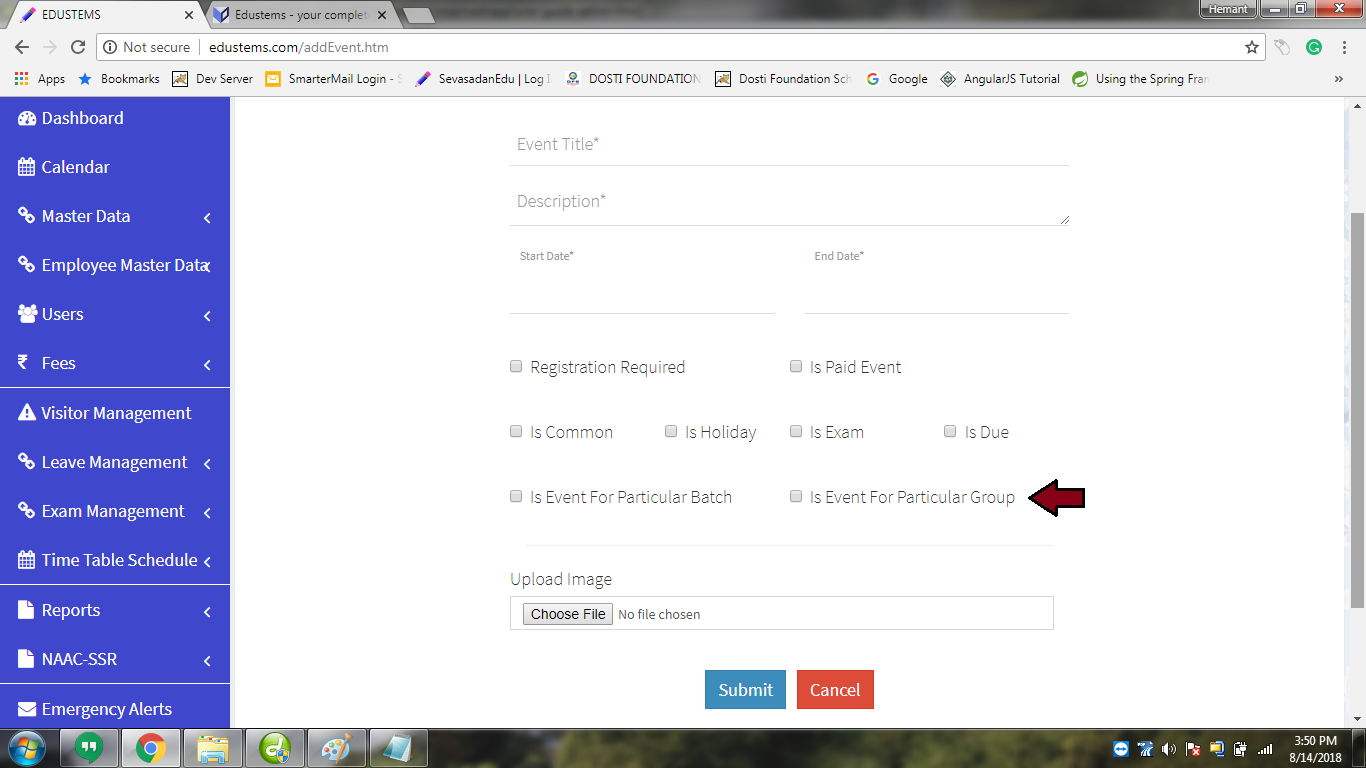
Learn how to create event
-
For create event. Click on Master Data >> Event link from left navigation Panel. Then click on Add Event button
-
Please enter event title & description
-
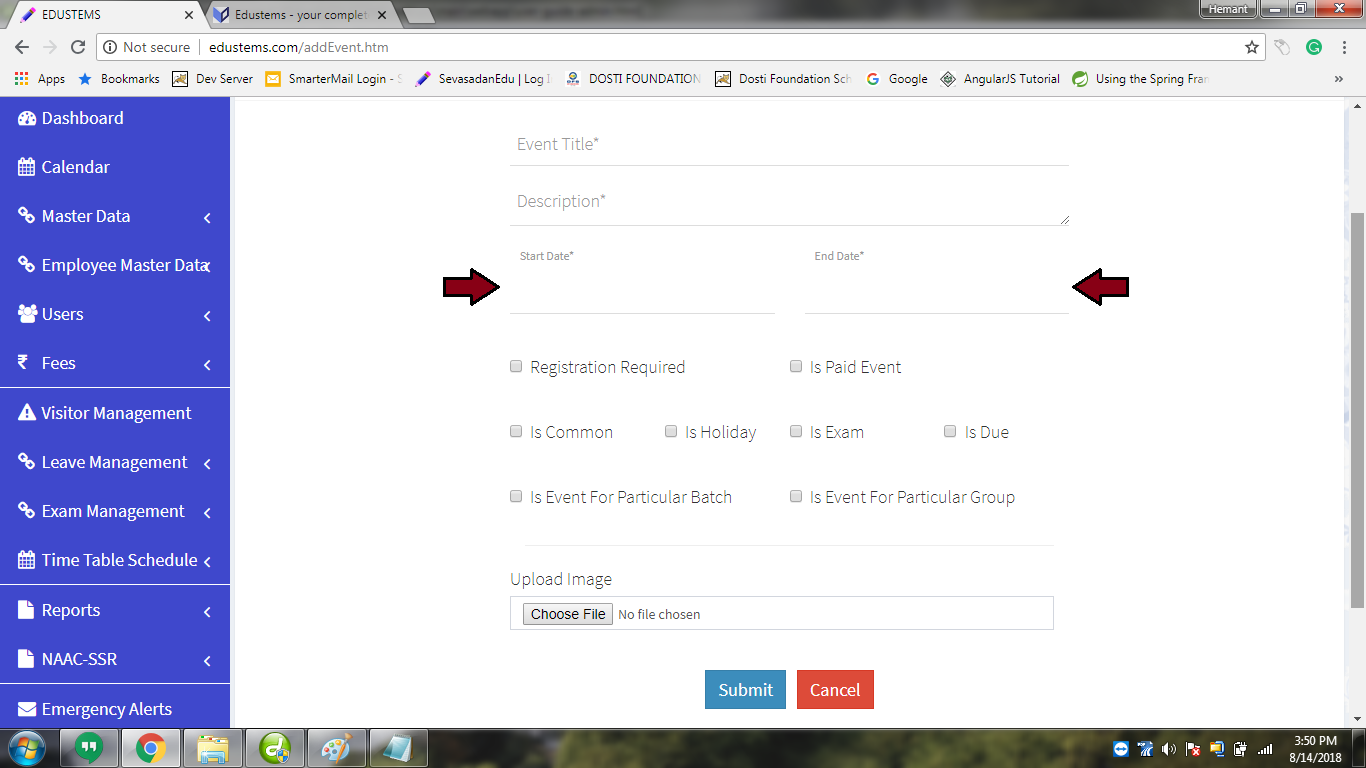
Please enter event start date and end date
-
Check Required Registration checkbox if is event required registration
-
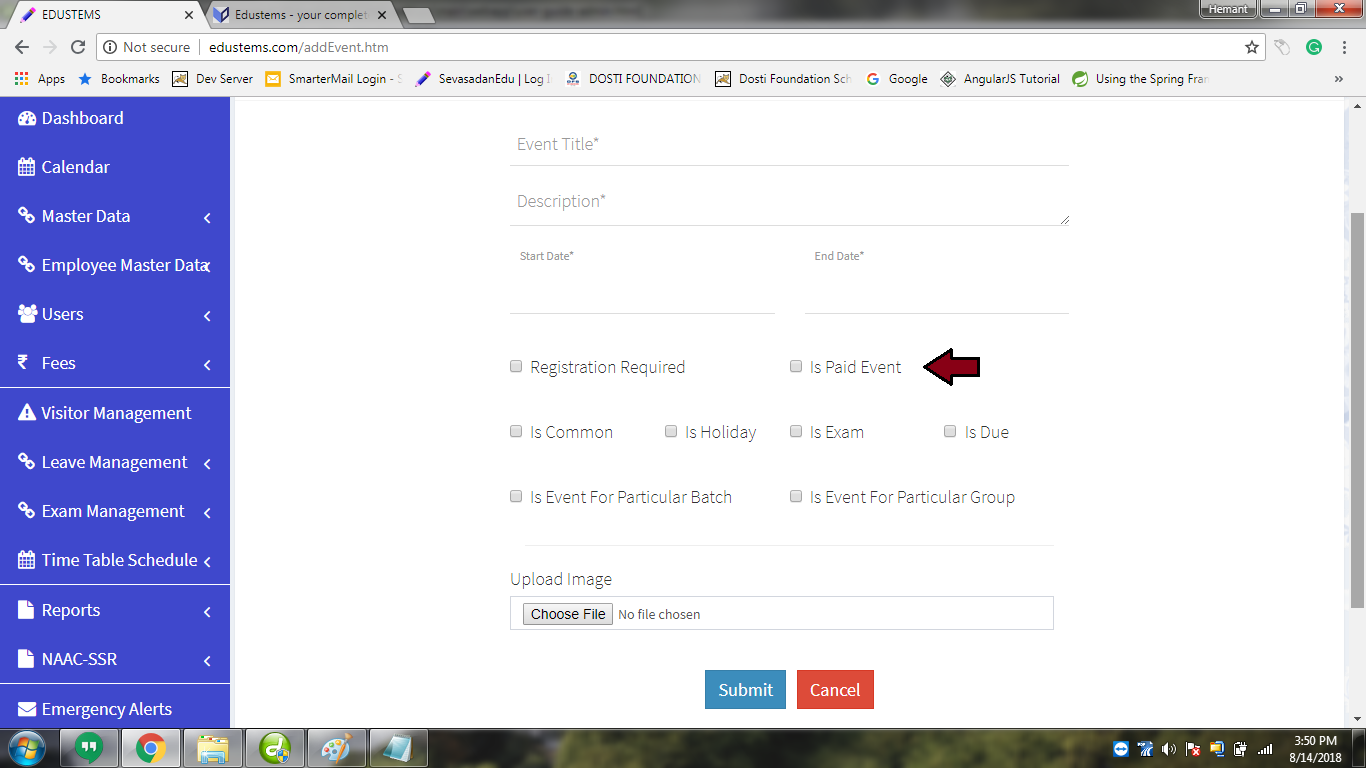
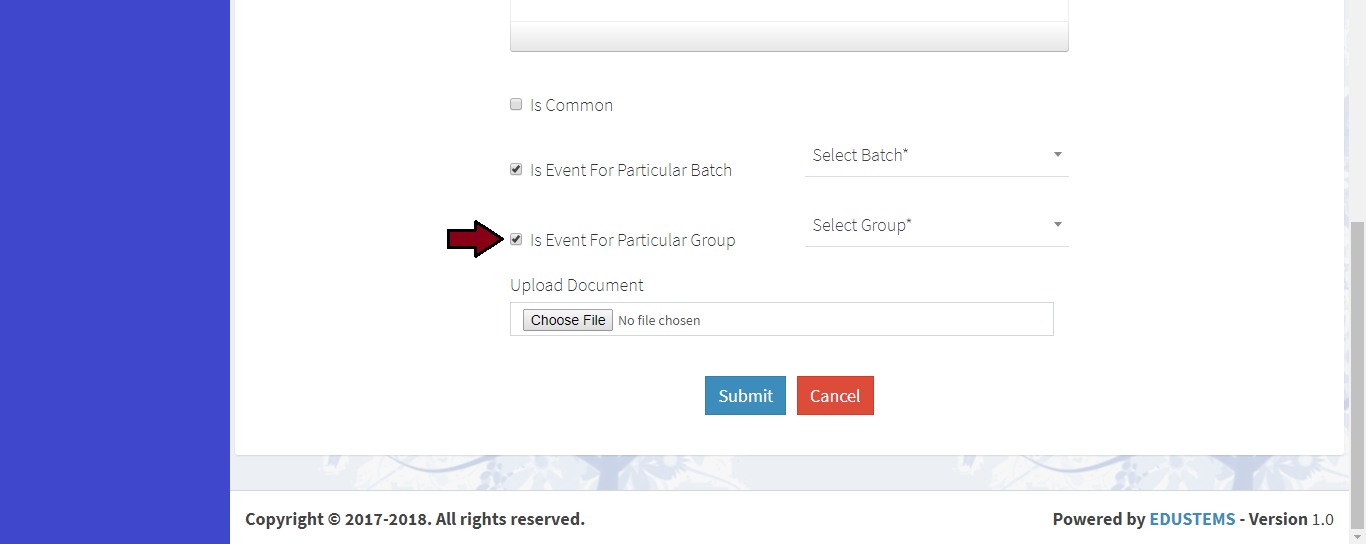
Check particular checkbox if is common event or is paid event
-
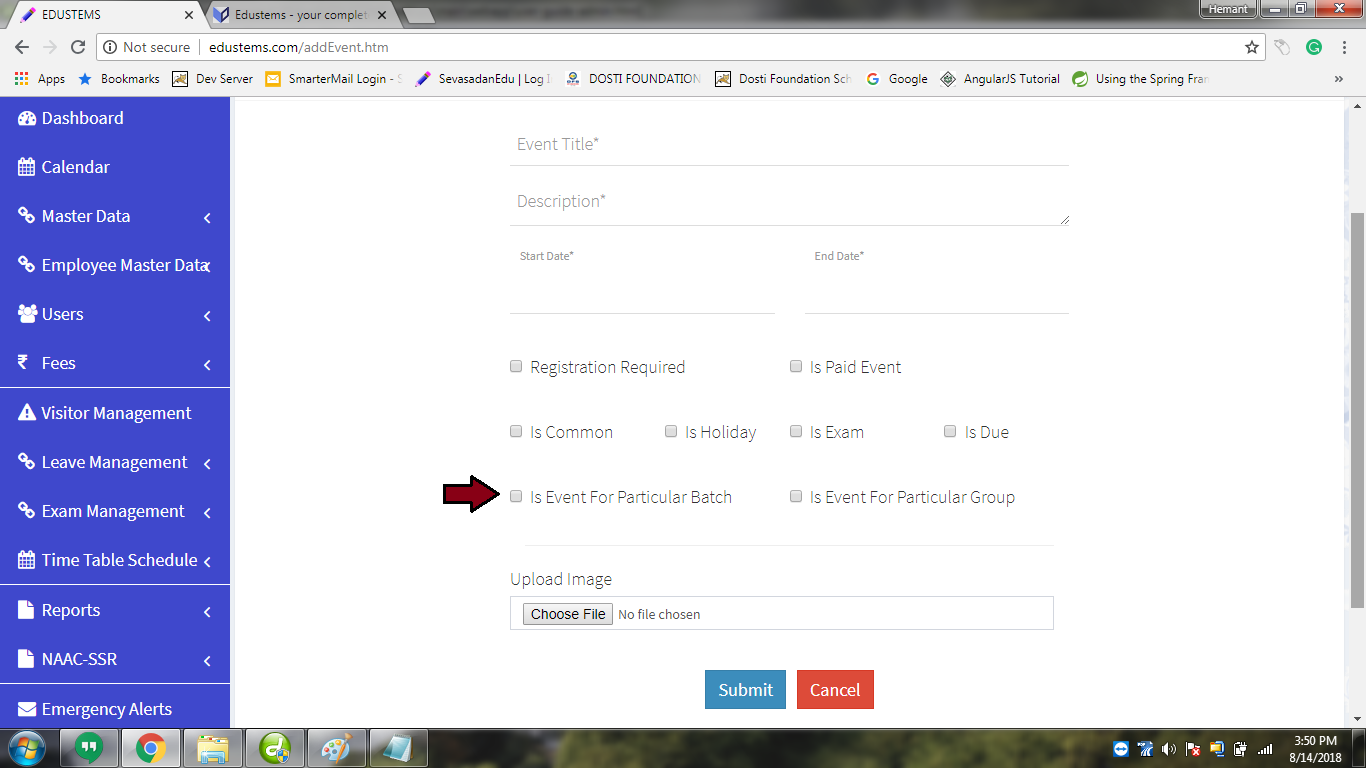
Check if this event for particular batch if checked than select batch
-
Check if this event for particular group if checked than select group
-
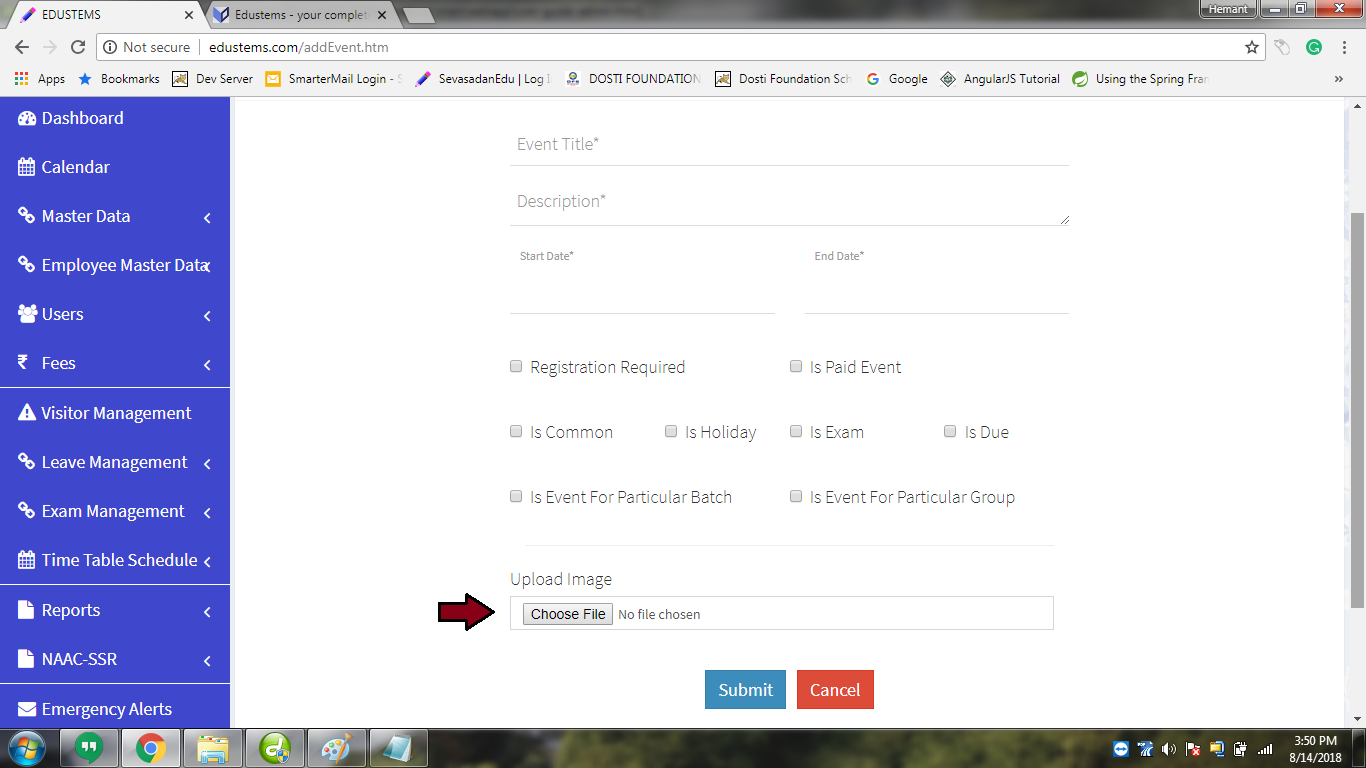
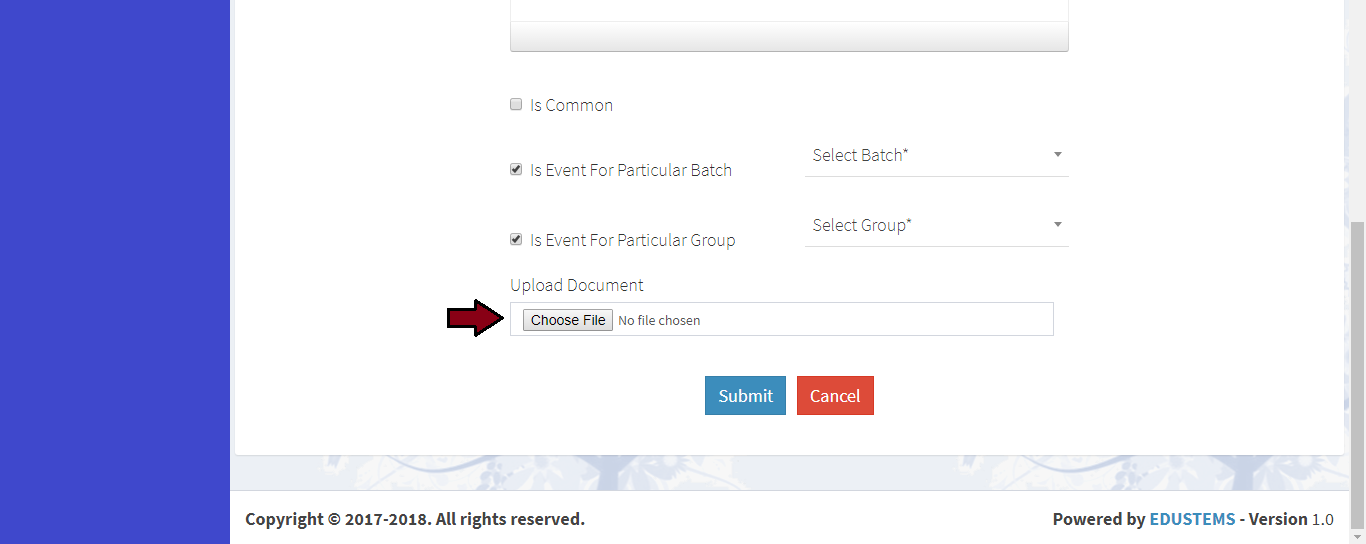
Please upload event image
-
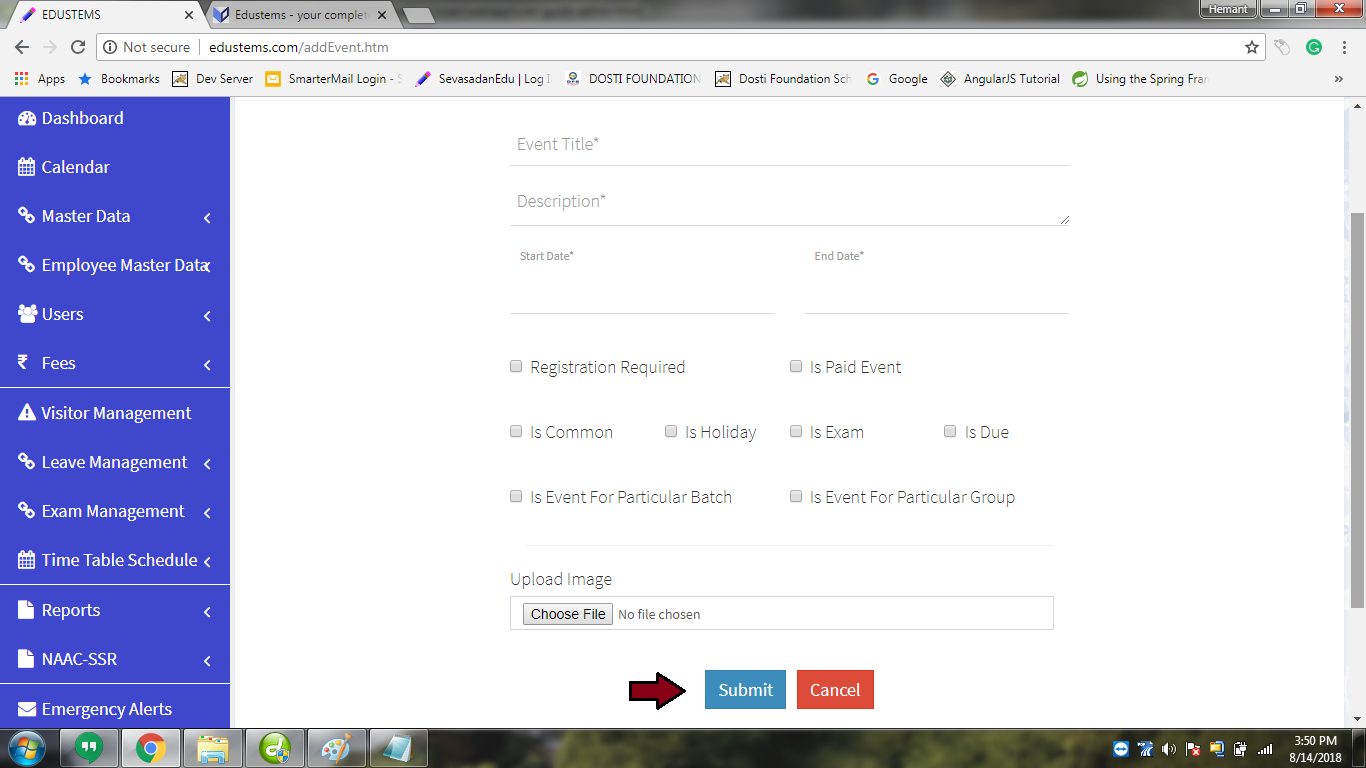
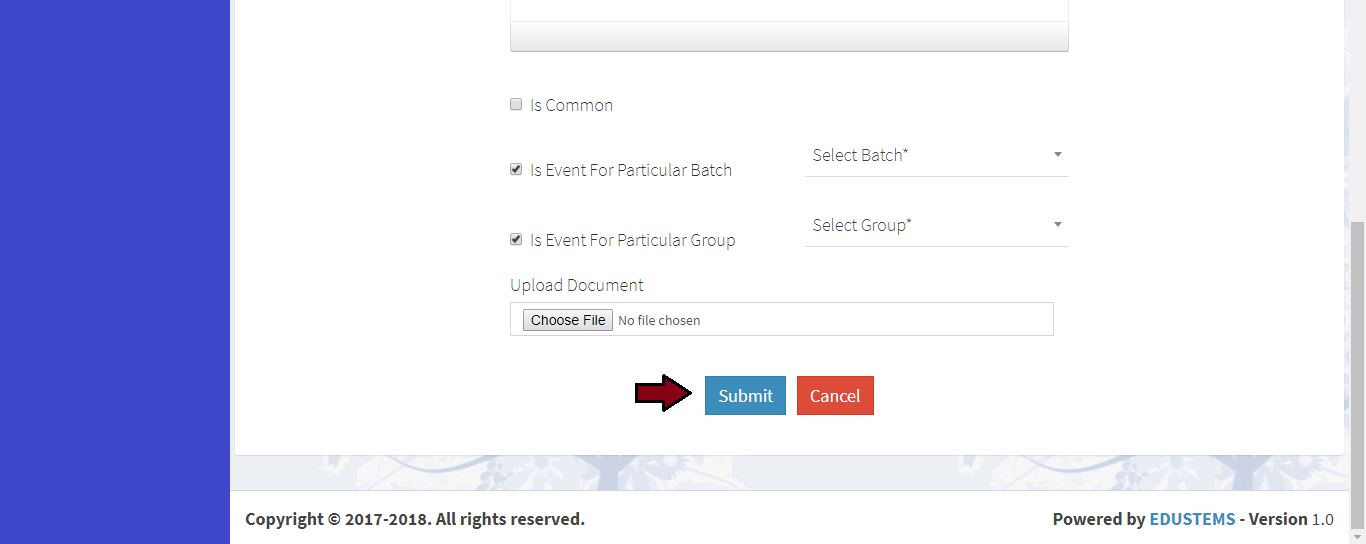
Click on Submit button

Learn how to create news
-
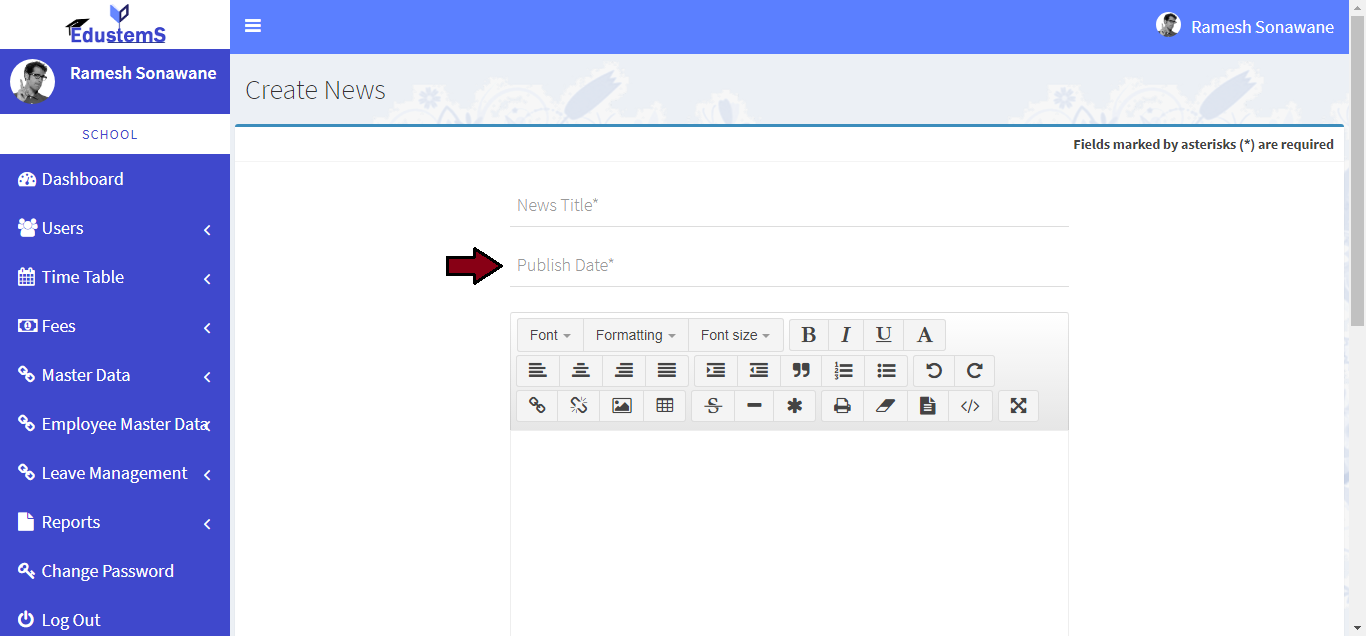
For create news. Click on Master Data >> News link from left navigation Panel. Then click on Create News button
-
Please enter news title
-
Please enter publish date
-
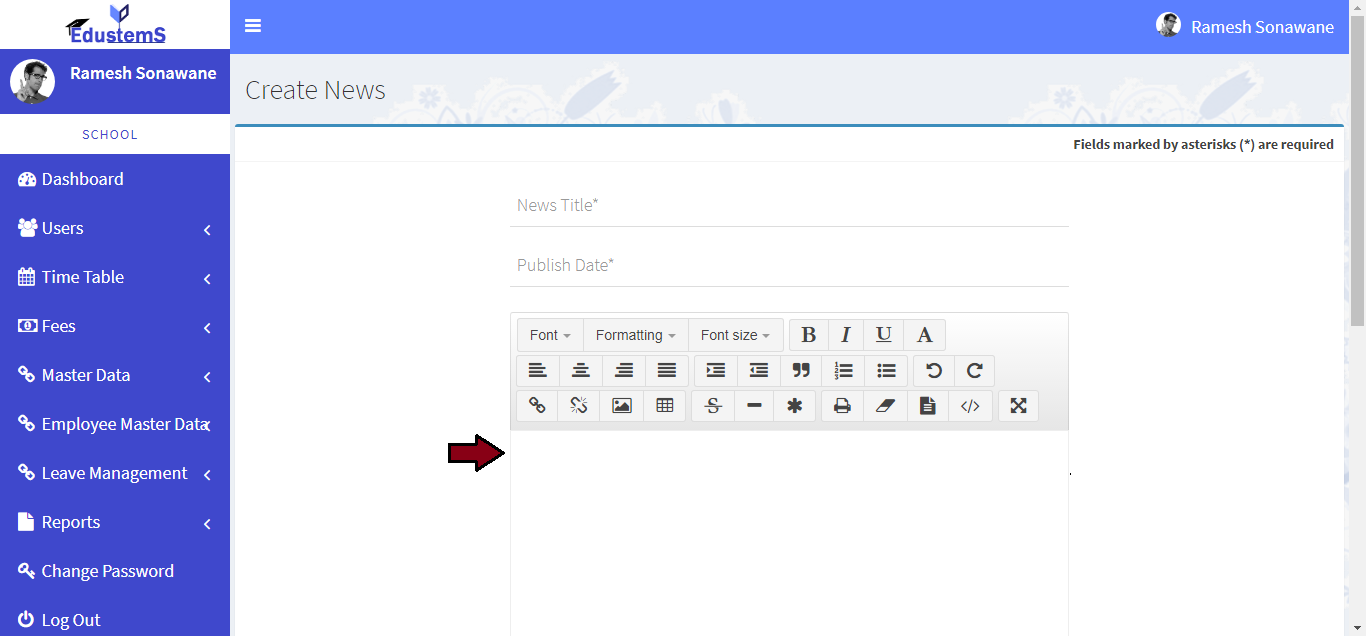
Please enter full news description
-
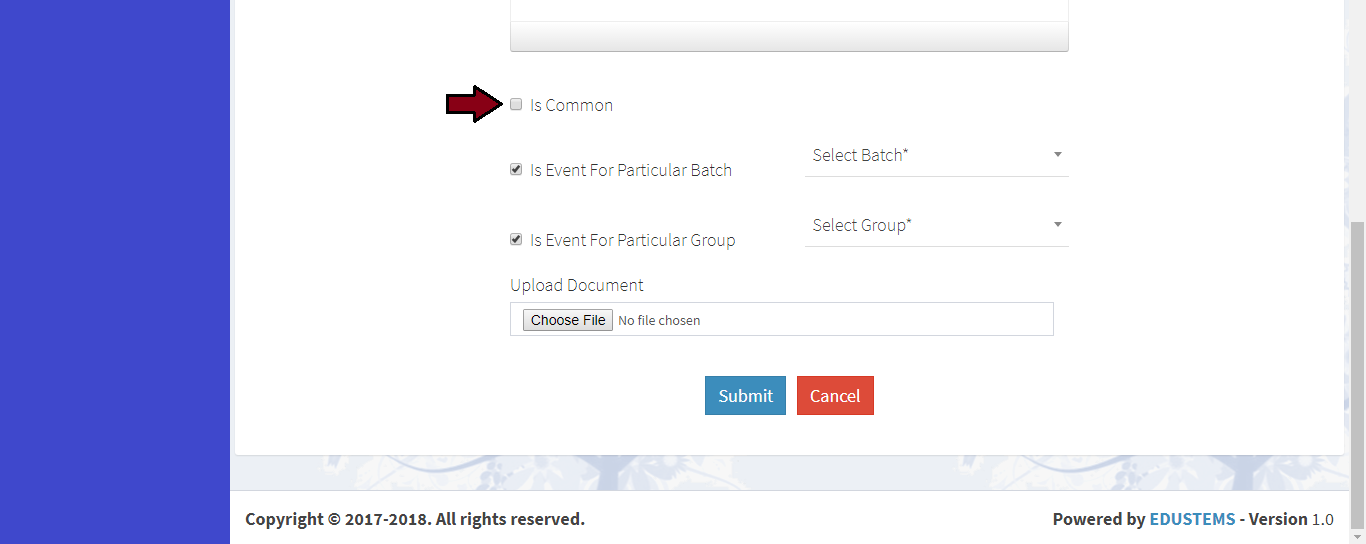
Check particular checkbox if this is common news
-
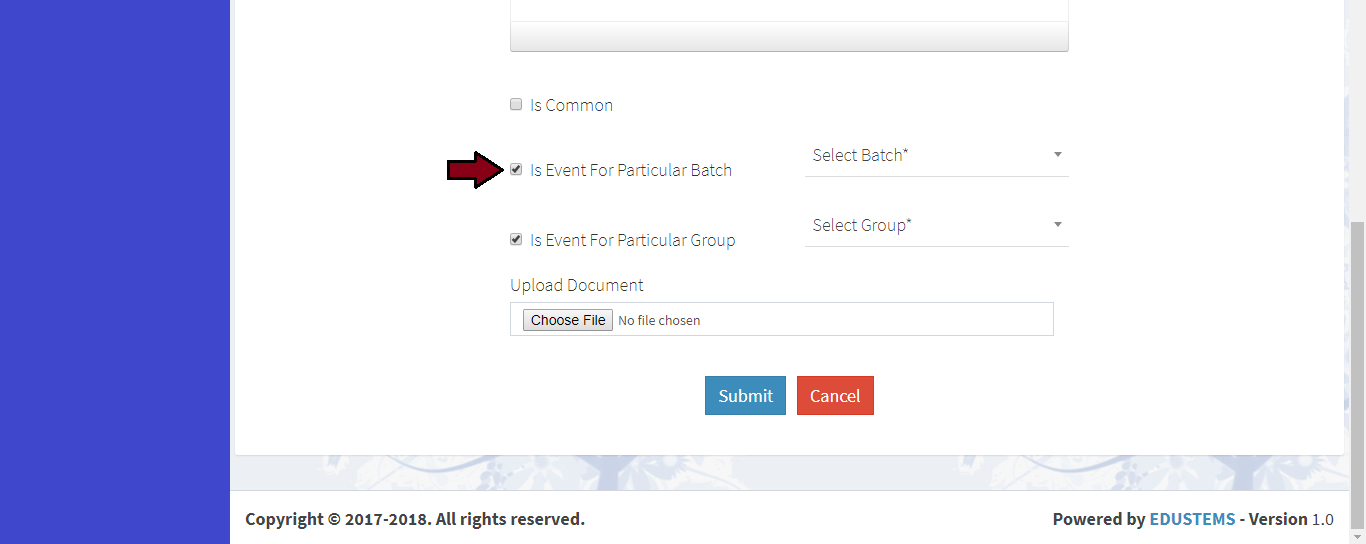
Check if this event for particular batch if checked than select batch
-
Check if this event for particular group if checked than select group
-
Please upload document
-
Click on Submit button

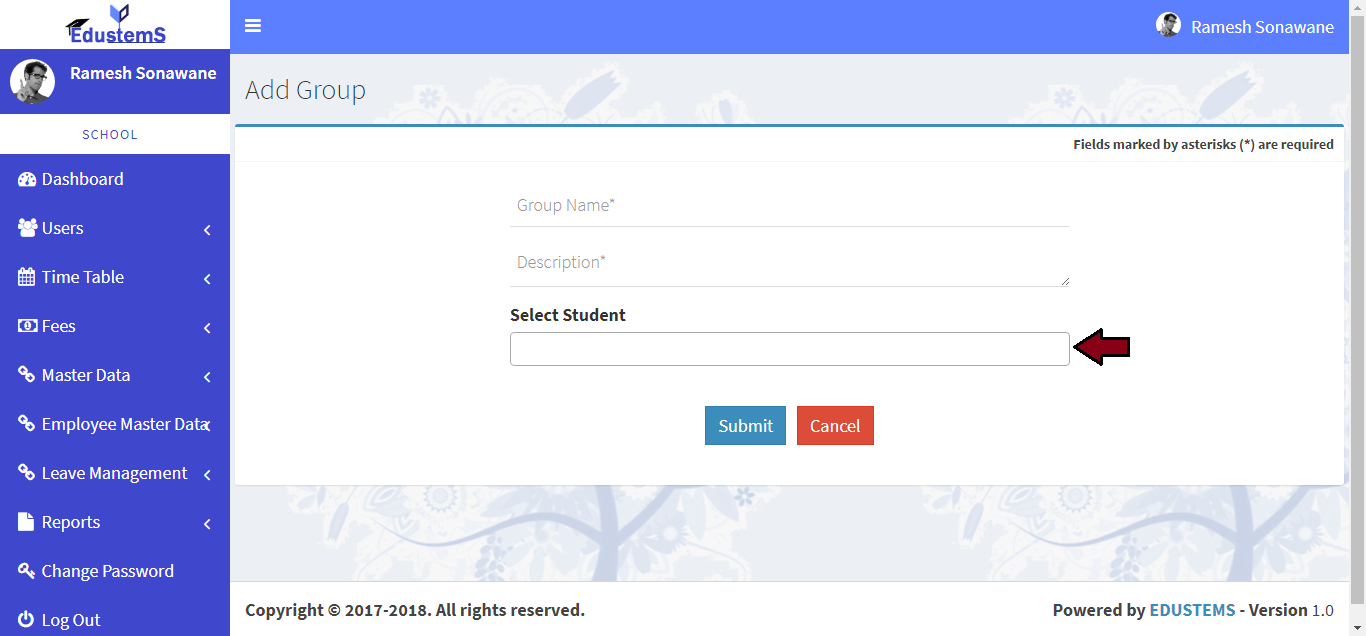
Learn how to create group
-
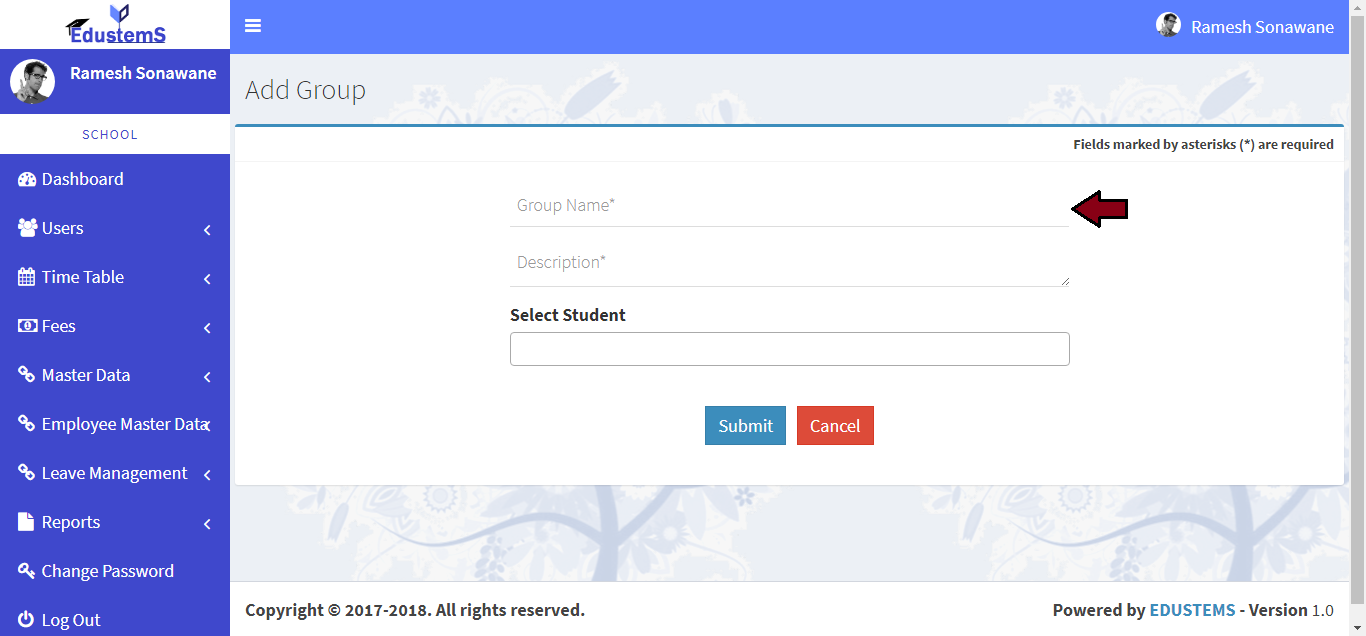
For create new group. Click on Master Data >> Group link from left navigation Panel. Then click on Add Group button
-
Please enter group name
-
Please enter description for course
-
Please select student for this group
-
Click on Submit button


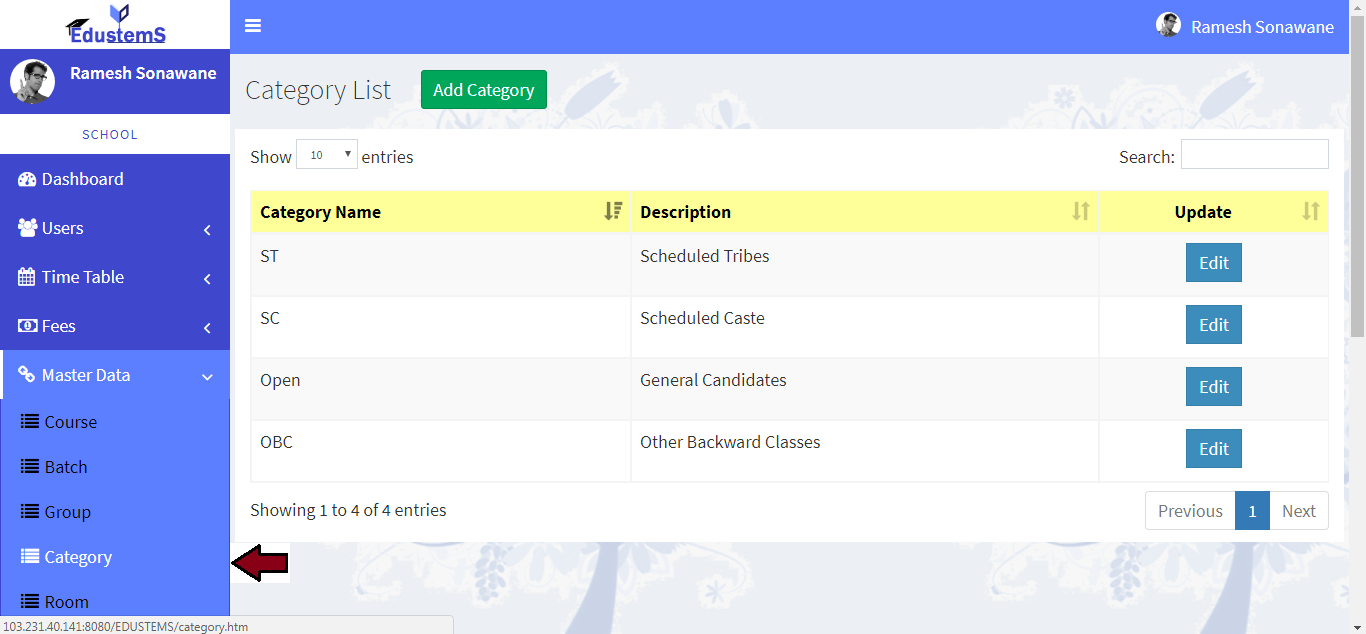
Learn how to create student category
-
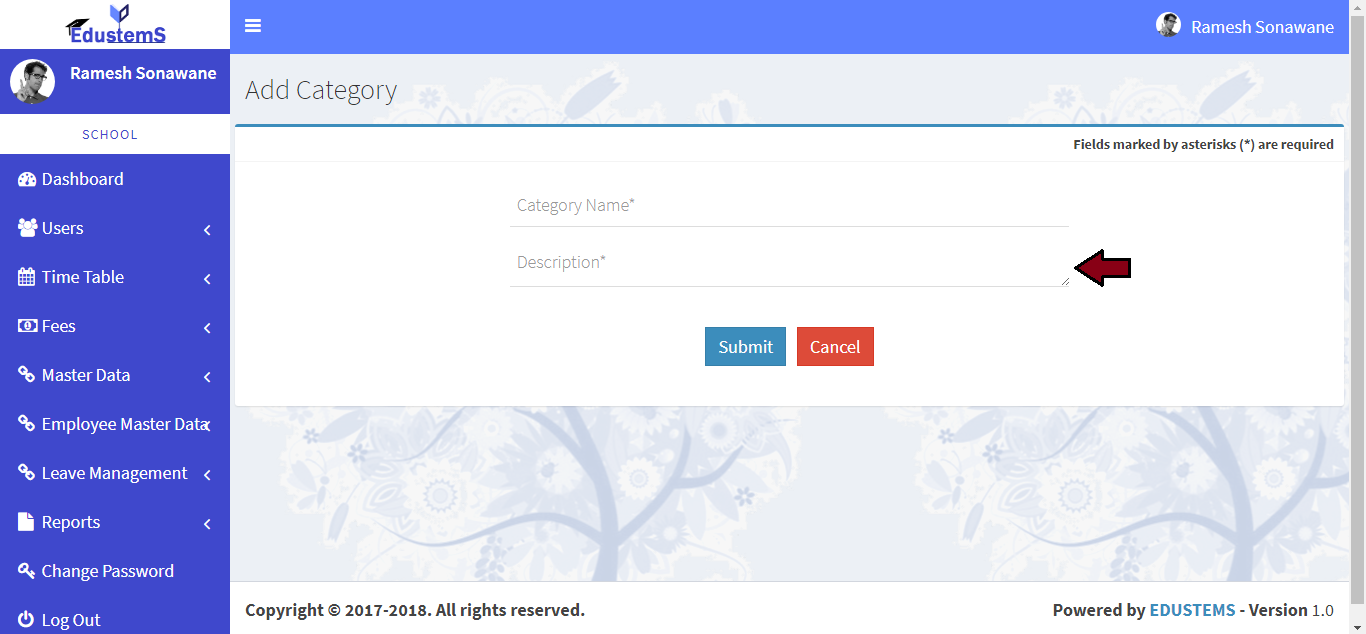
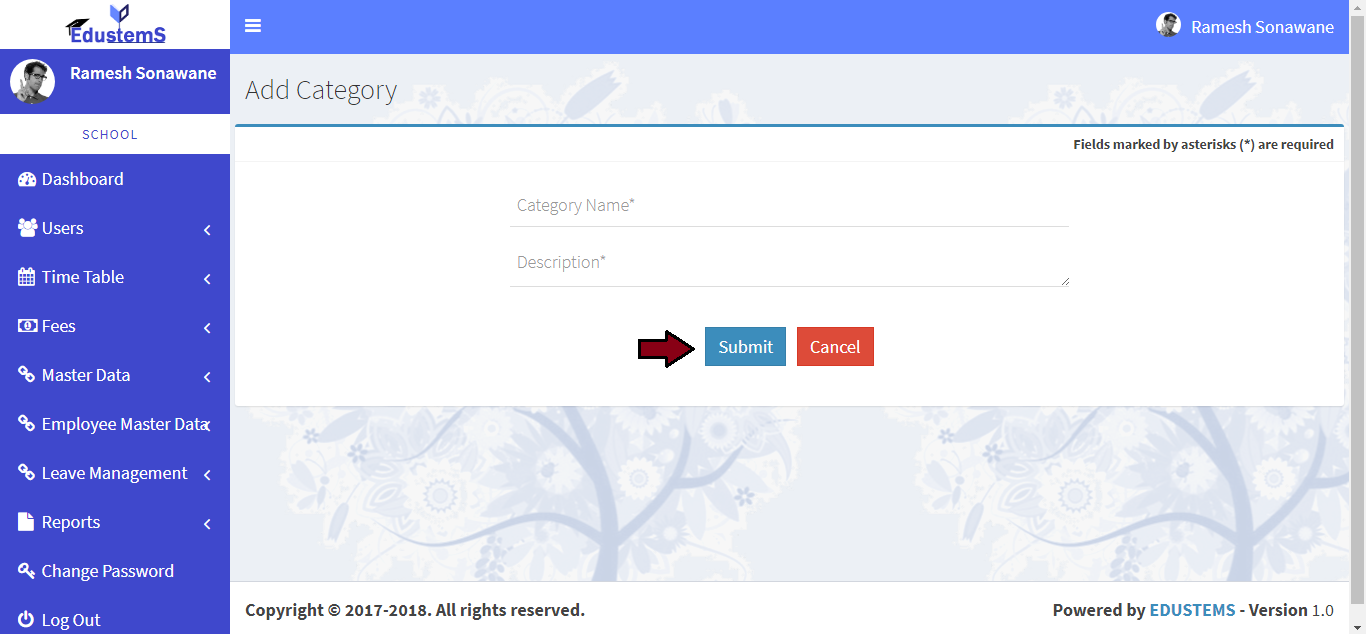
For create new category. Click on Master Data >> Category link from left navigation Panel. Then click on Add Category button
-
Please category name
-
Please description for category
-
Click on Submit button

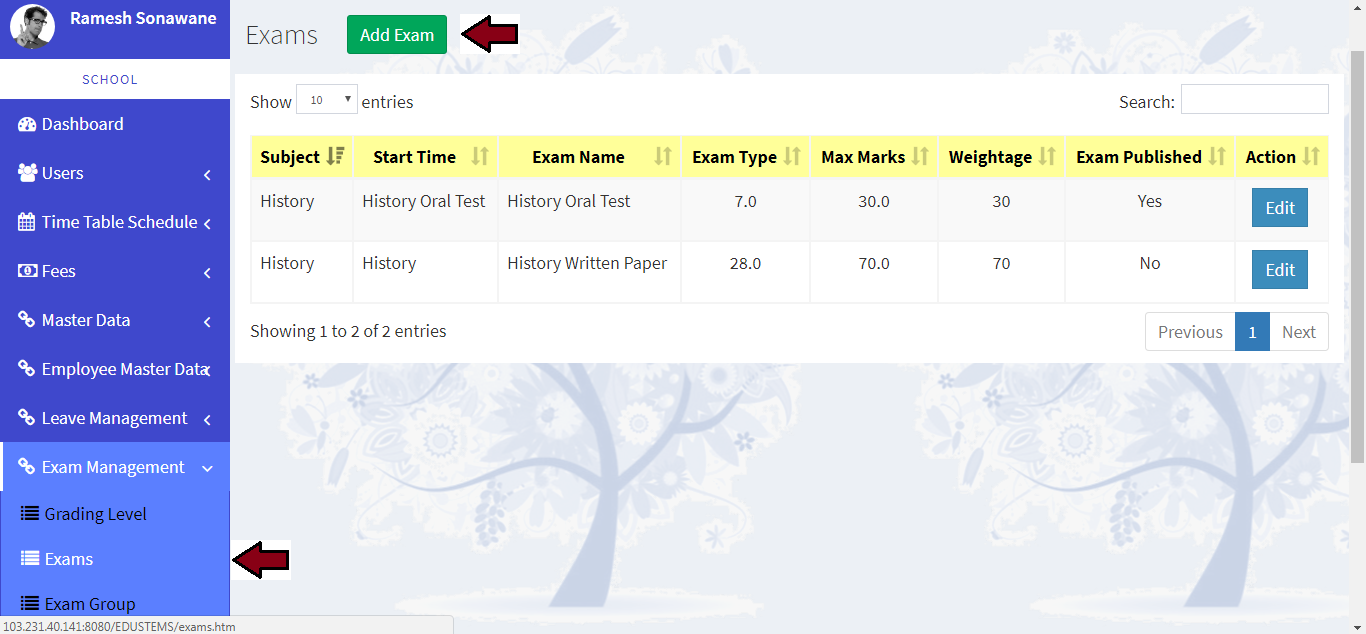
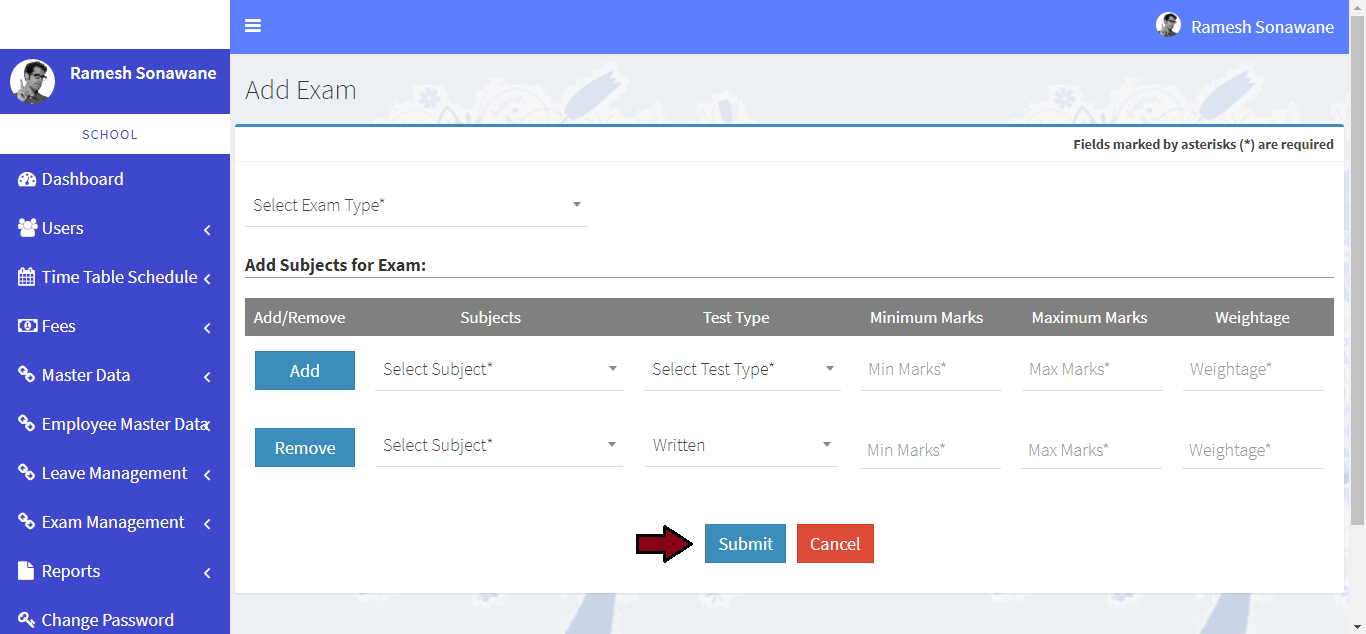
Learn how to add exam
-
For create new Exam. Click on Exam Management >> Exams link from left navigation Panel. Then click on Add Exam button
-
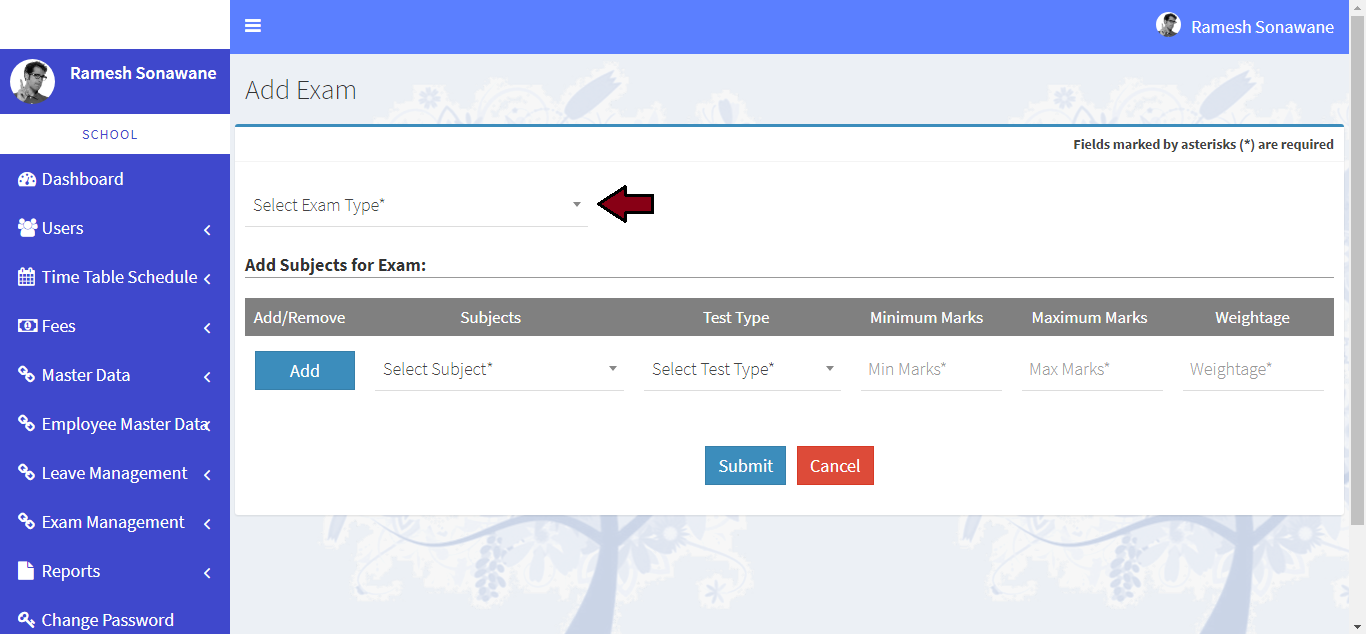
Please enter exam type
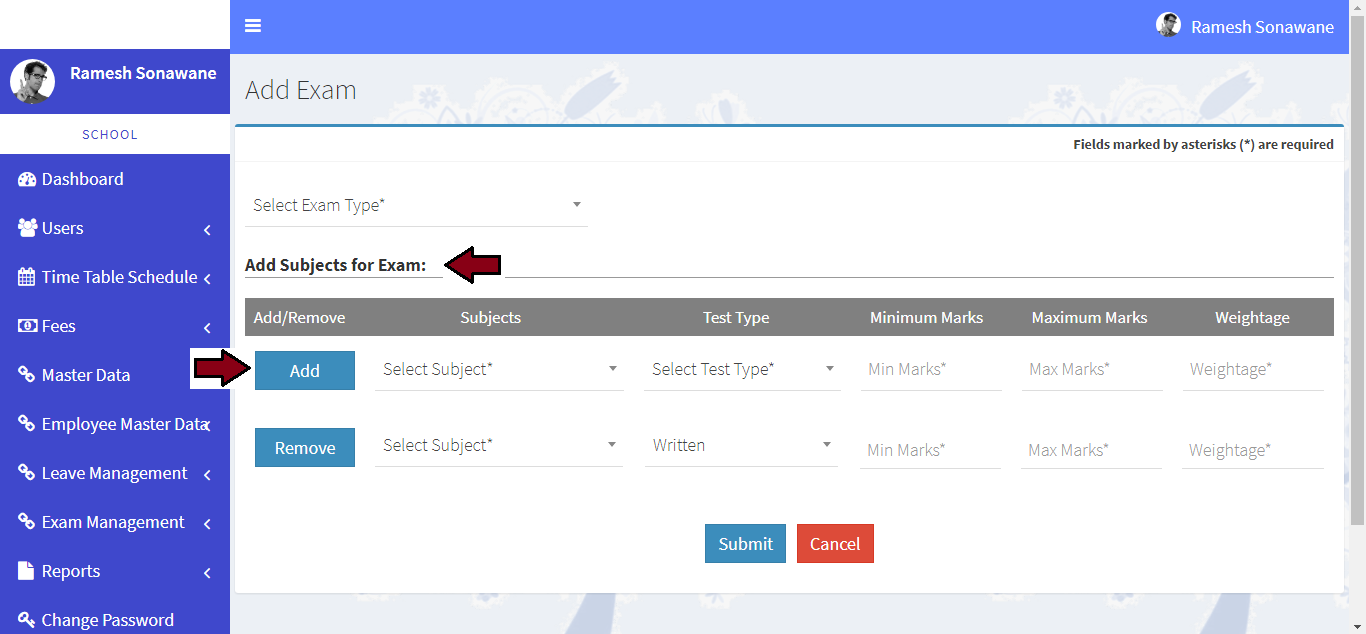
-
Please add subjects for exam , you can add more rows by clicking Add button
-
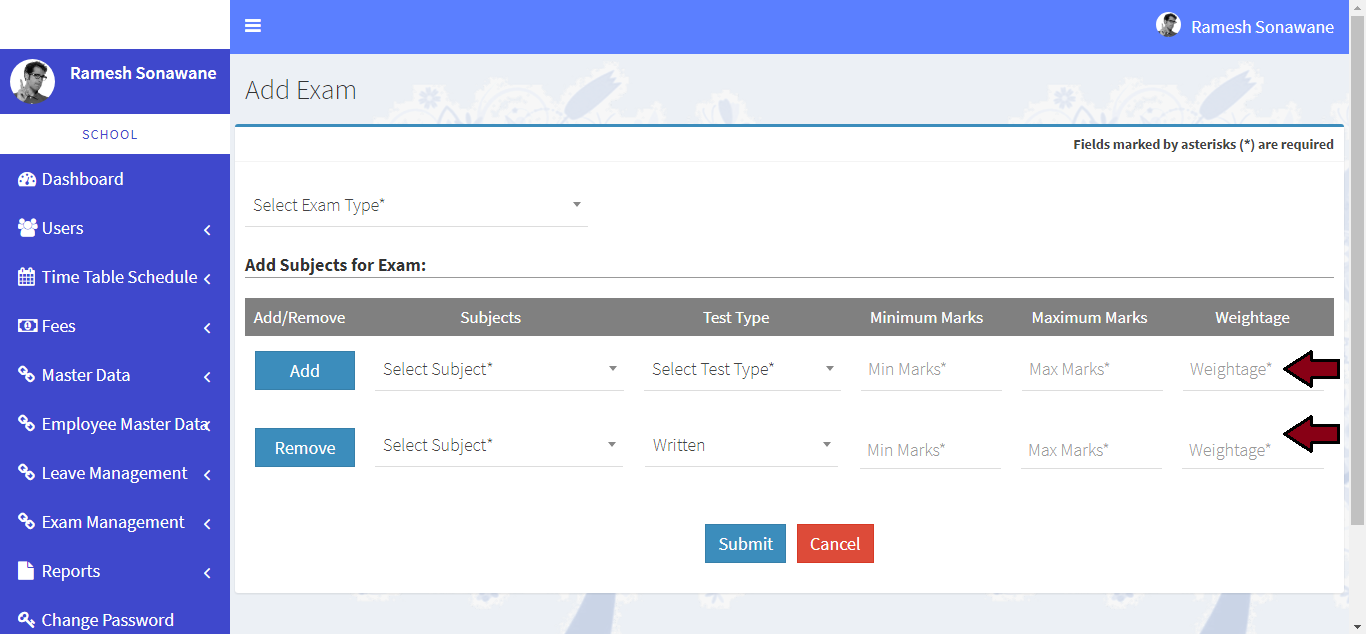
Please select subject, test type enter min marks, max marks and weightage
-
Click on Submit button
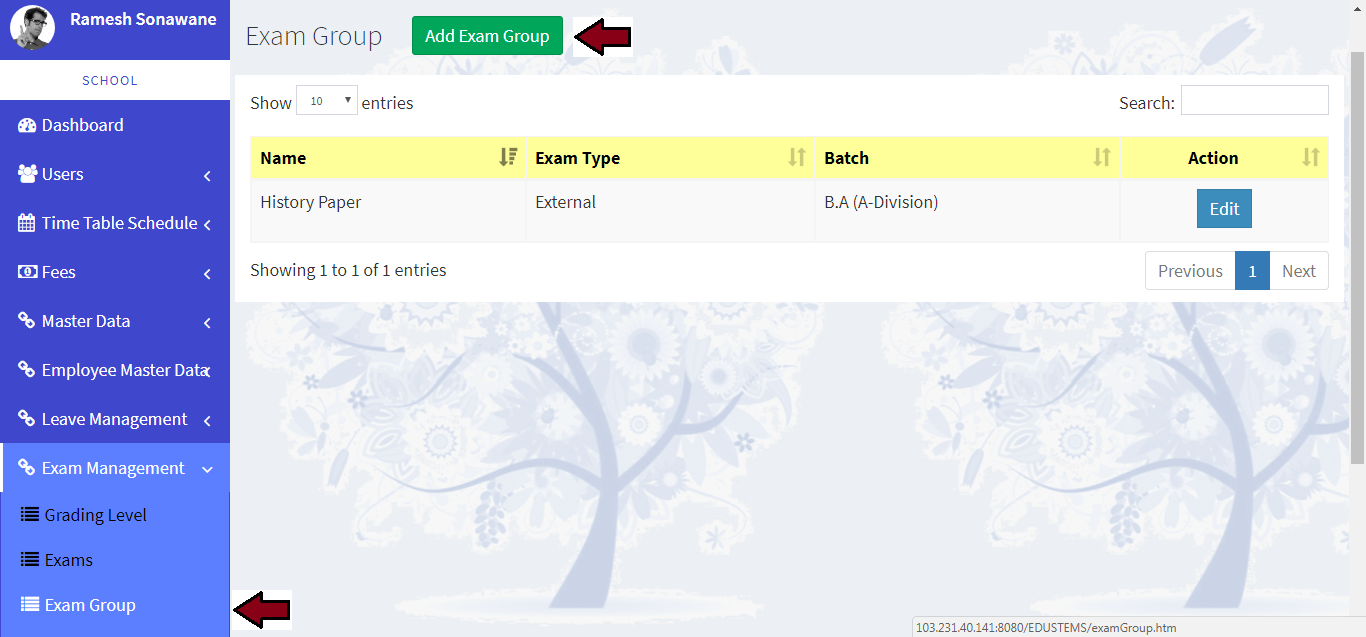
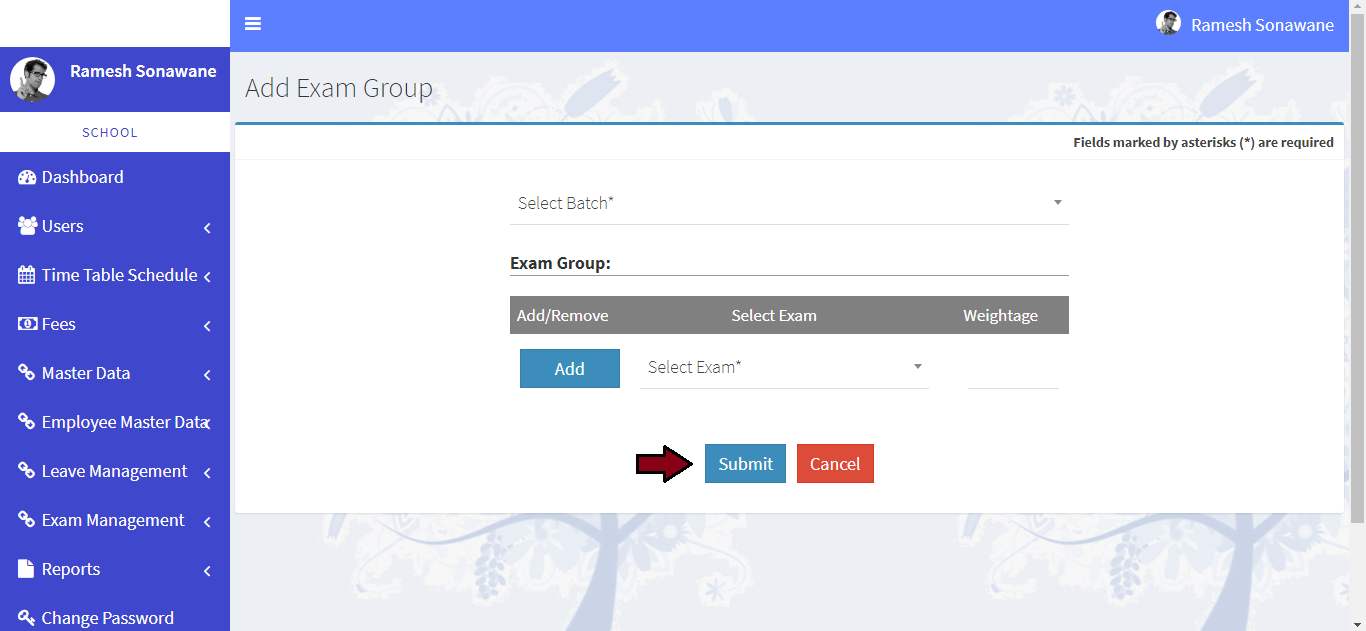
Learn how to add exam group
-
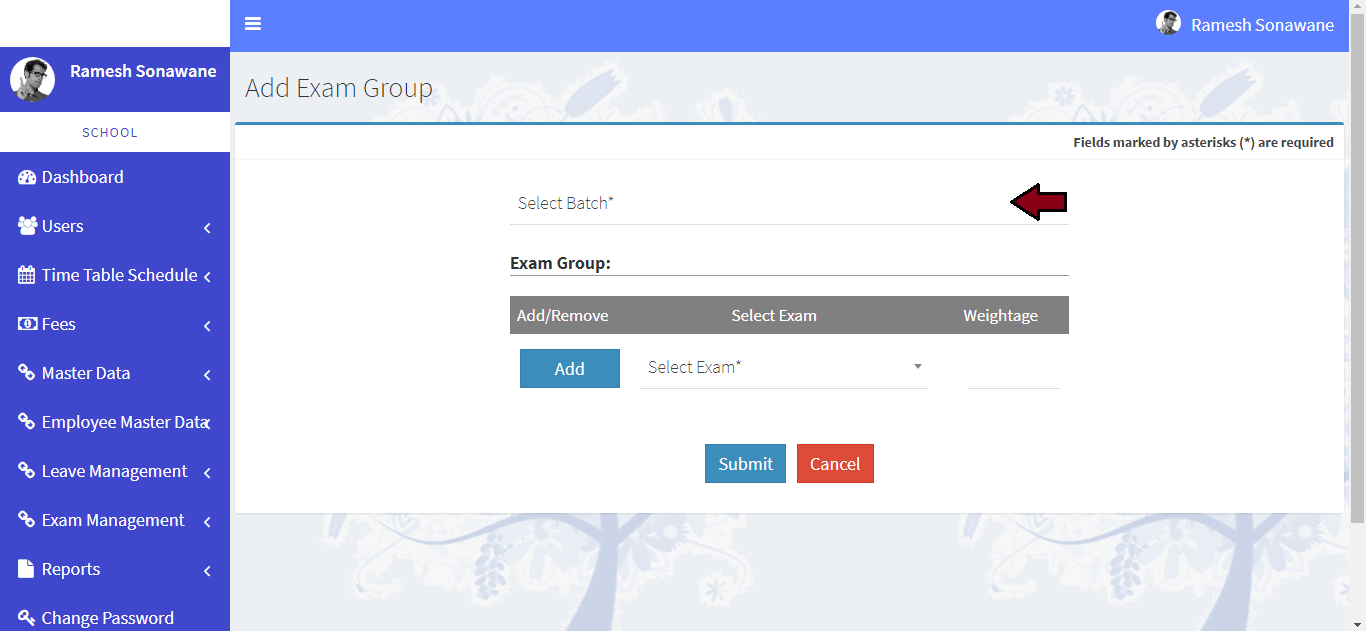
For create new exam group. Click on Exam Management >> Exam Group link from left navigation Panel. Then click on Add Exam Group button
-
Please select batch
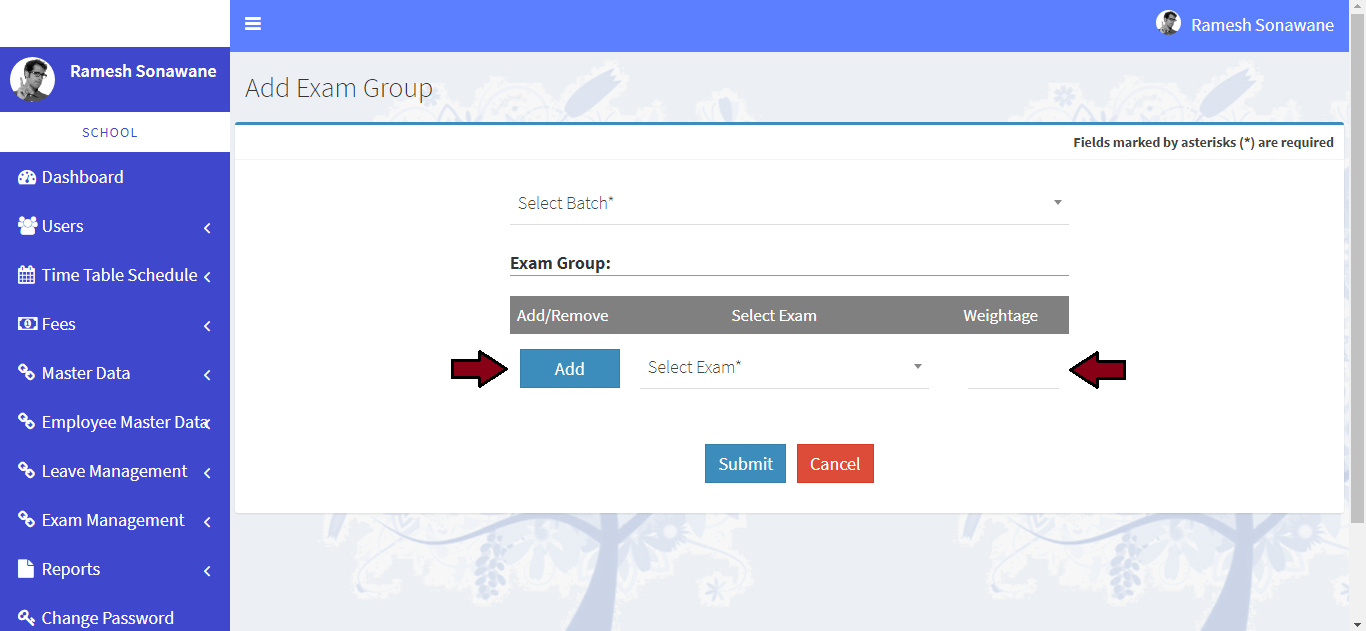
-
For grouping the subject select exam and then click on Add button for grouping new exam
-
Click on Submit button
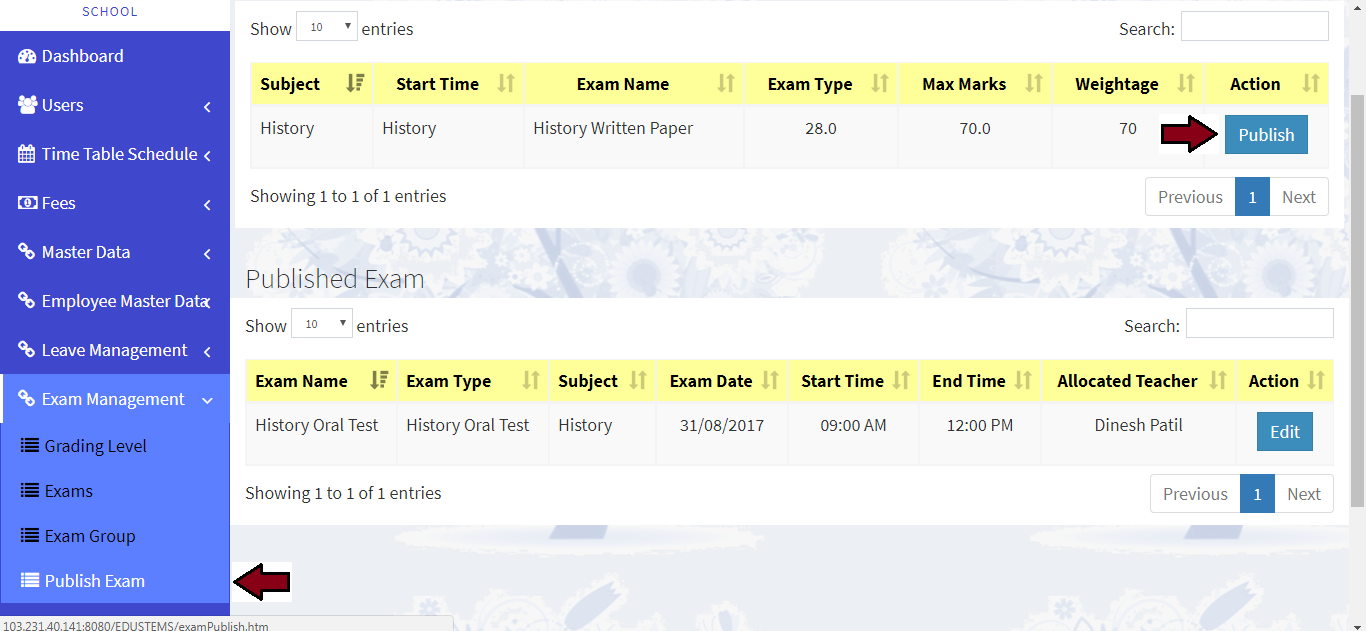
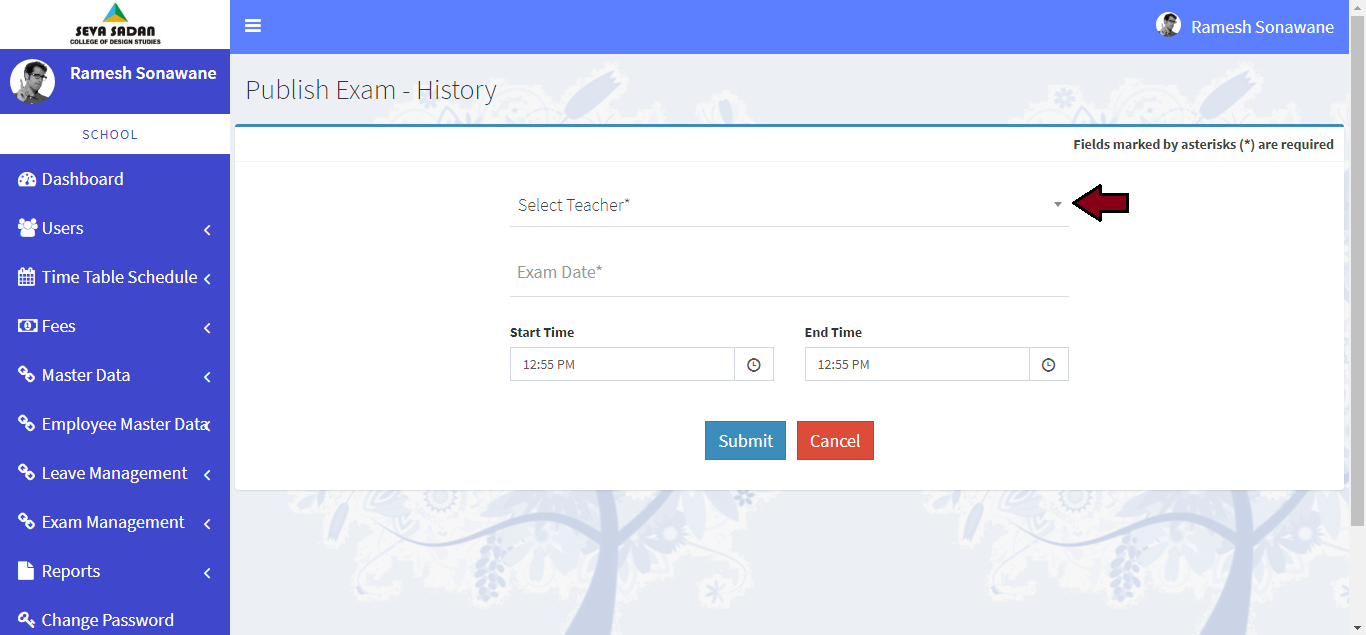
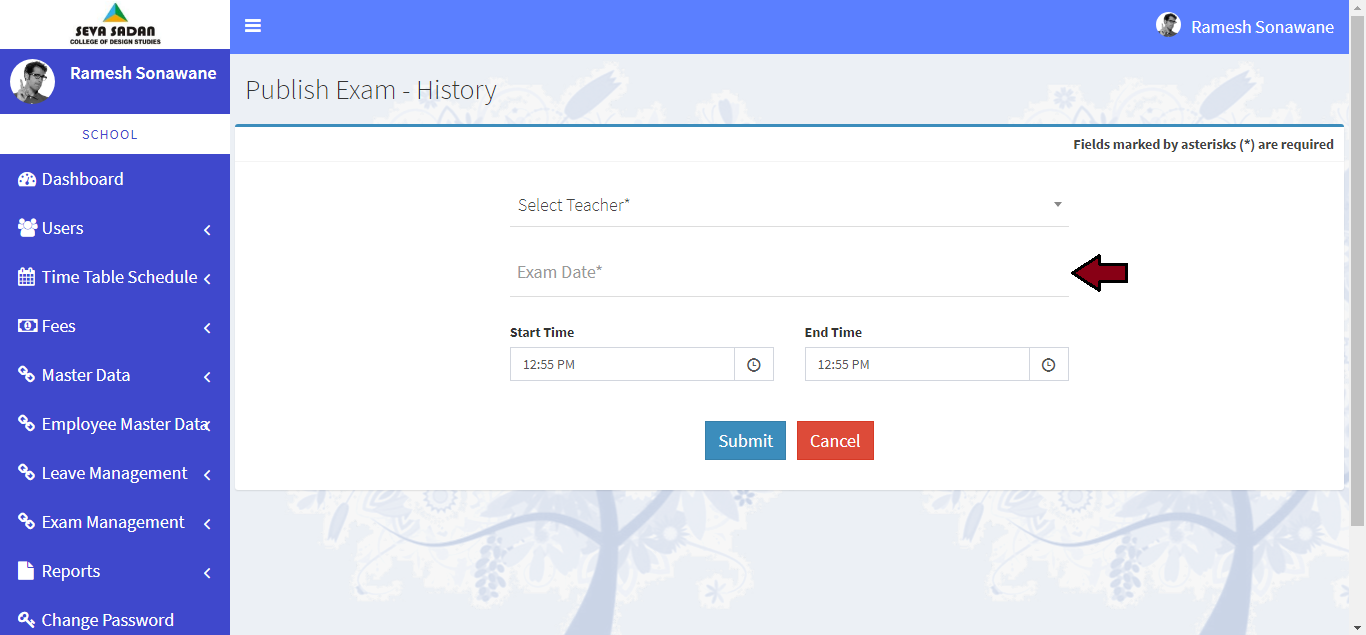
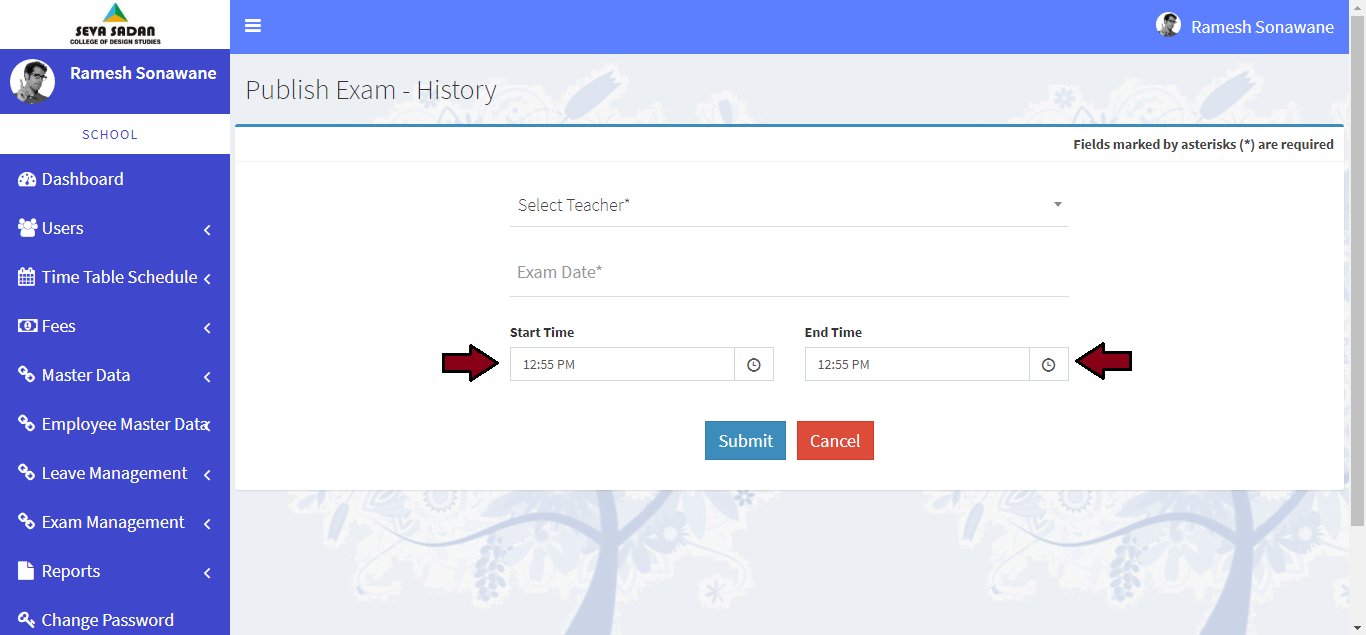
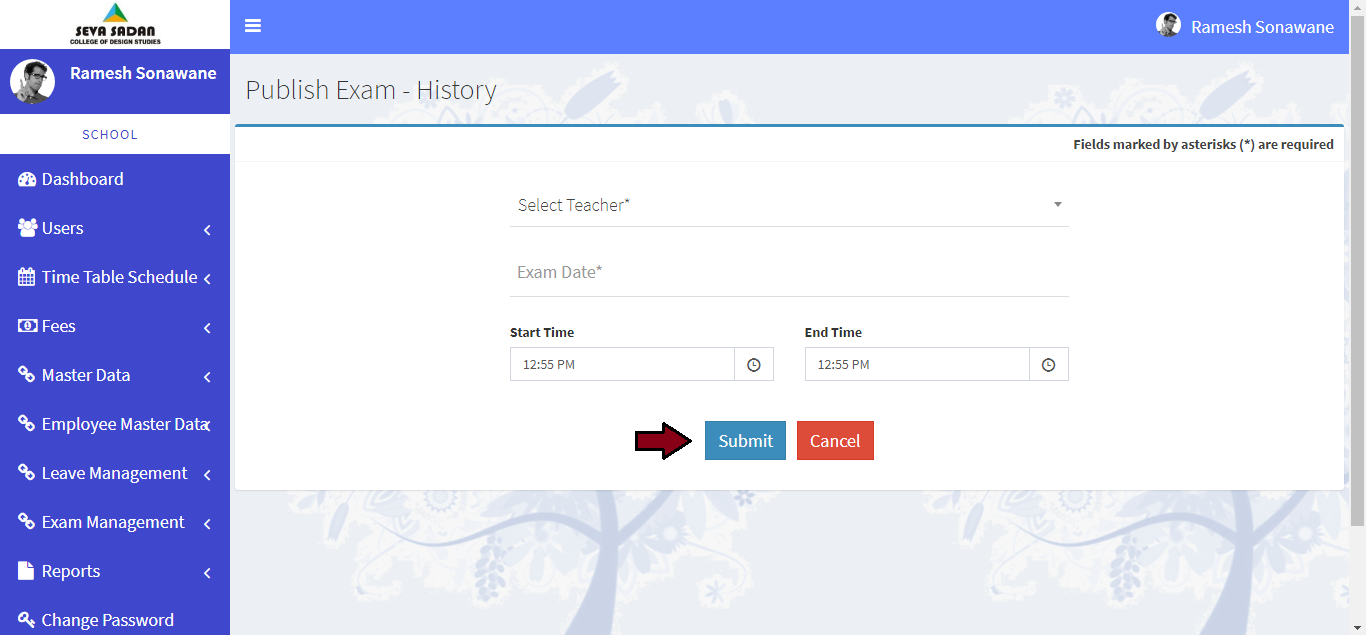
Learn how publish exam
-
For publish exam. Click on Exam Management >> Publish Exam link from left navigation Panel. Then click on Publish Exam button
-
Please select teacher
-
Please select exam date
-
Please select start time and end time
-
Click on Submit button
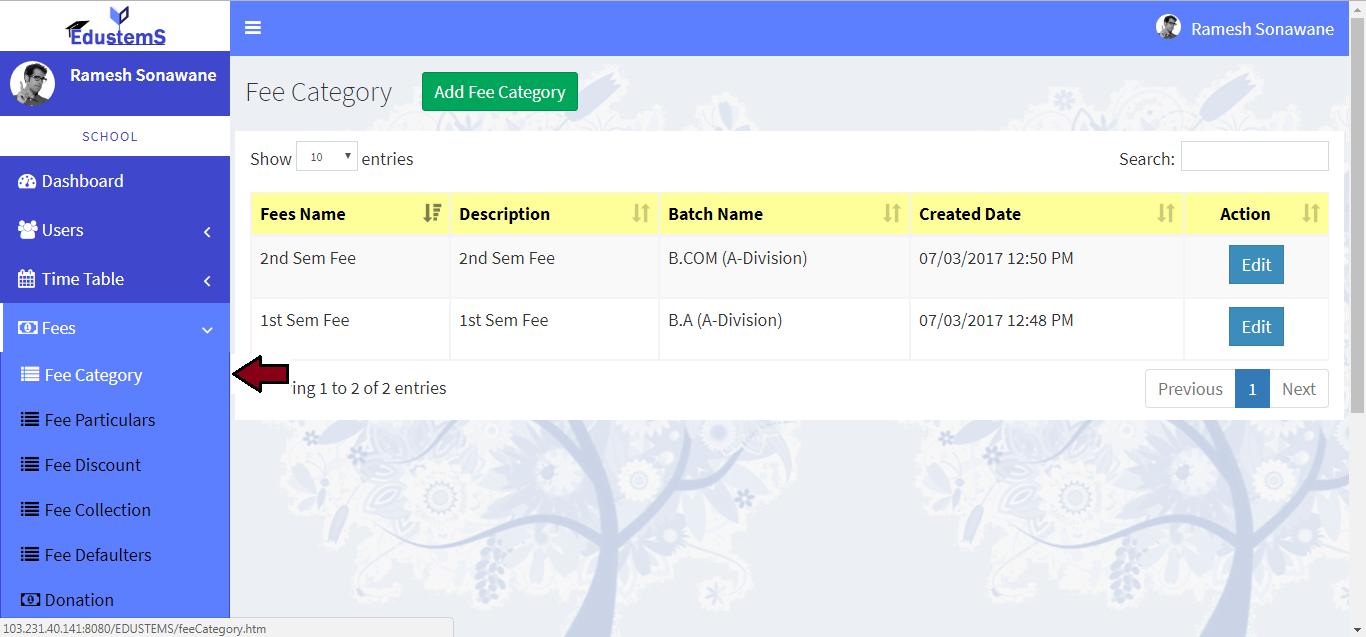
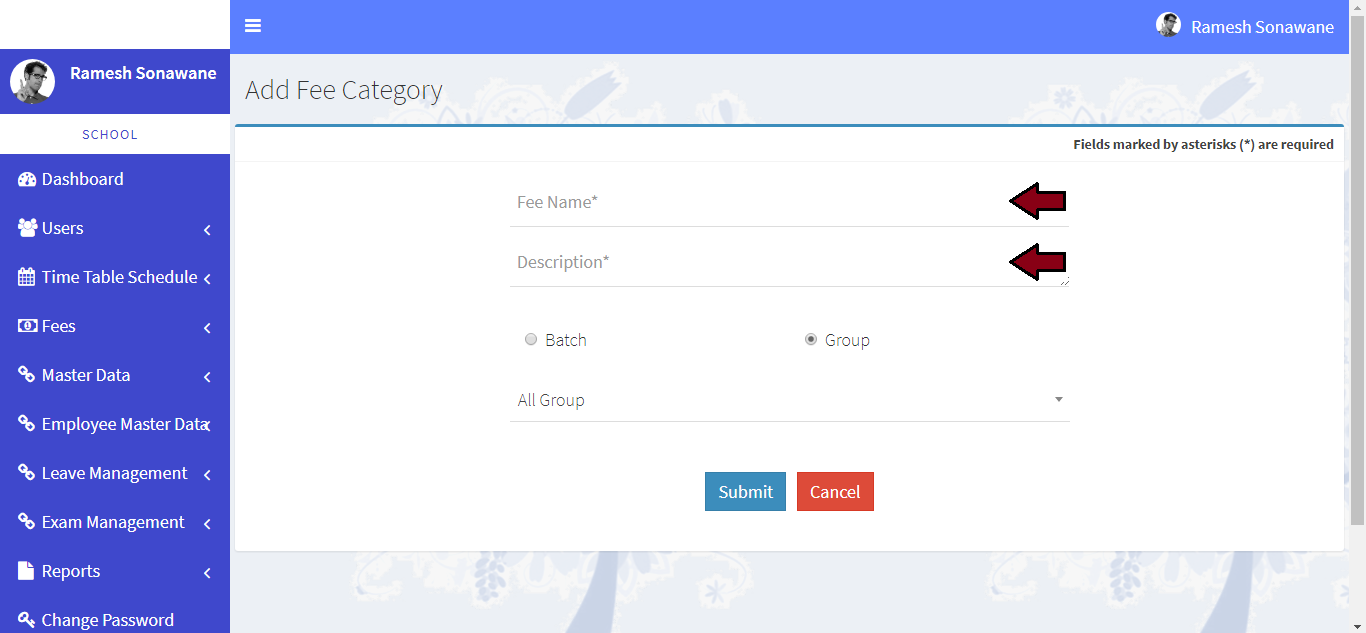
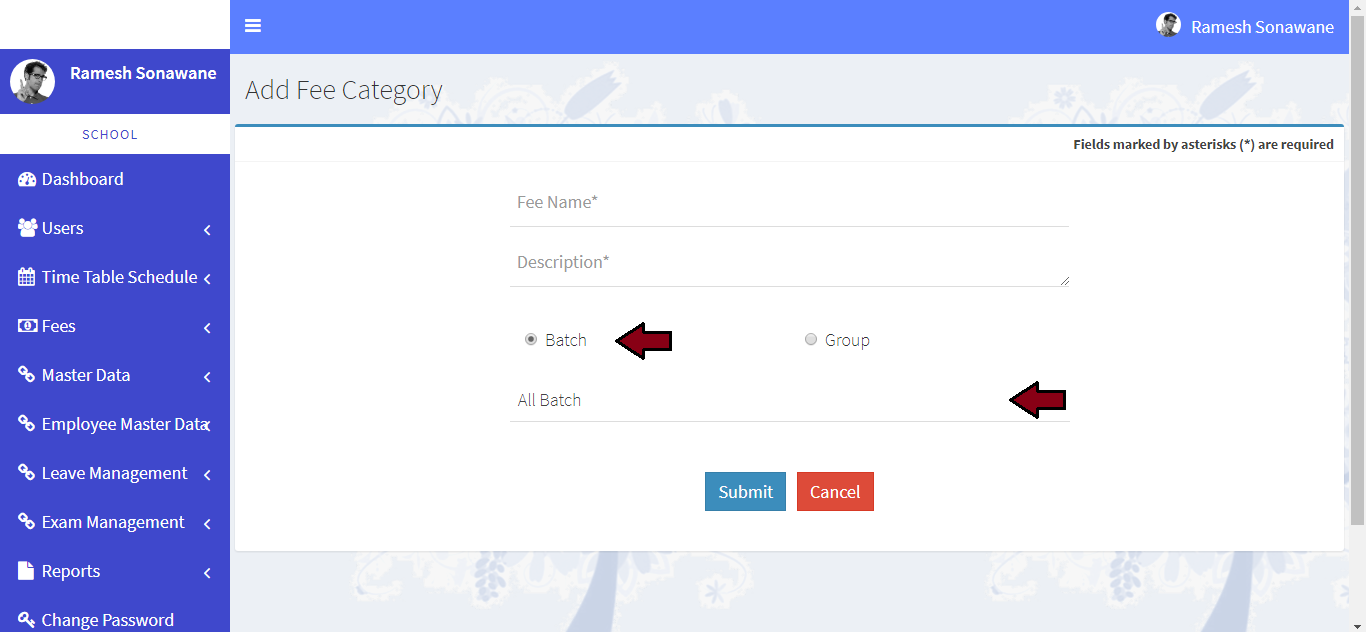
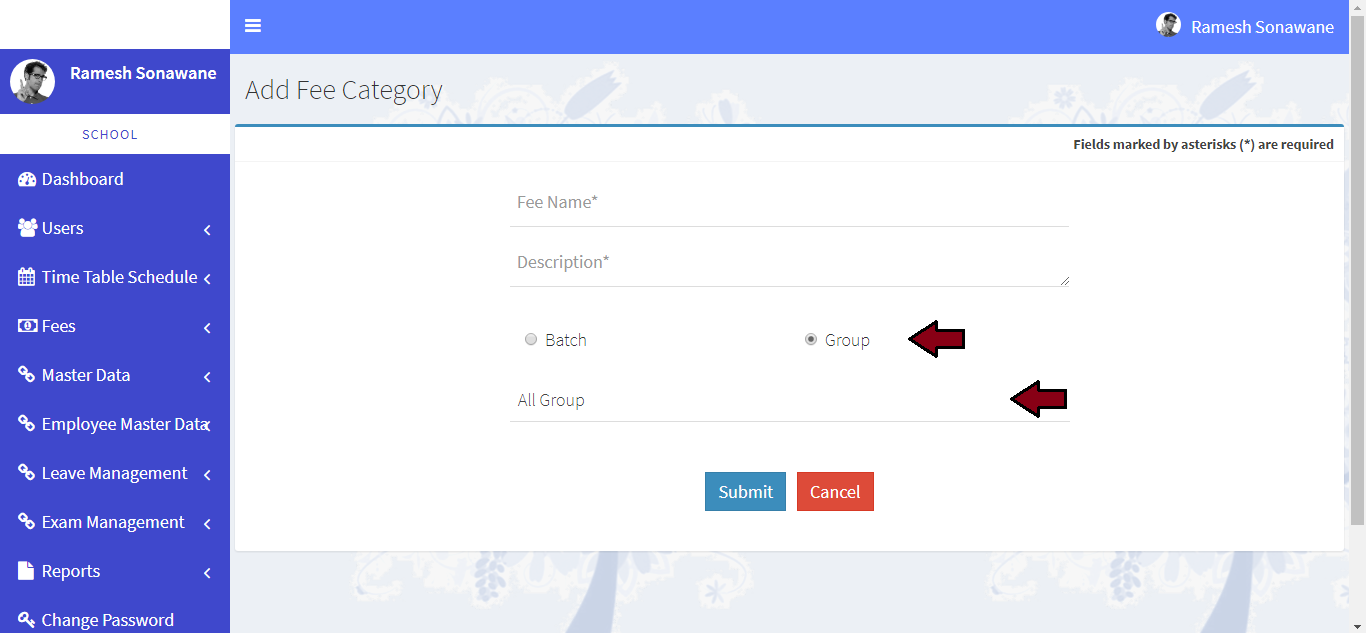
Learn how to add fee category
-
For create new category. Click on Fees >> Fee Category link from left navigation Panel. Then click on Add Fee Category button
-
Please category name and description for category
-
Chooose Batch or Group from options. If Batch then select particular batch from drop down
-
If Group then select particular group from drop down
-
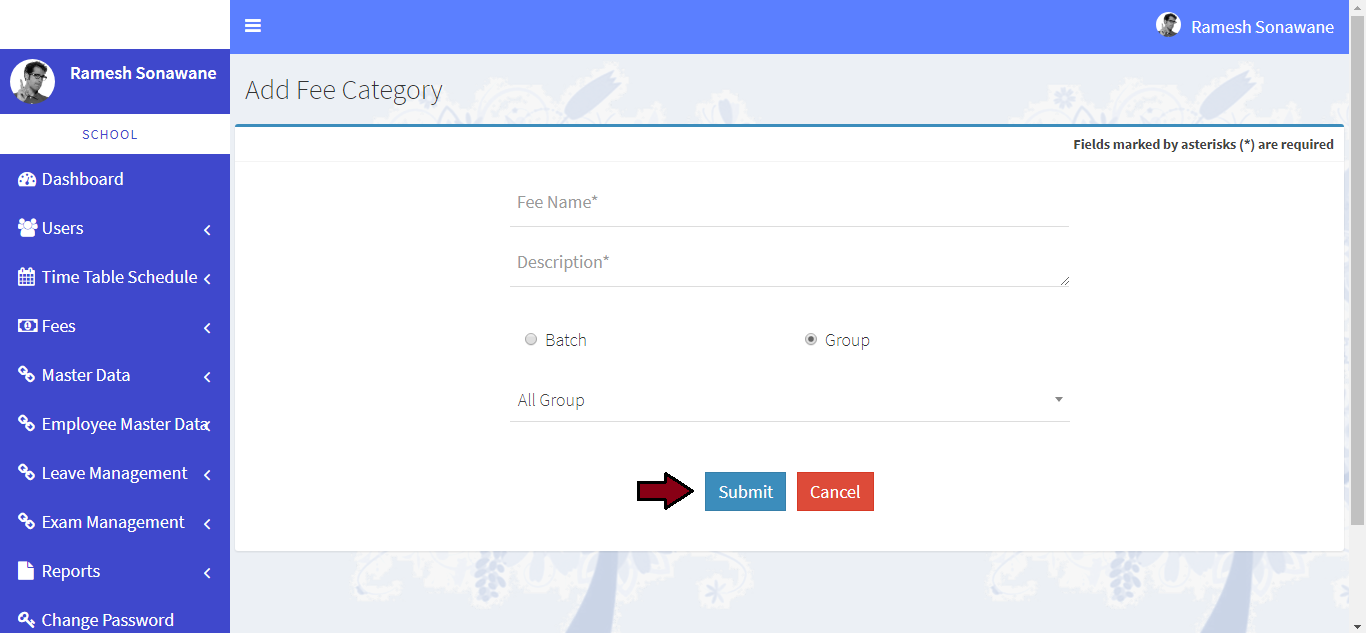
Click on Submit button
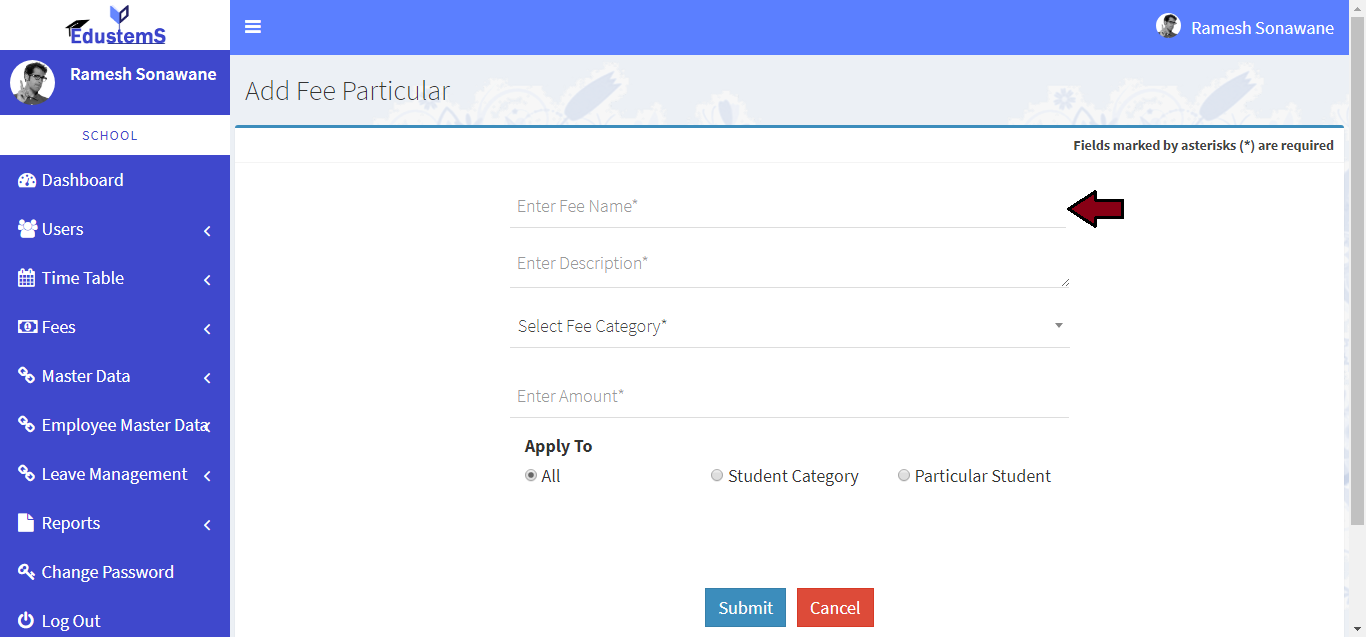
Learn how to add fee particular
-
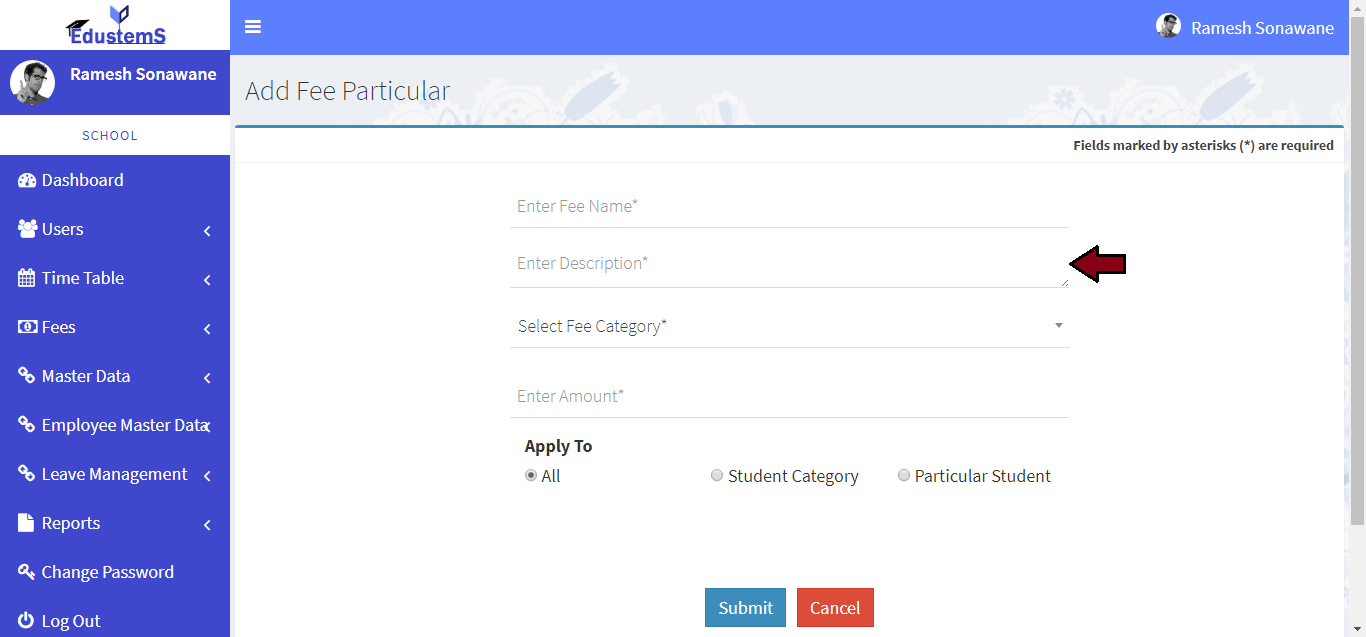
For create new category. Click on Fees >> Fee Particulars link from left navigation Panel. Then click on Add Fee Particular button
-
Please enter particular name
-
Please enter description for particular
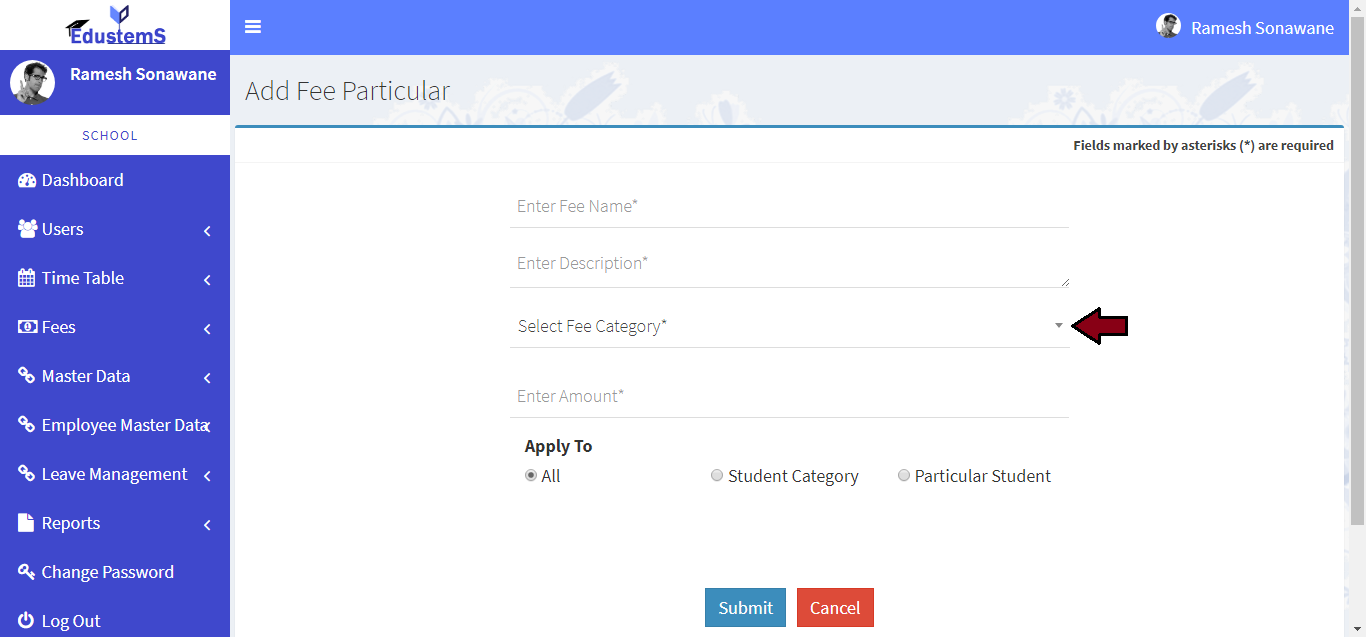
-
Please select fee category
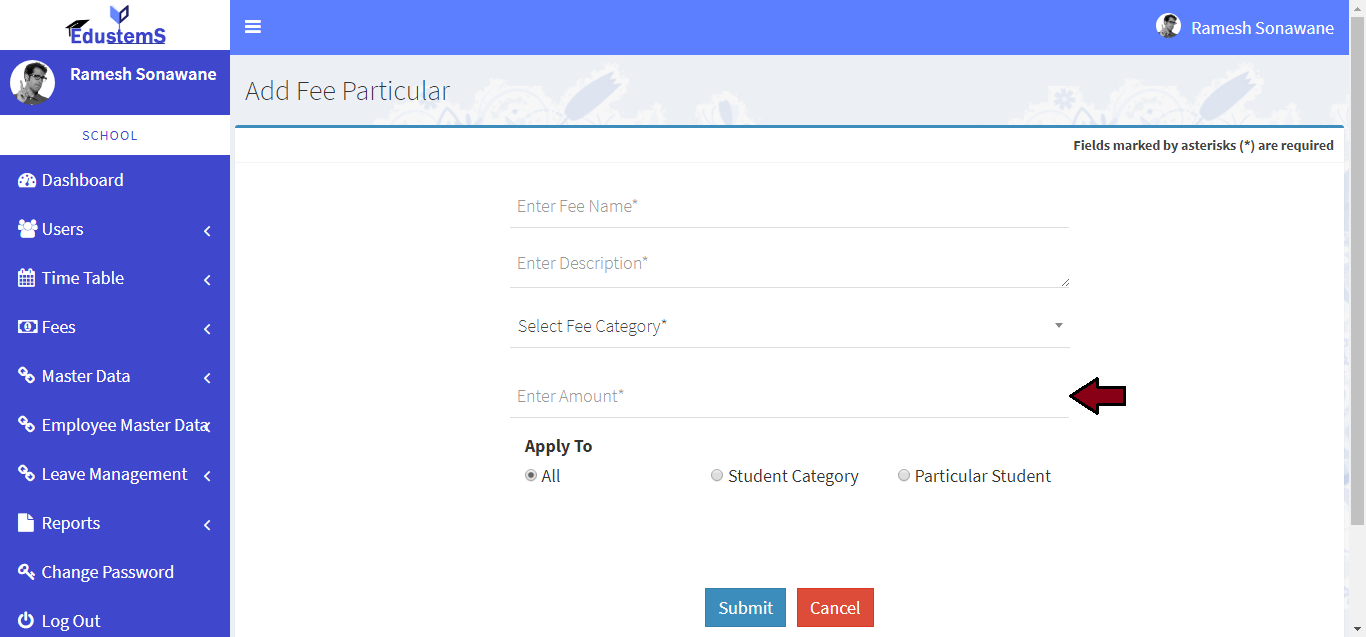
-
Please enter amount
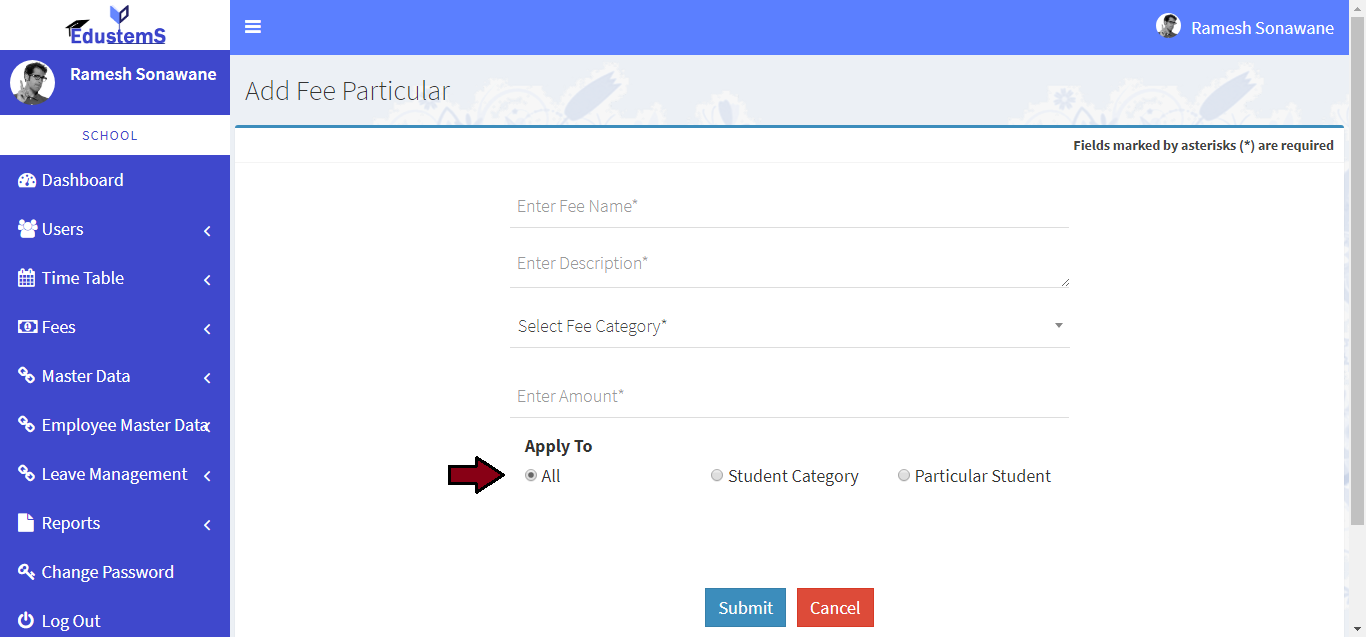
-
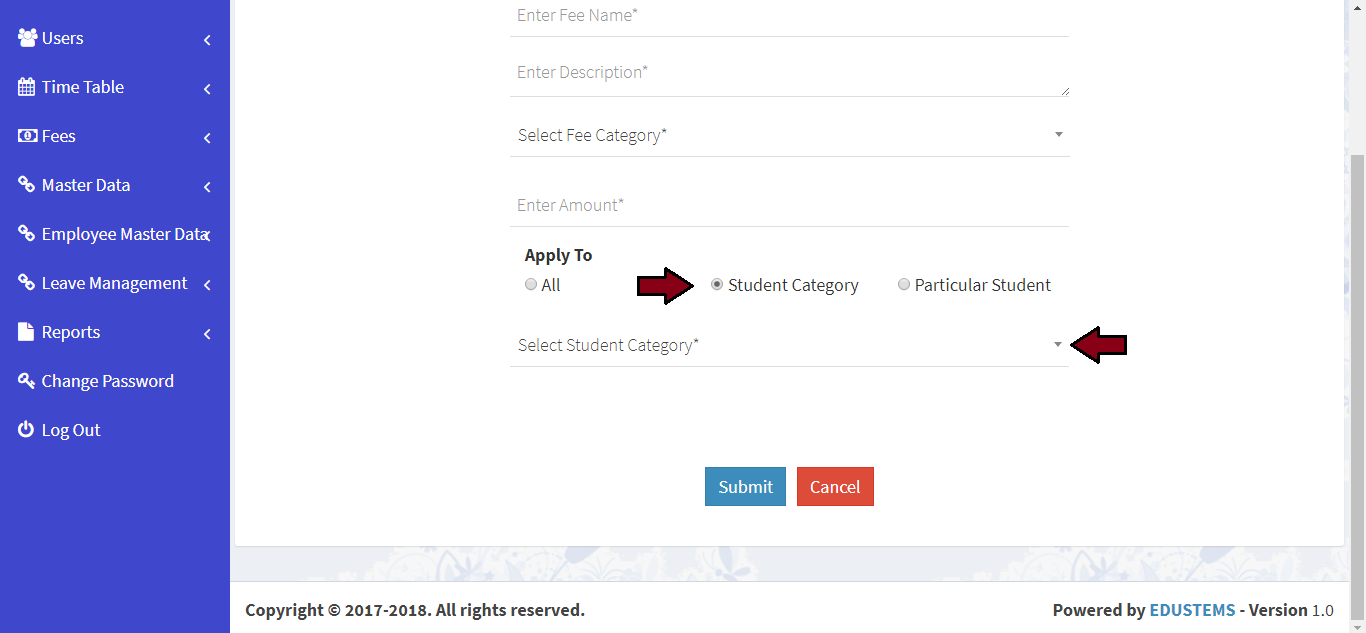
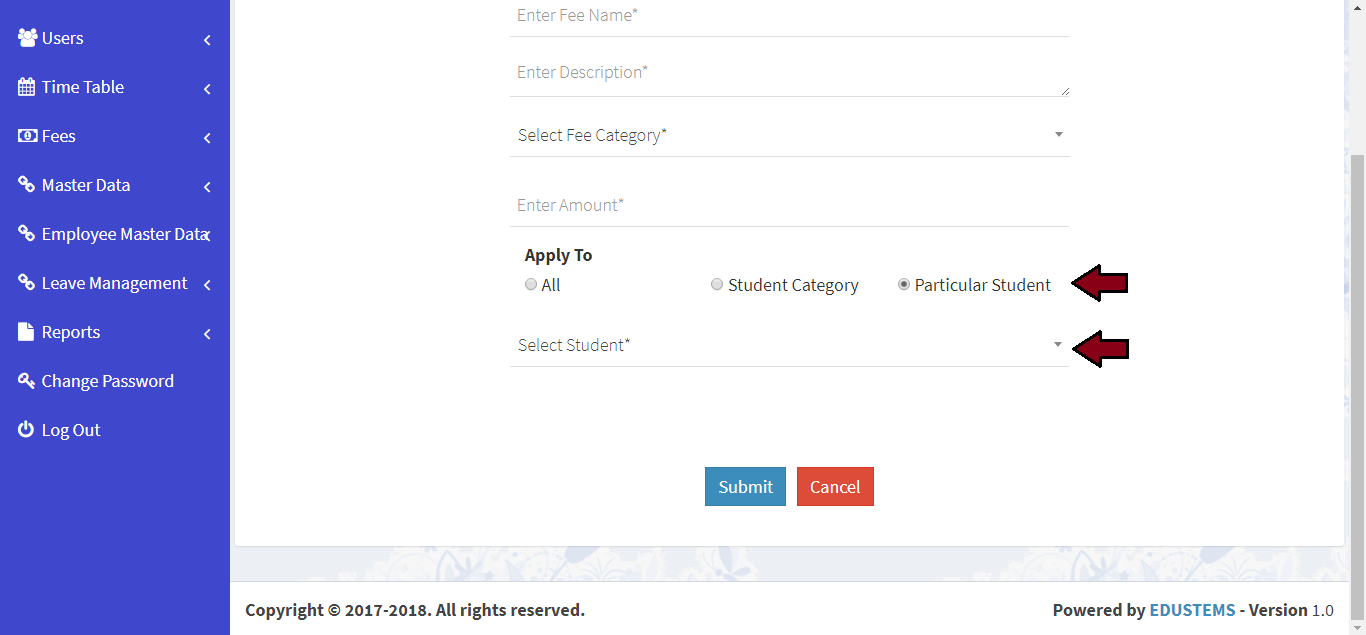
Please choose apply to - if you choose All then applied to all student in school
-
If you choose Student Category then applied to only those student who belong to selected category
-
If you choose Particular Student then applied to only selected student
-
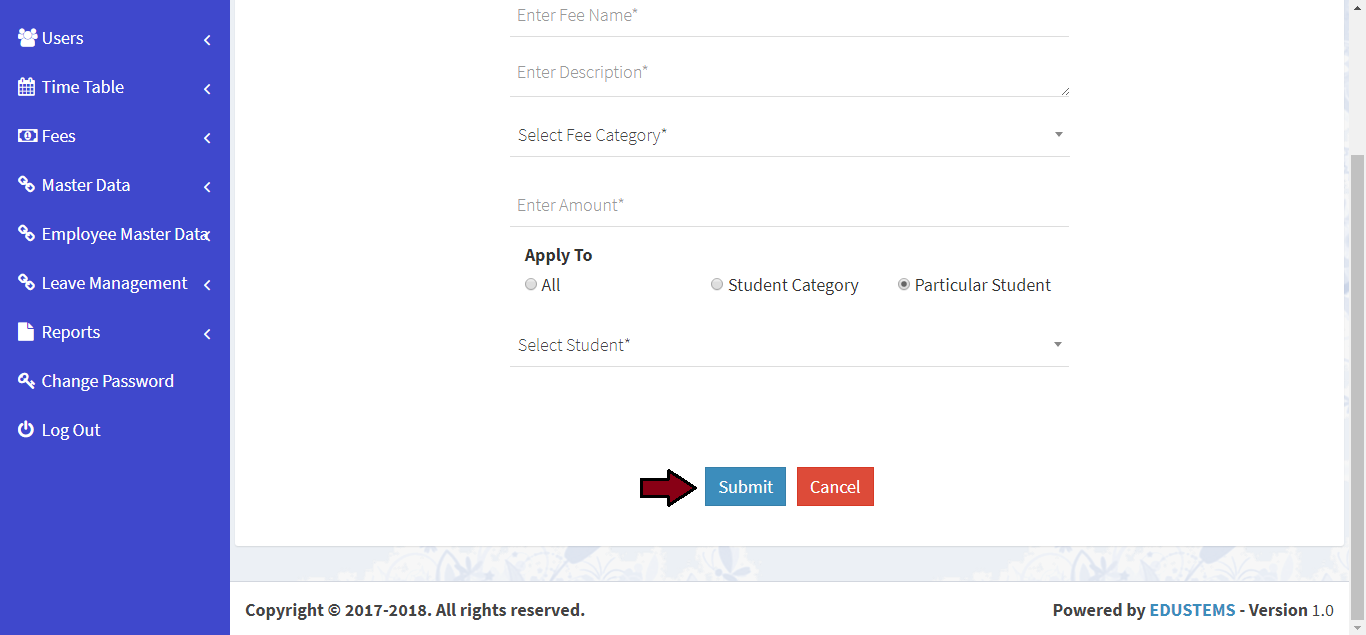
Click on Submit button

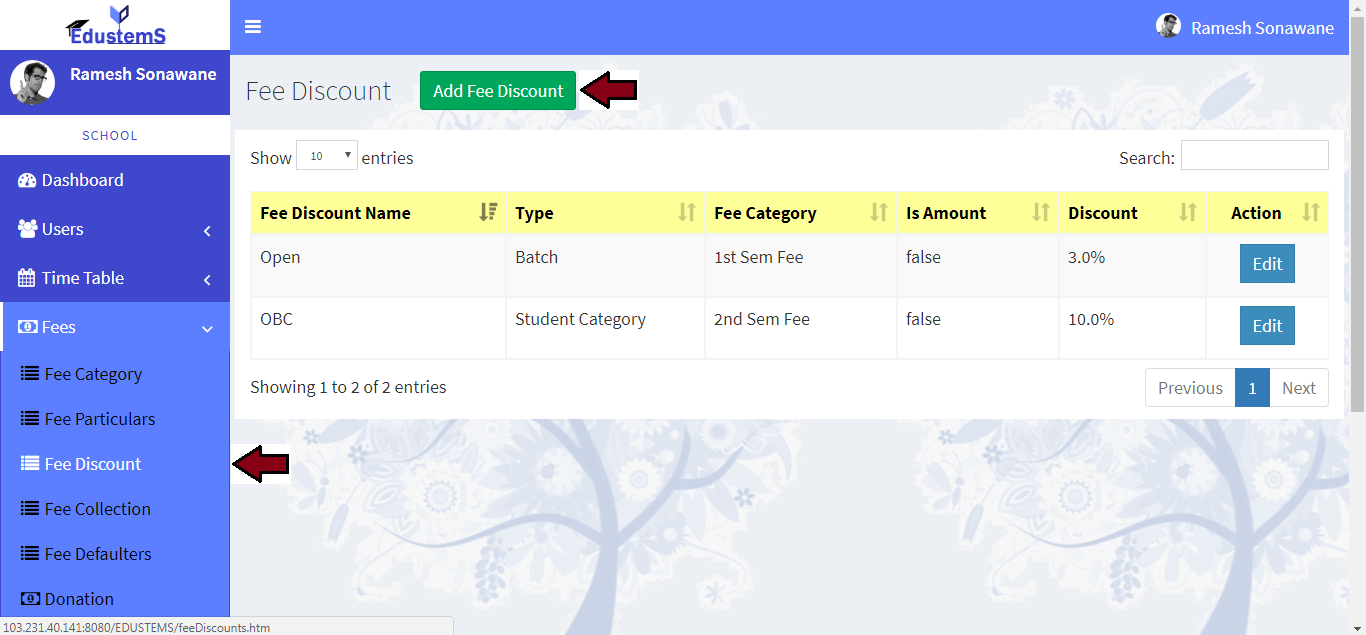
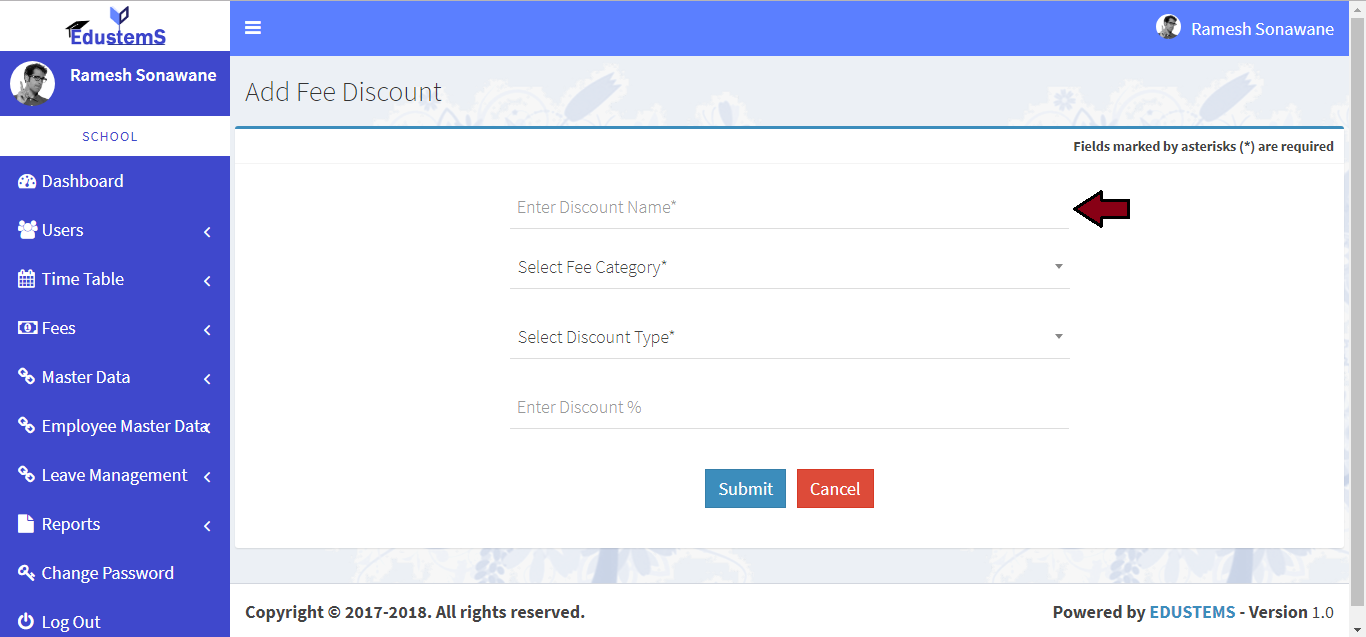
Learn how to add fee discount
-
For create new fee discount. Click on Fees >> Fee Discount link from left navigation Panel. Then click on Add Fee Discout button
-
Please enter discount name
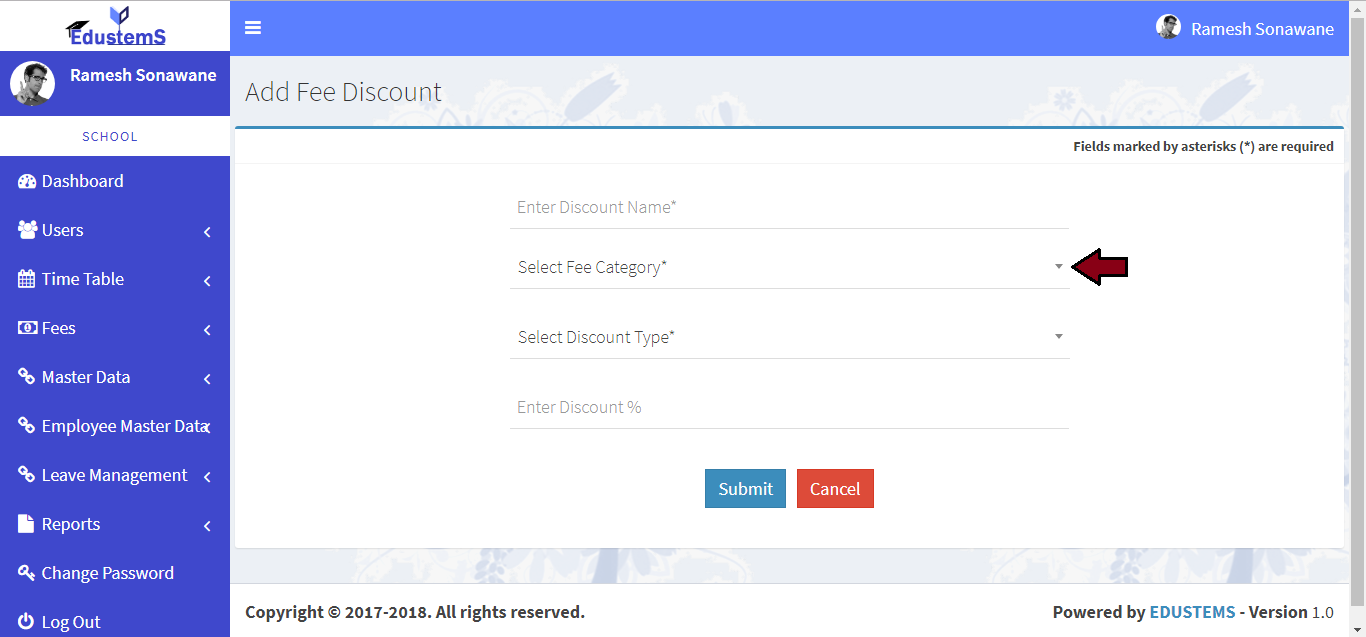
-
Please select fee category on which you want to apply discount
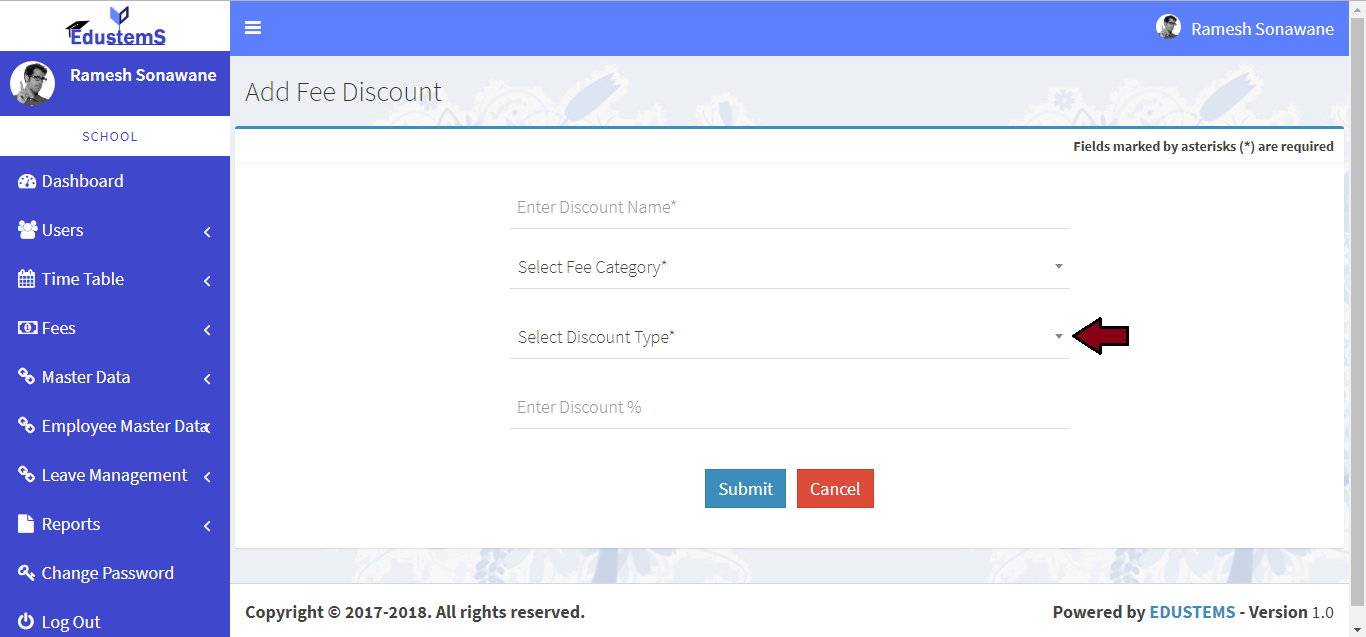
-
Please select discount type - batch / student / student category
-
Please enter discount percent
-
Click on Submit button


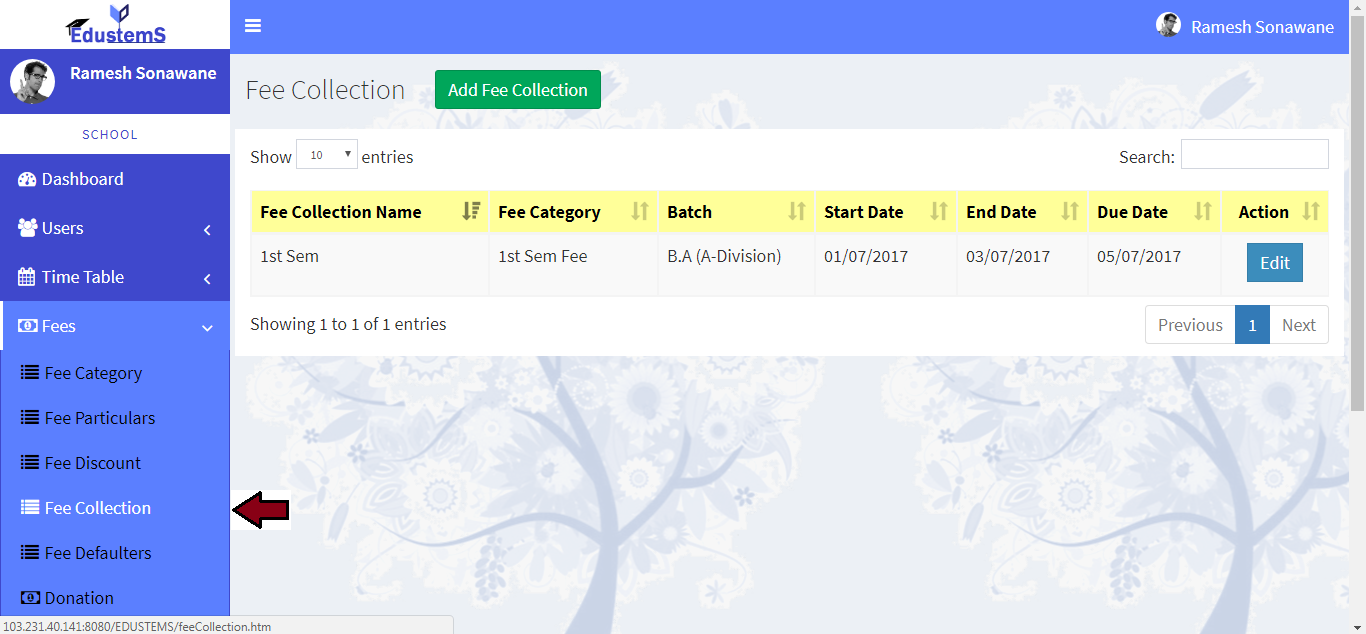
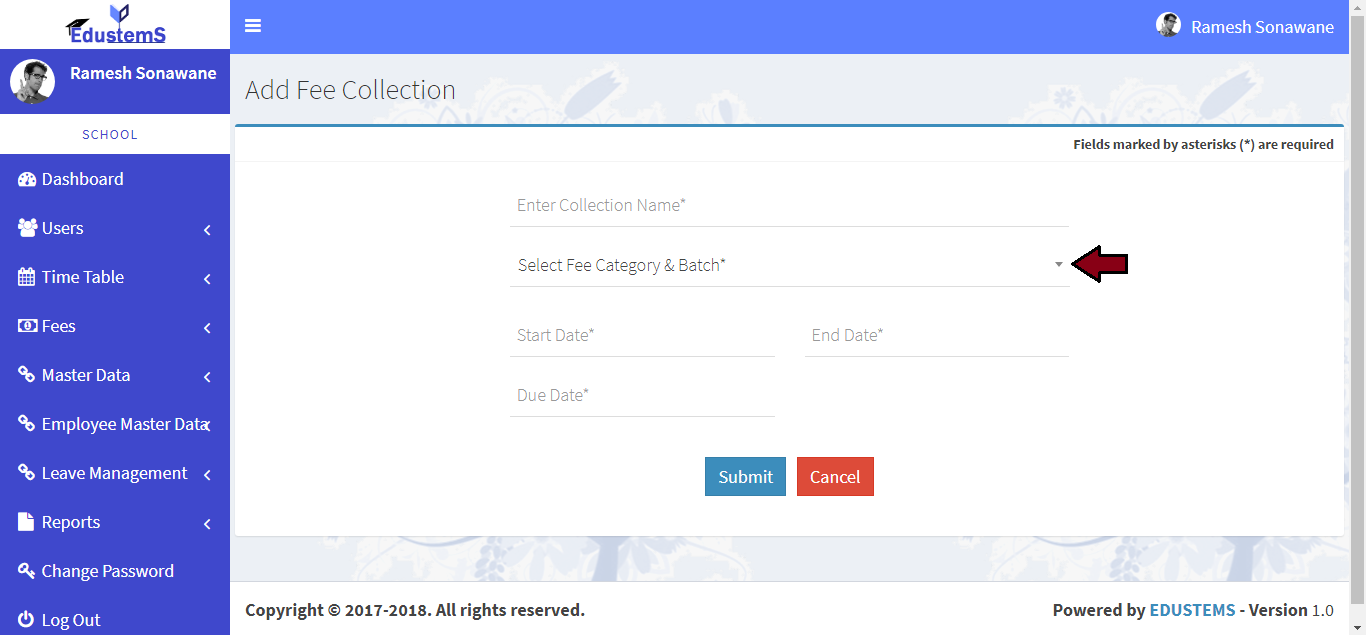
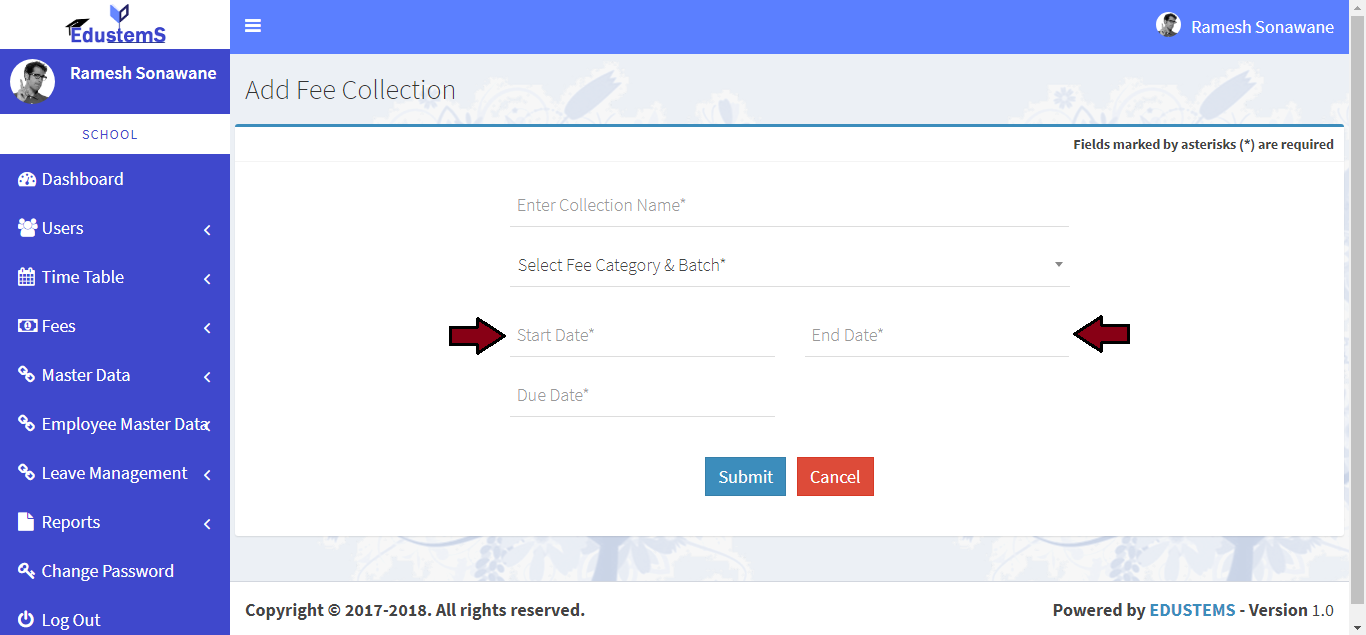
Learn how to add fee collection
-
For create new fee collection. Click on Fees >> Fee Collection link from left navigation Panel. Then click on Add Fee Collection button
-
Please enter collection name
-
Please select fee category and batch for which batch you want to collect the fees
-
Please enter start date and end date
-
Please enter due date
-
Click on Submit button


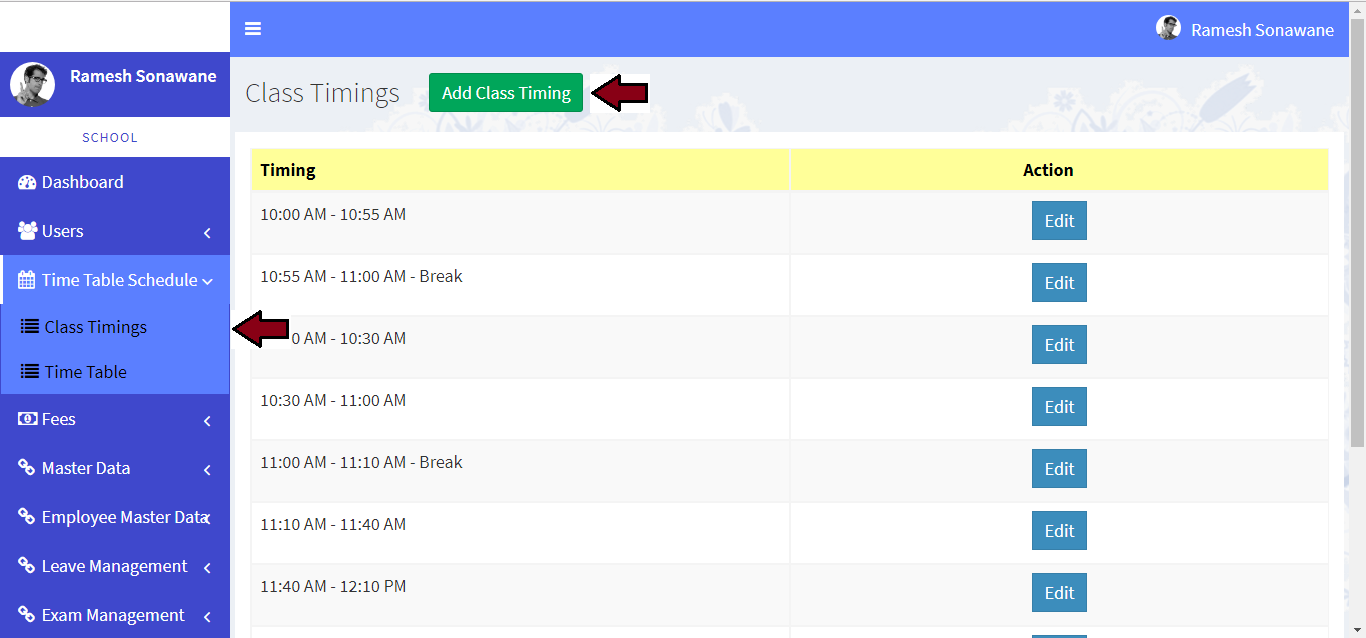
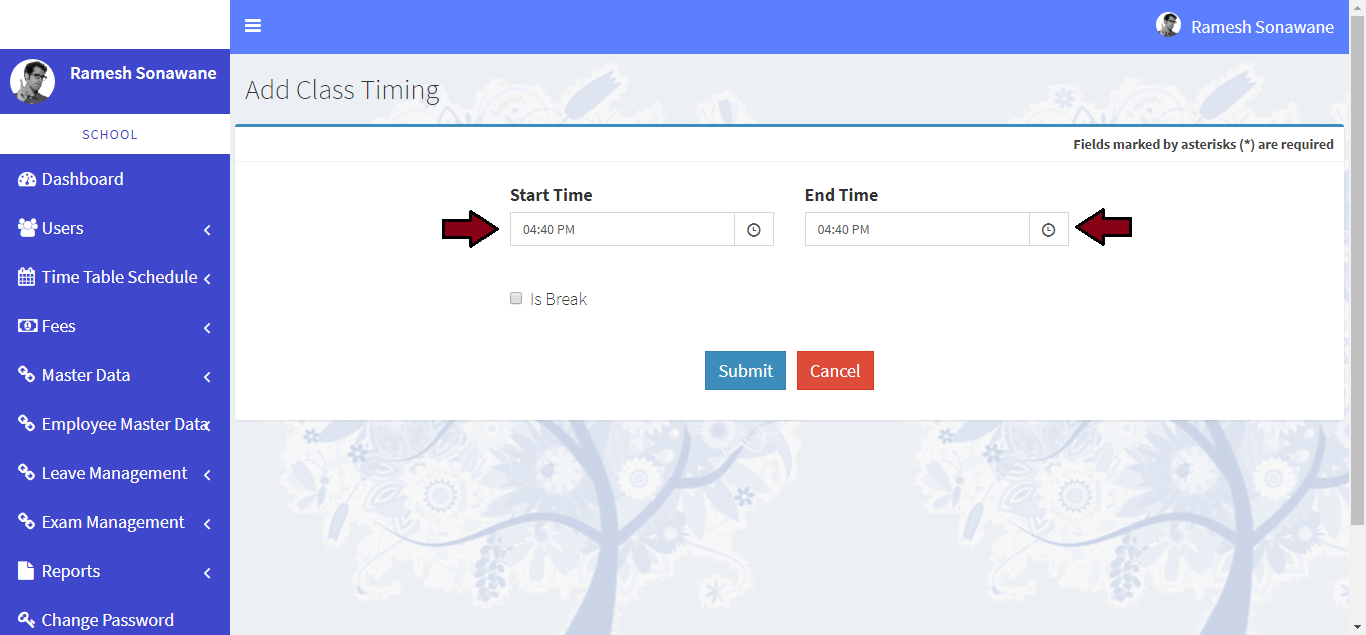
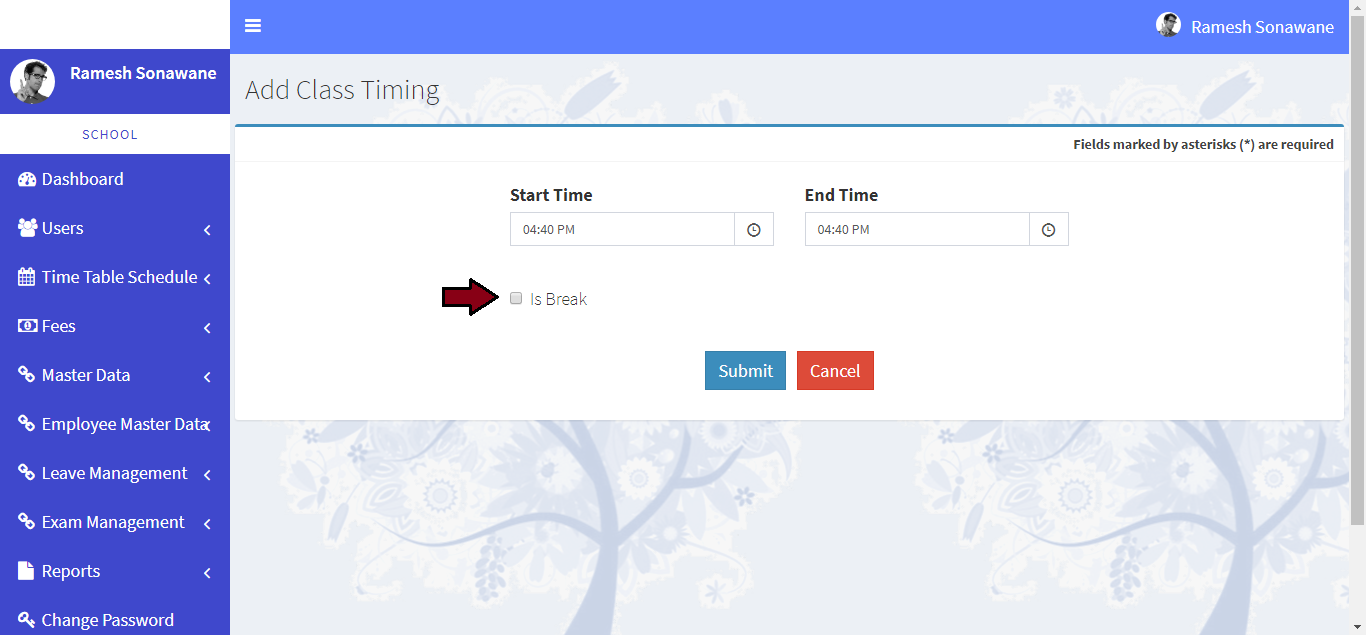
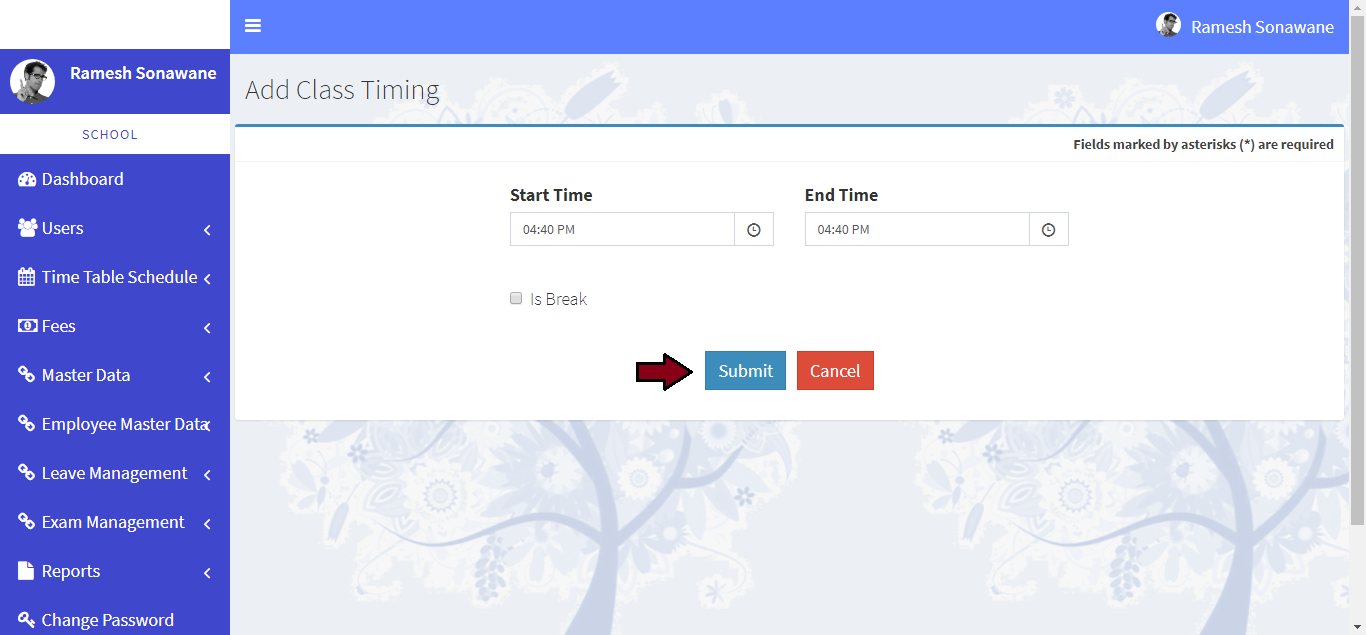
Learn how to add class timing
-
Click on Time Table Schedule >> Class Timings link from left navigation Panel. Then click on Add Class Timings button
-
Please enter start date and end date
-
Please check if mentioned time is break time
-
Click on Submit button
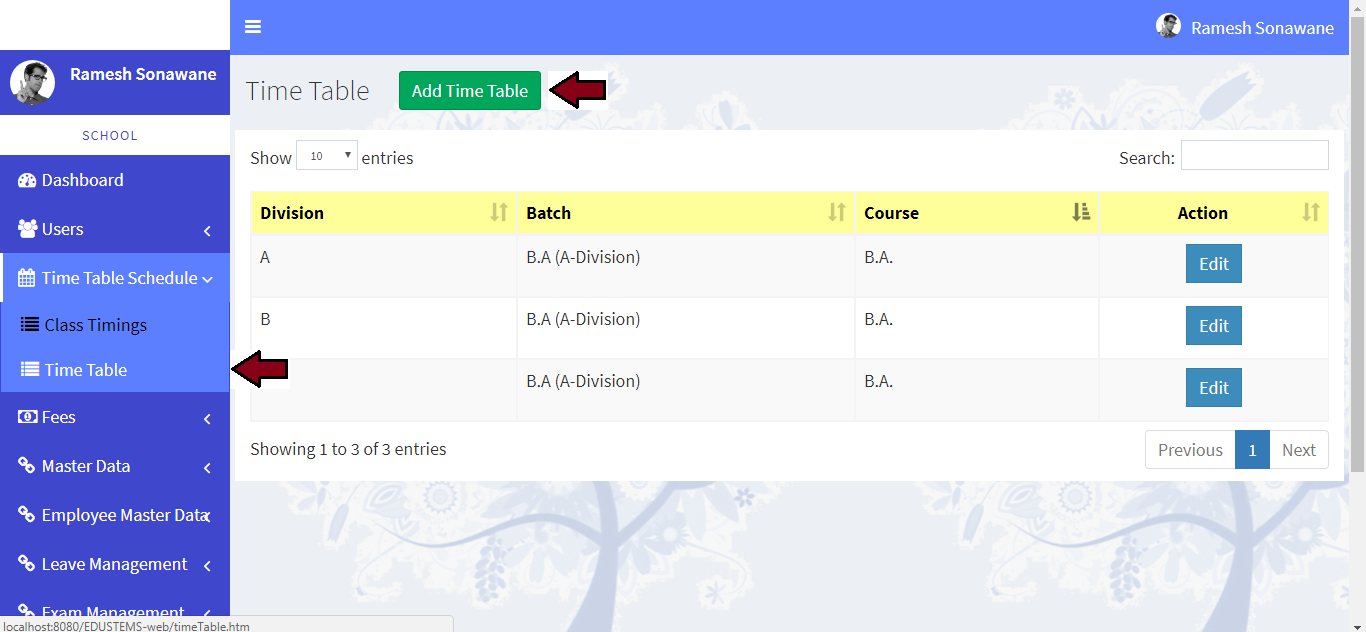
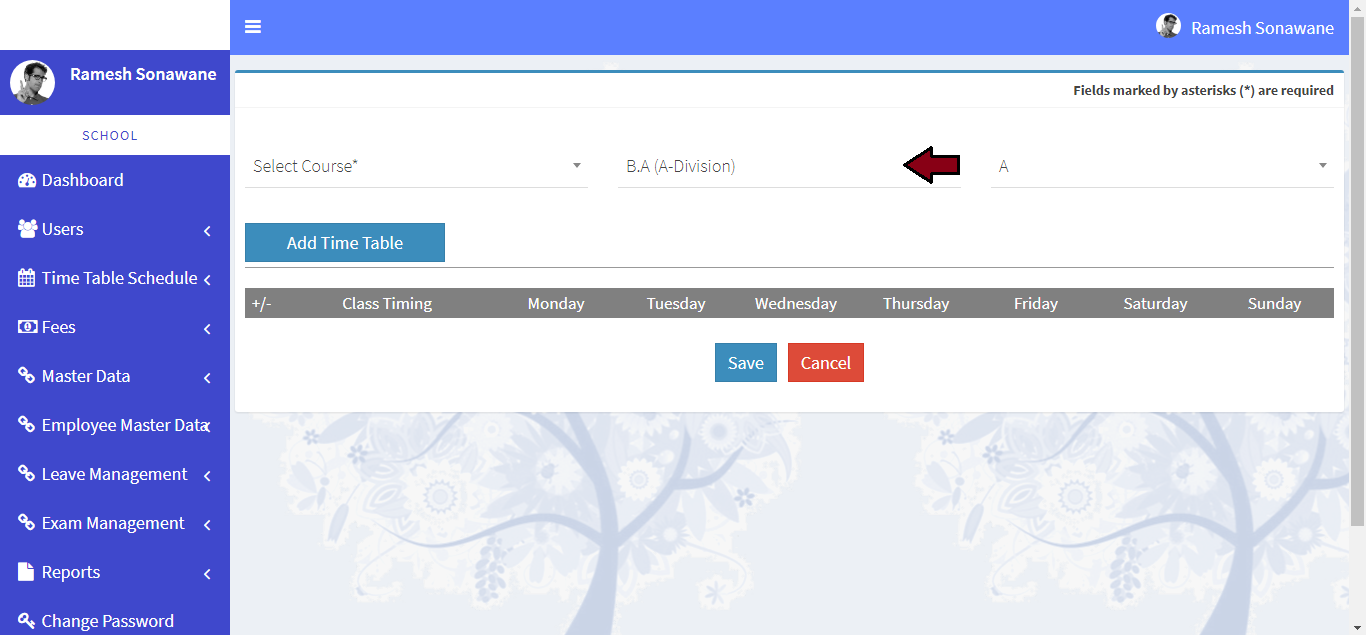
Learn how to create a time table
-
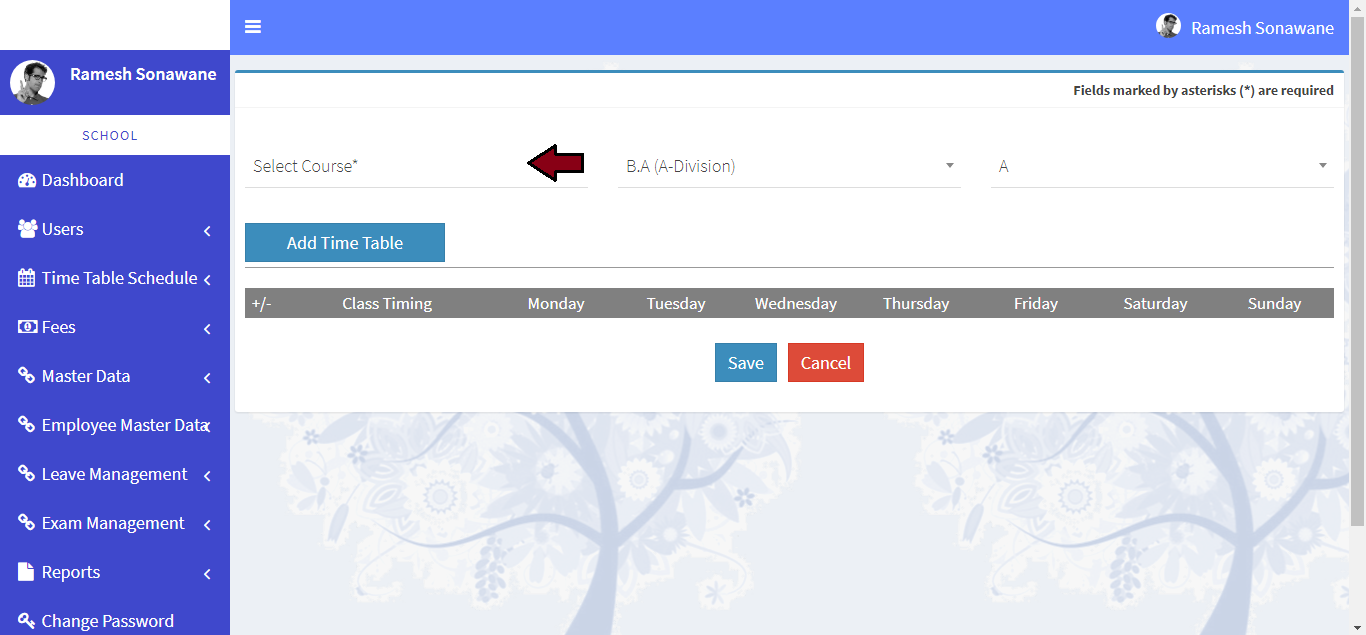
Click on Time Table Schedule >> Time Table link from left navigation Panel. Then click on Add Time Table button
-
Please select course
-
Please select batch
-
Please select division
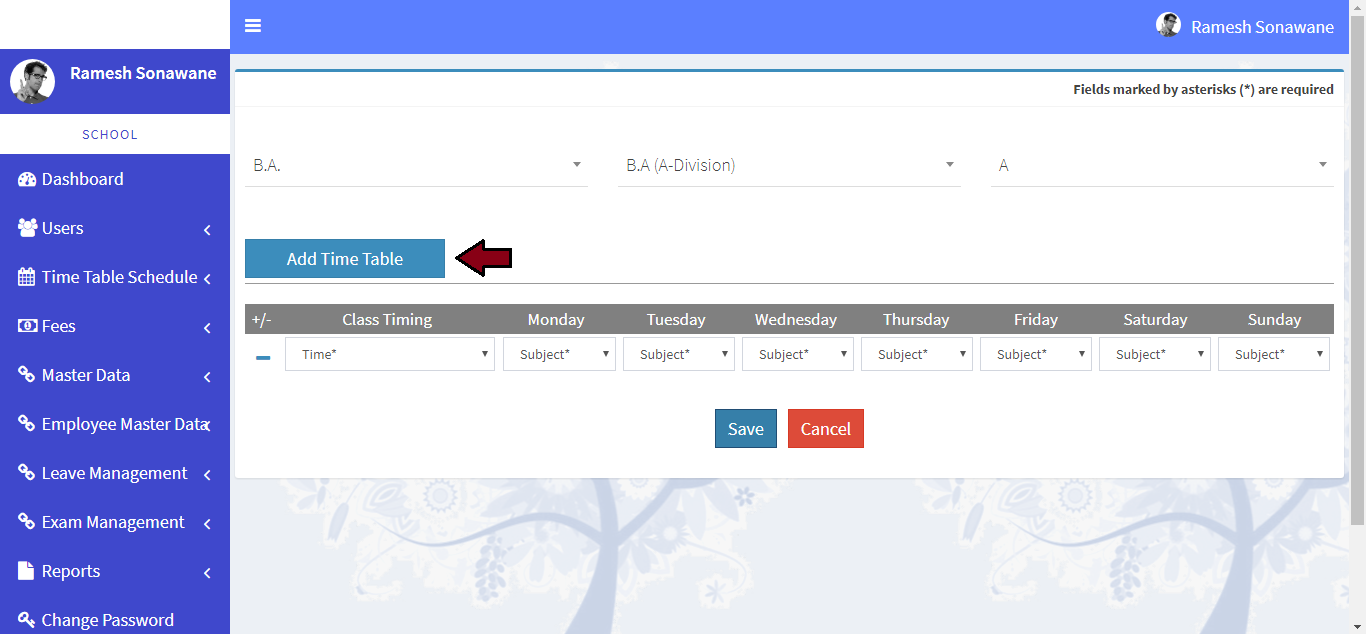
-
Please select Add Time Table button
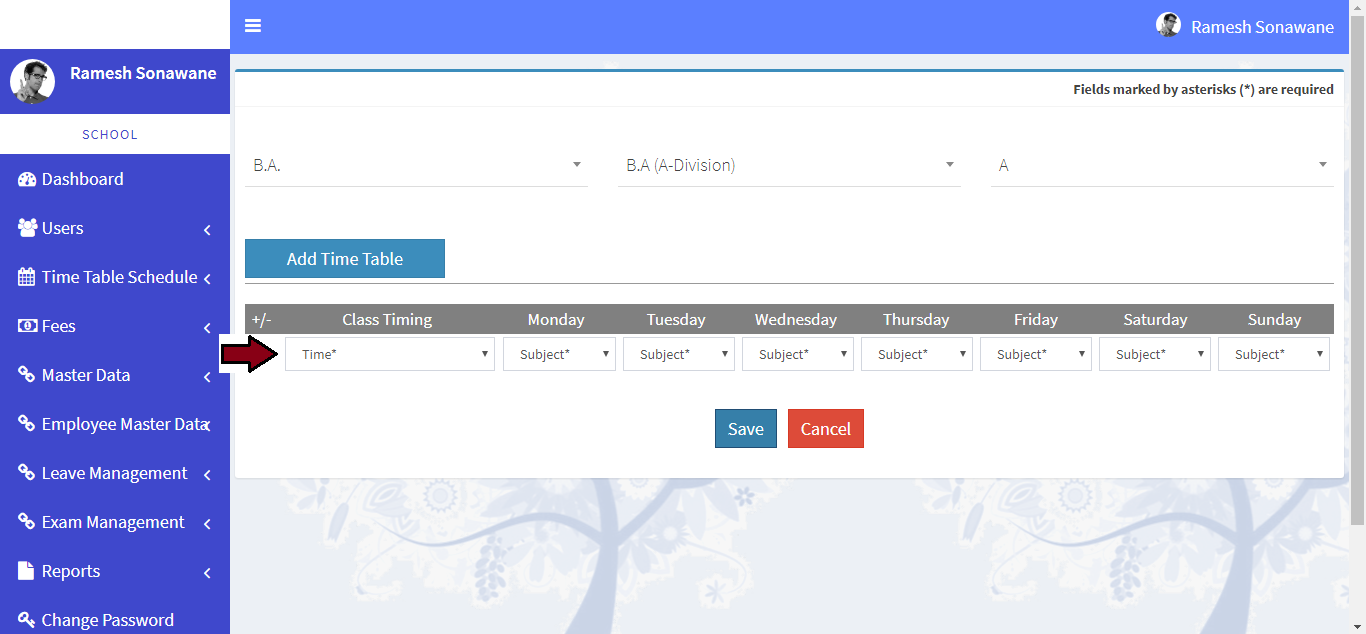
-
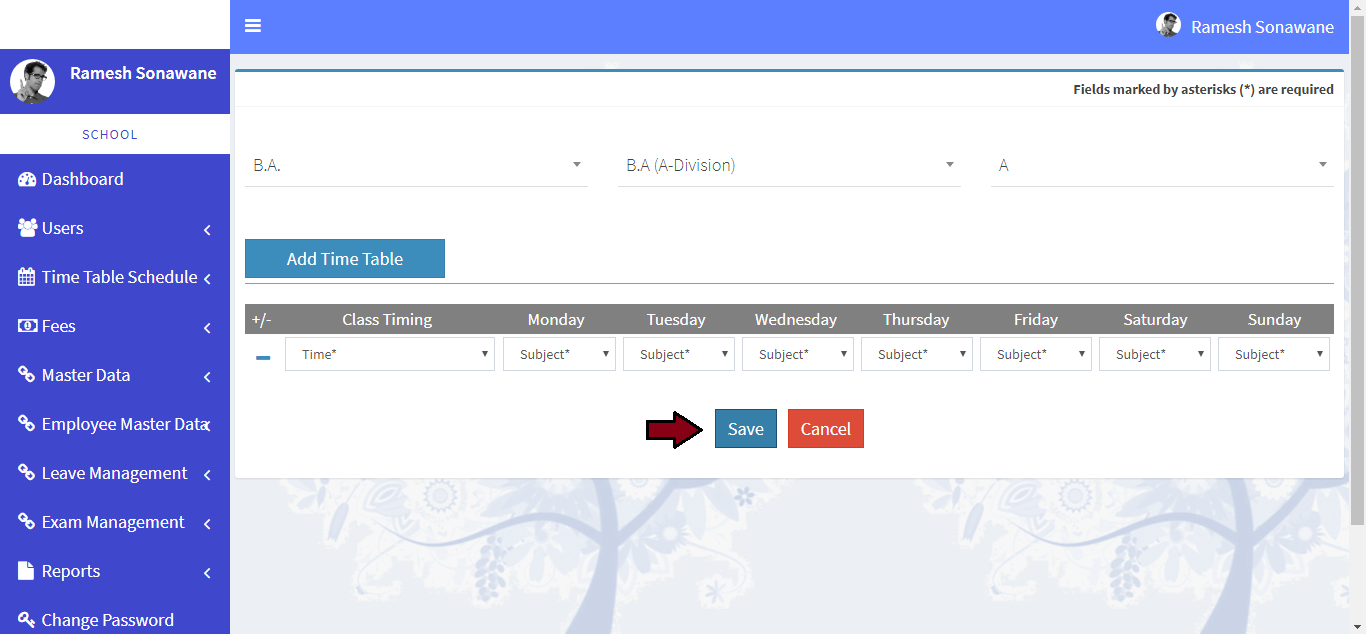
Please enter the all values
-
Click on Submit button

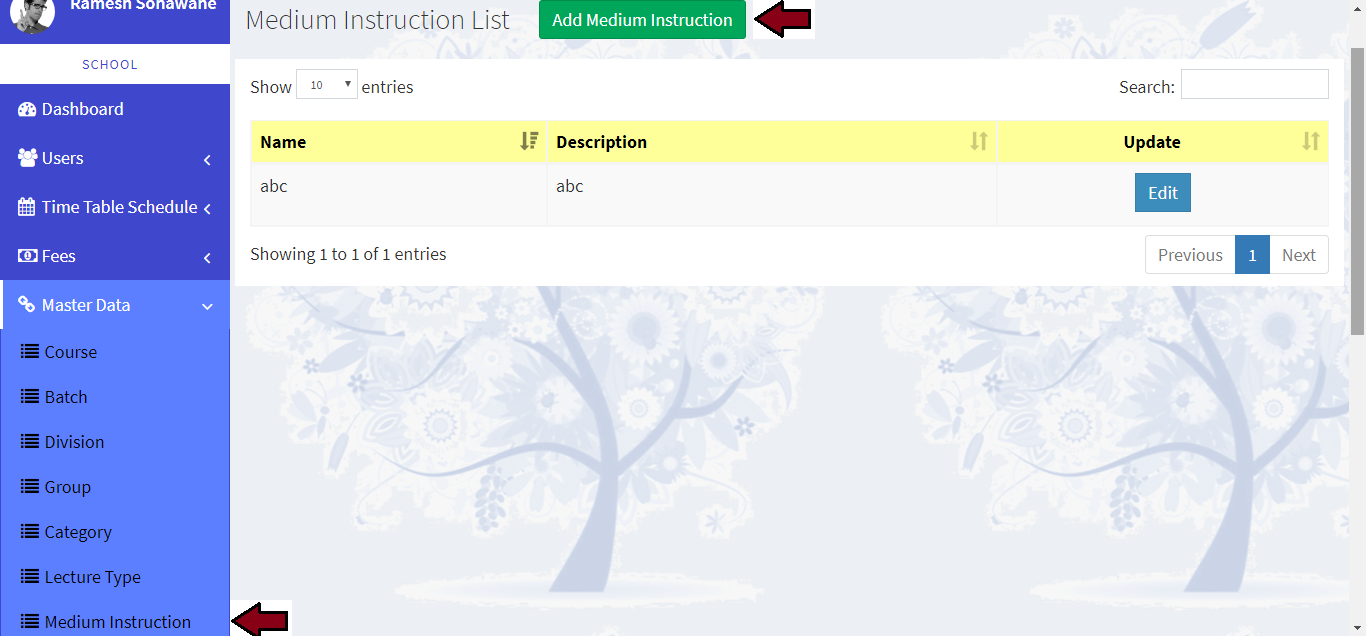
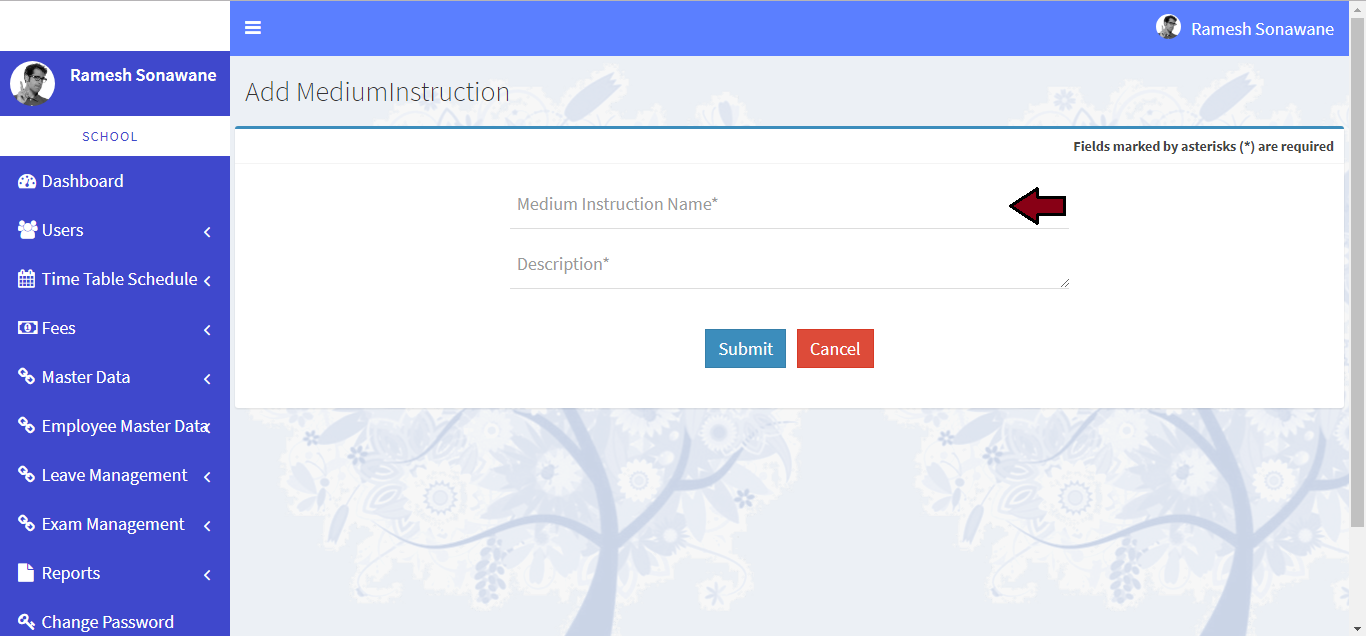
Learn how to add medium instruction
-
Click on Master Data >> Medium Instruction link from left navigation Panel. Then click on Add Medium Instruction button
-
Please enter name
-
Please enter description
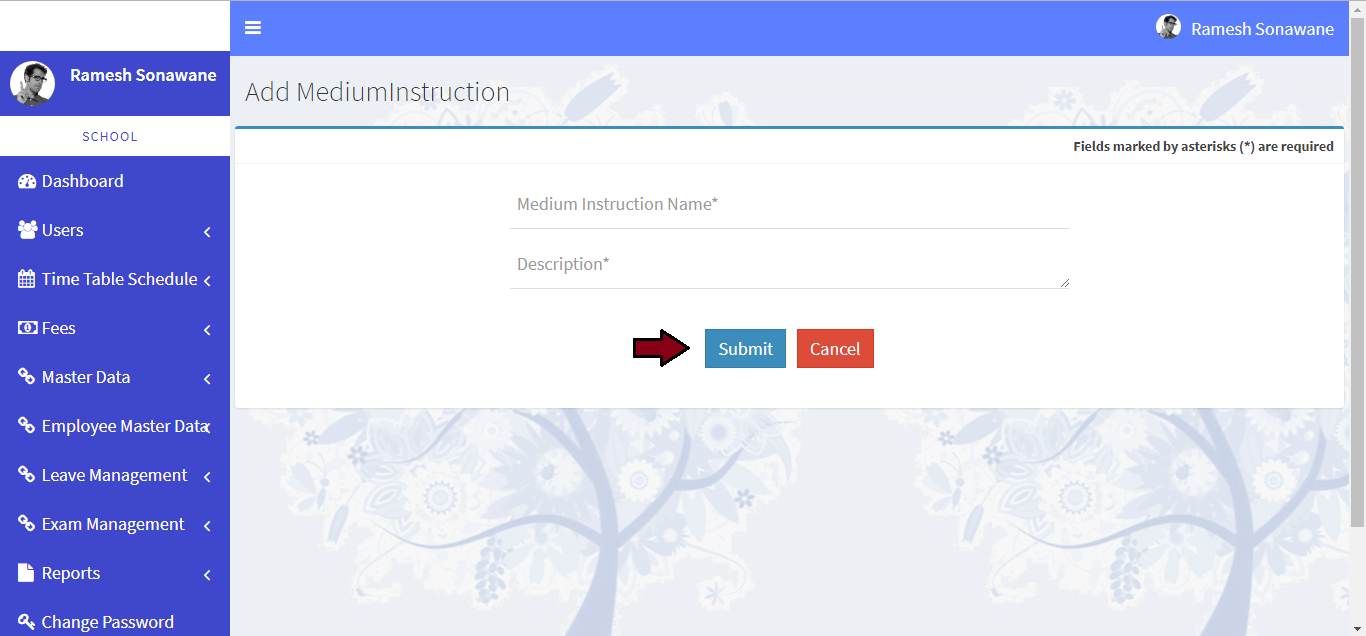
-
Click on Submit button

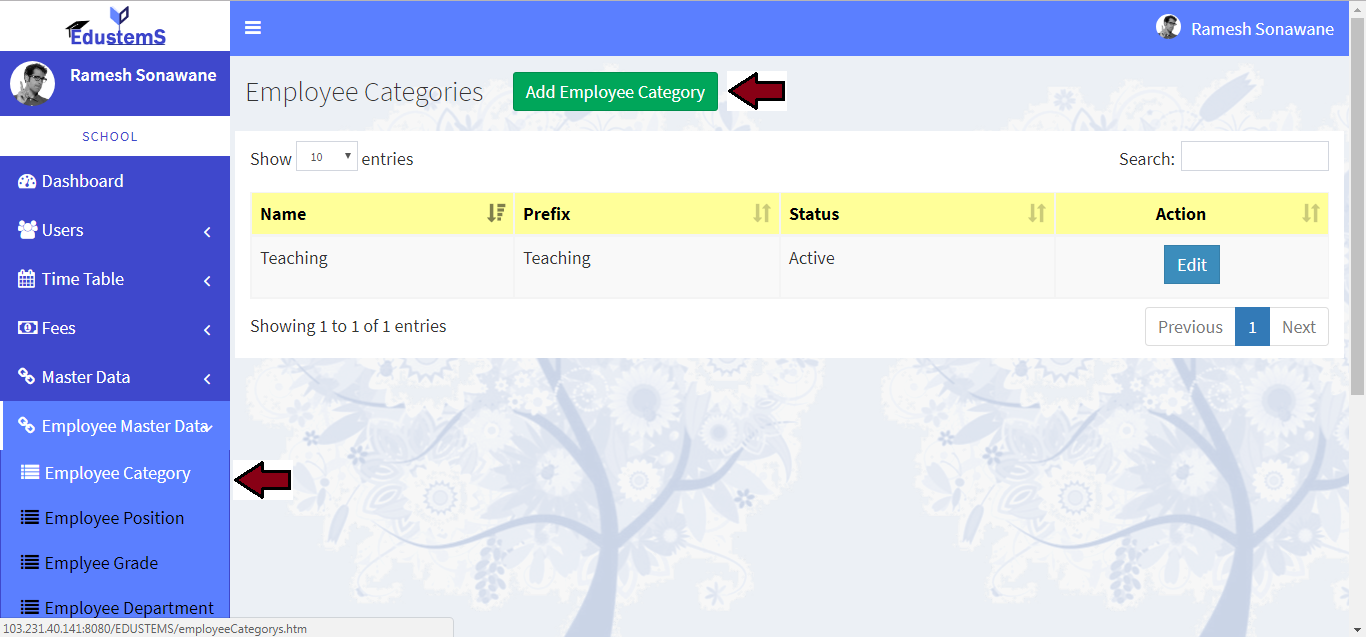
Learn how to add employee category
-
Click on Employee Master Data >> Employee Category link from left navigation Panel. Then click on Add Employee Category button
-
Please enter employee category name
-
Please enter prefix
-
Please choose active / inactive
-
Click on Submit button


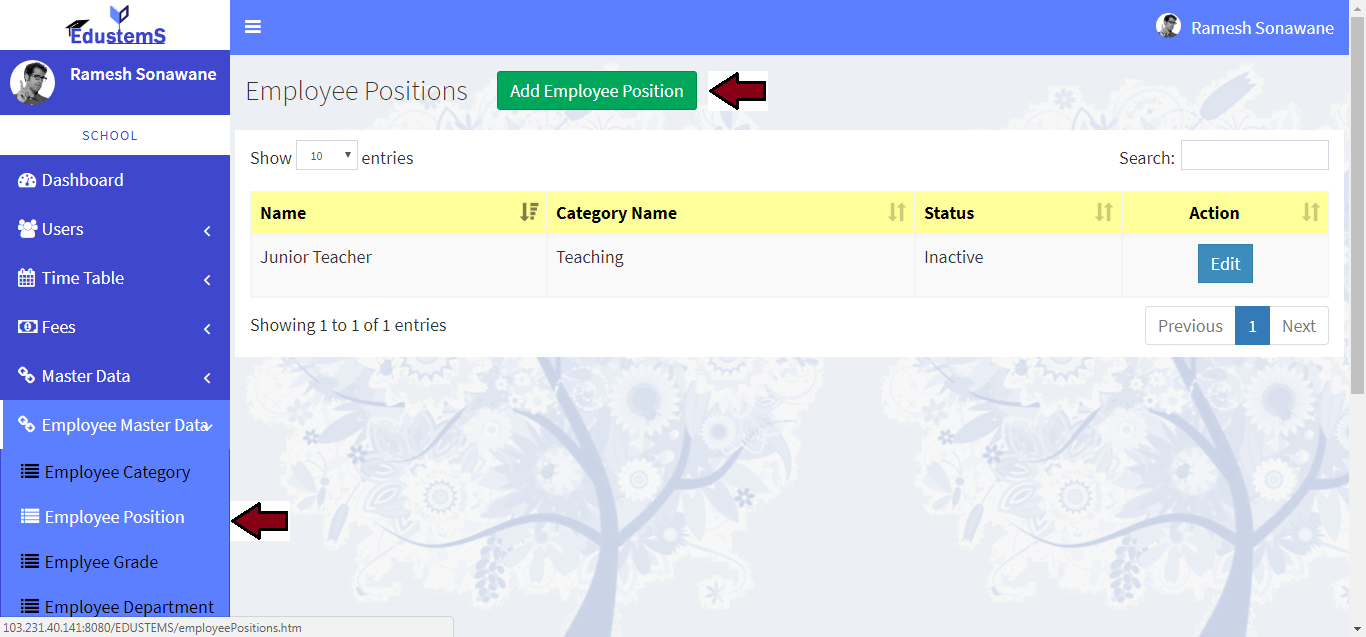
Learn how to add employee position
-
Click on Employee Master Data >> Employee Position link from left navigation Panel. Then click on Add Employee Position button
-
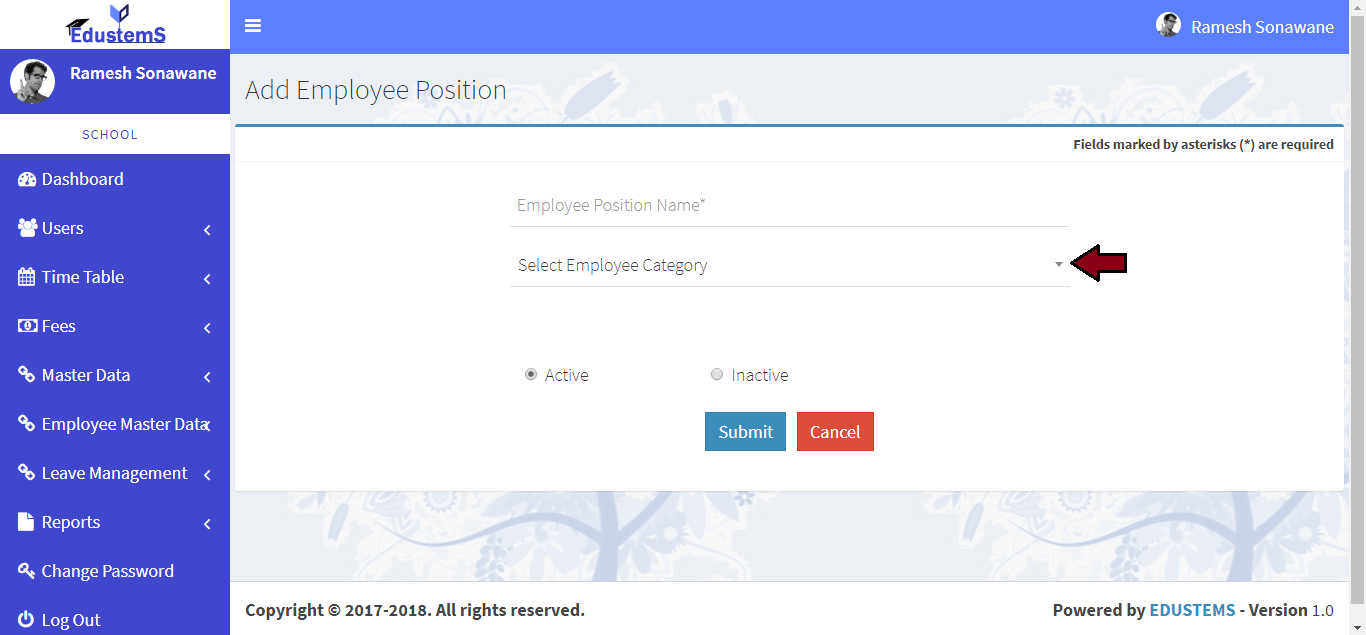
Please enter employee position name
-
Please enter employee category
-
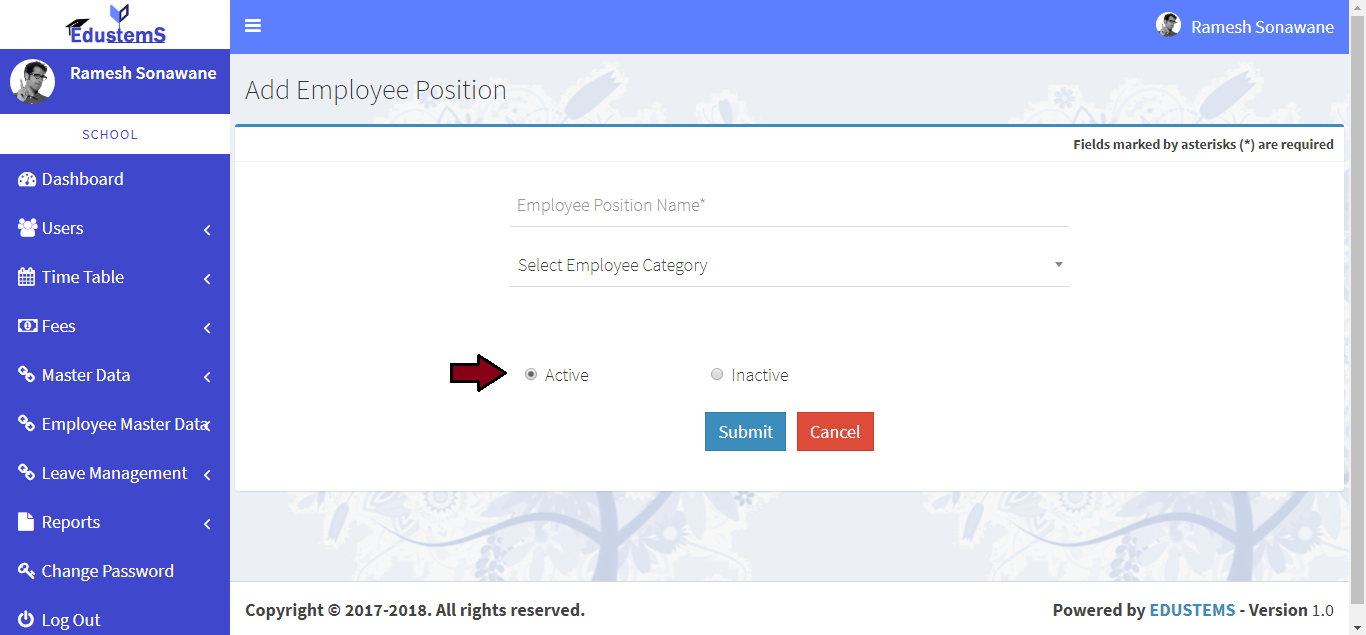
Please choose active / inactive
-
Click on Submit button


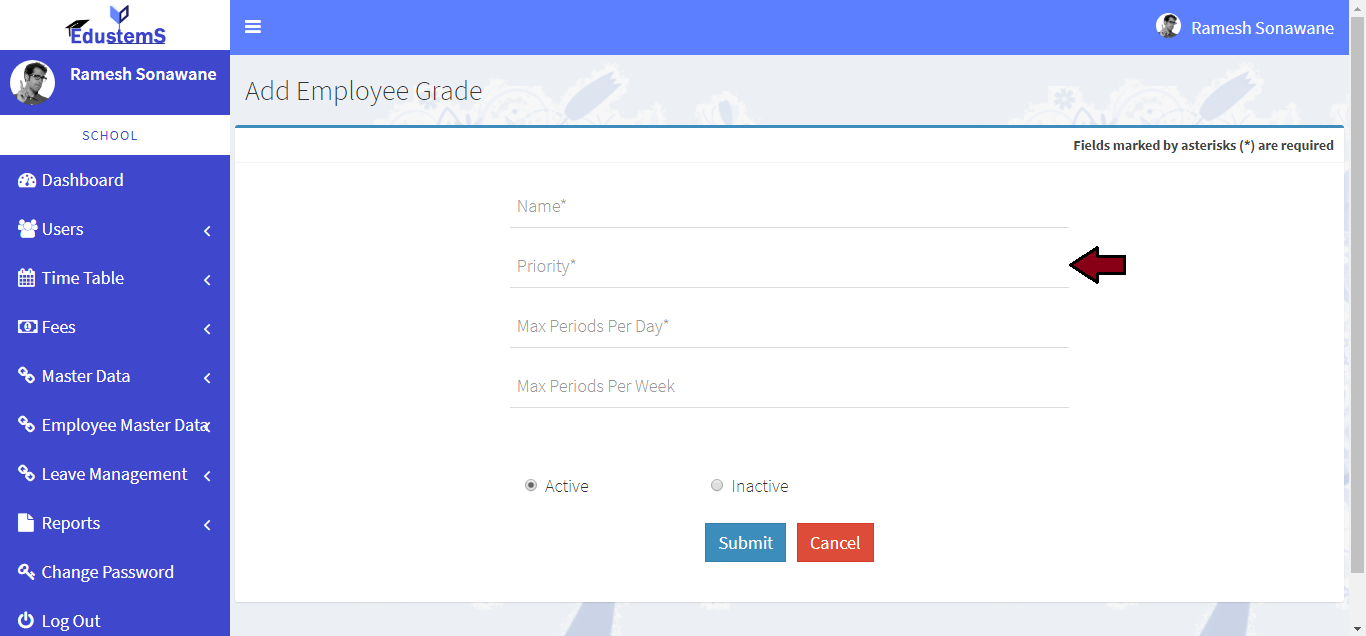
Learn how to add employee grade
-
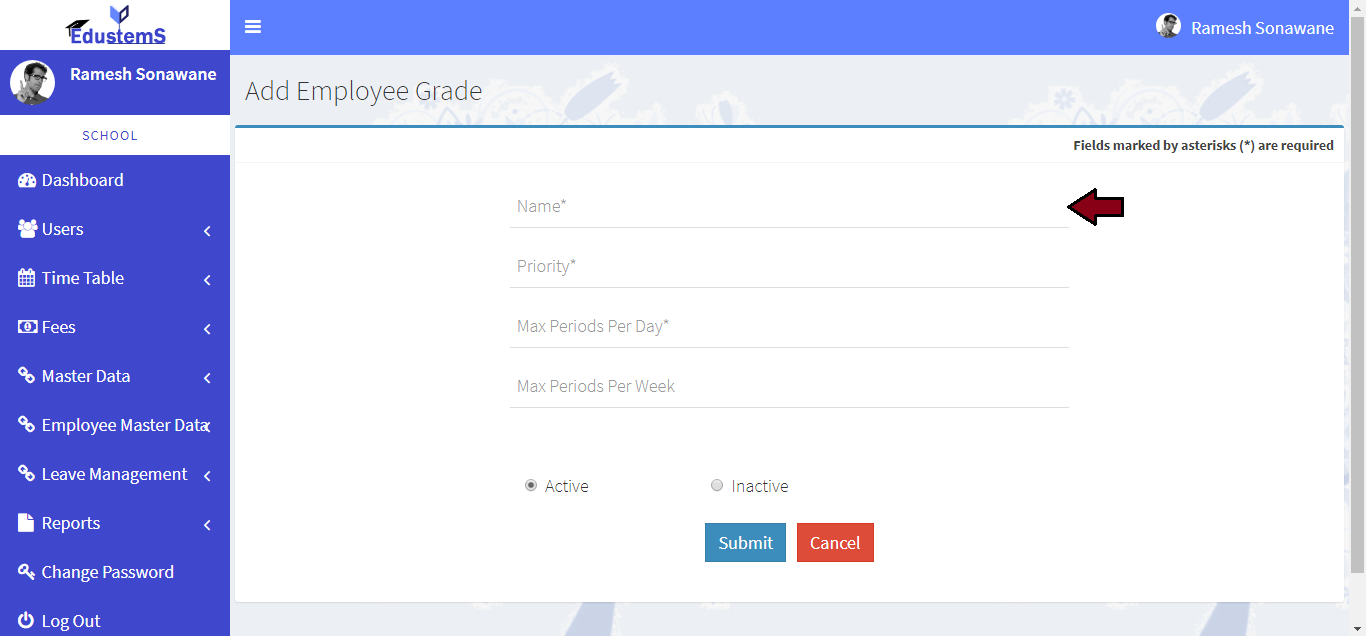
Click on Employee Master Data >> Employee Grade link from left navigation Panel. Then click on Add Employee Grade button
-
Please enter grade name
-
Please enter priority
-
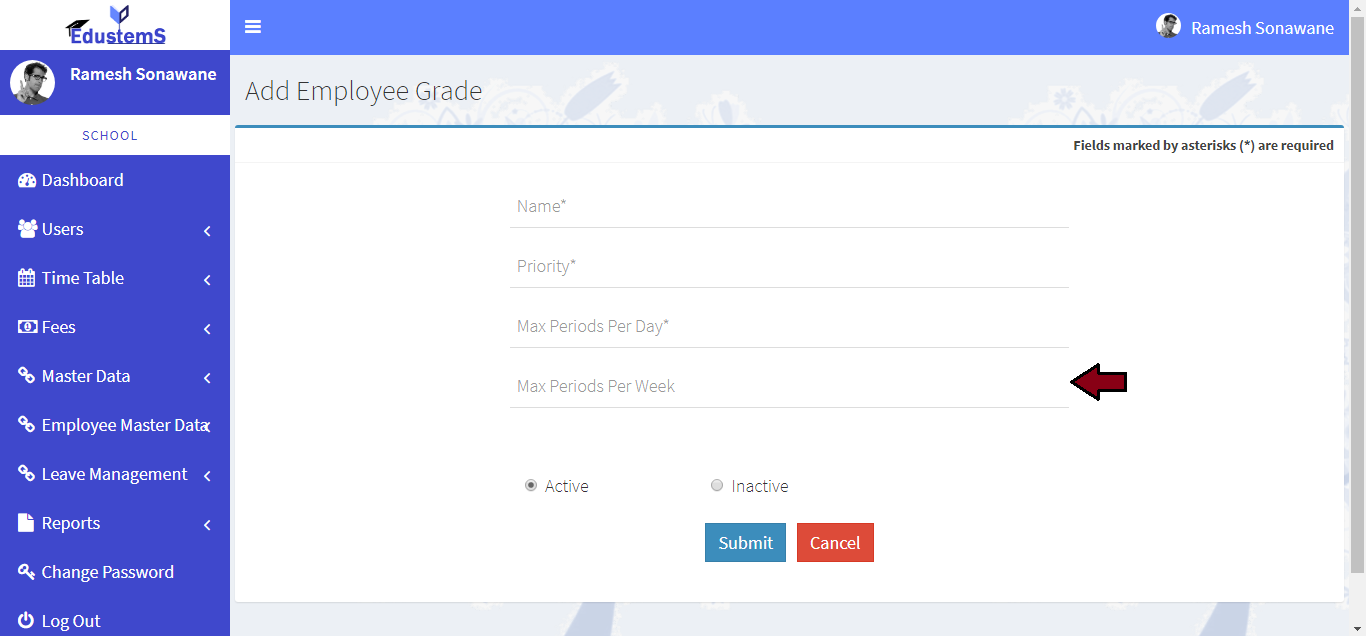
Please enter max periods per day
-
Please max periods per week
-
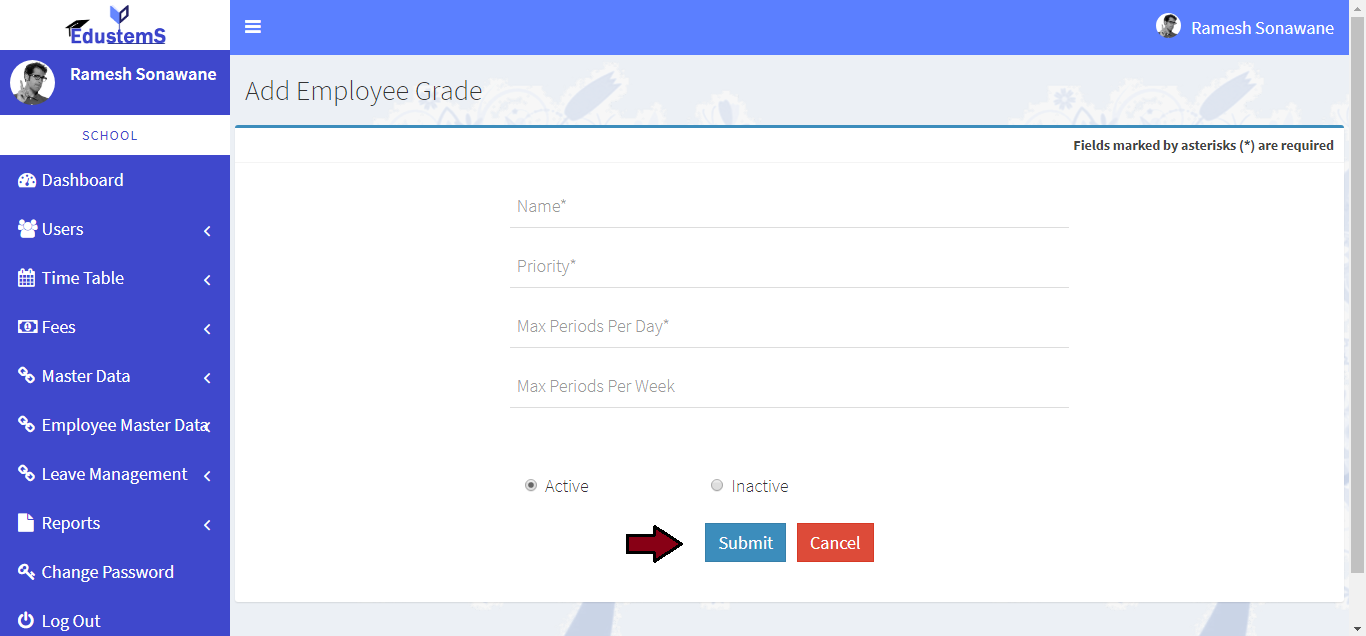
Please choose active / inactive
-
Click on Submit button


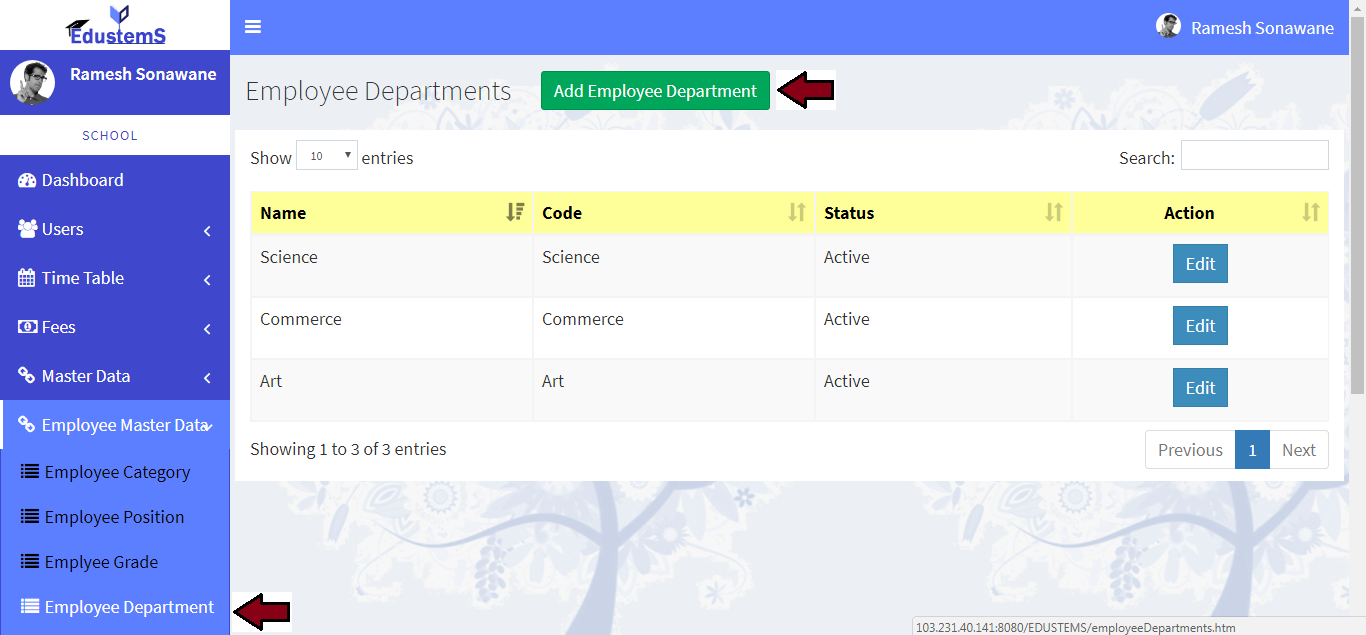
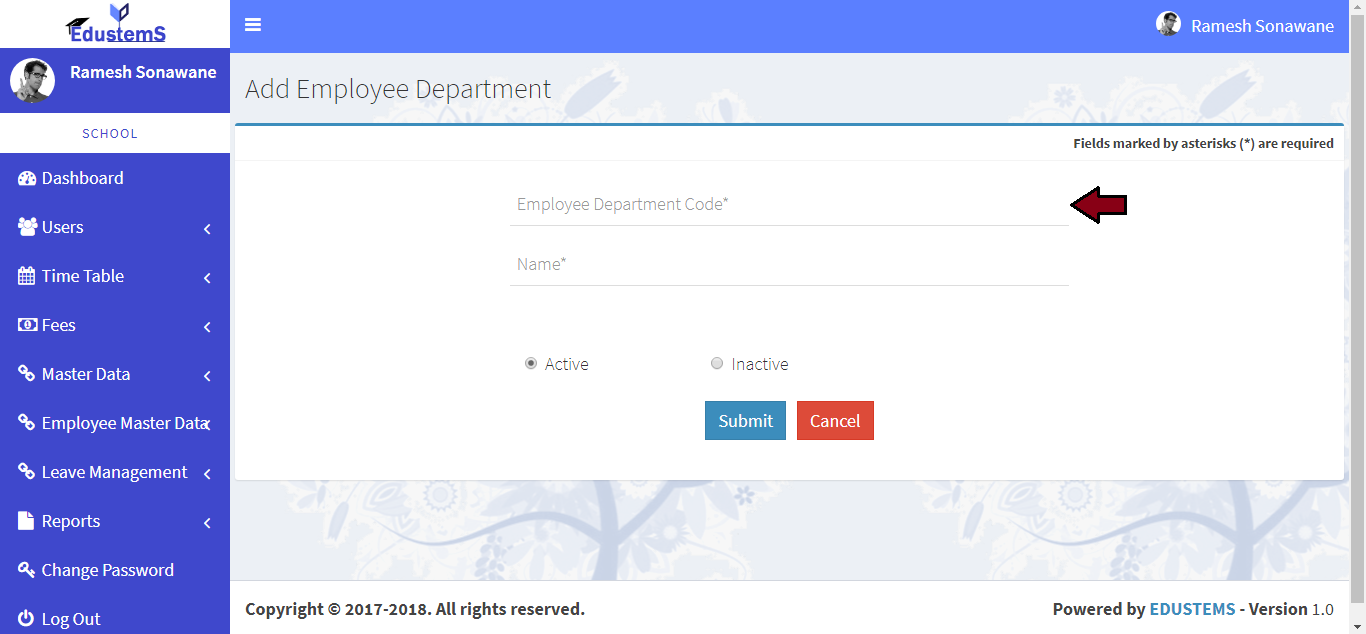
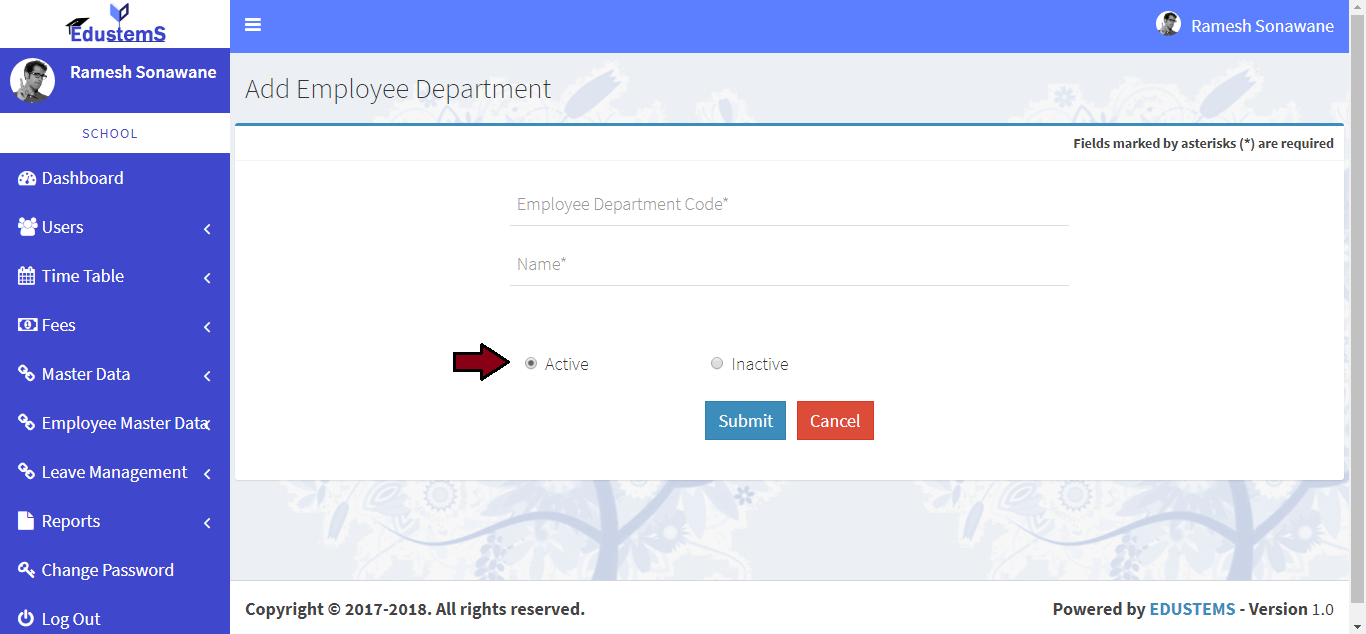
Learn how to add employee department
-
Click on Employee Master Data >> Employee Department link from left navigation Panel. Then click on Add Employee Department button
-
Please enter department code
-
Please enter department name
-
Please choose active / inactive
-
Click on Submit button


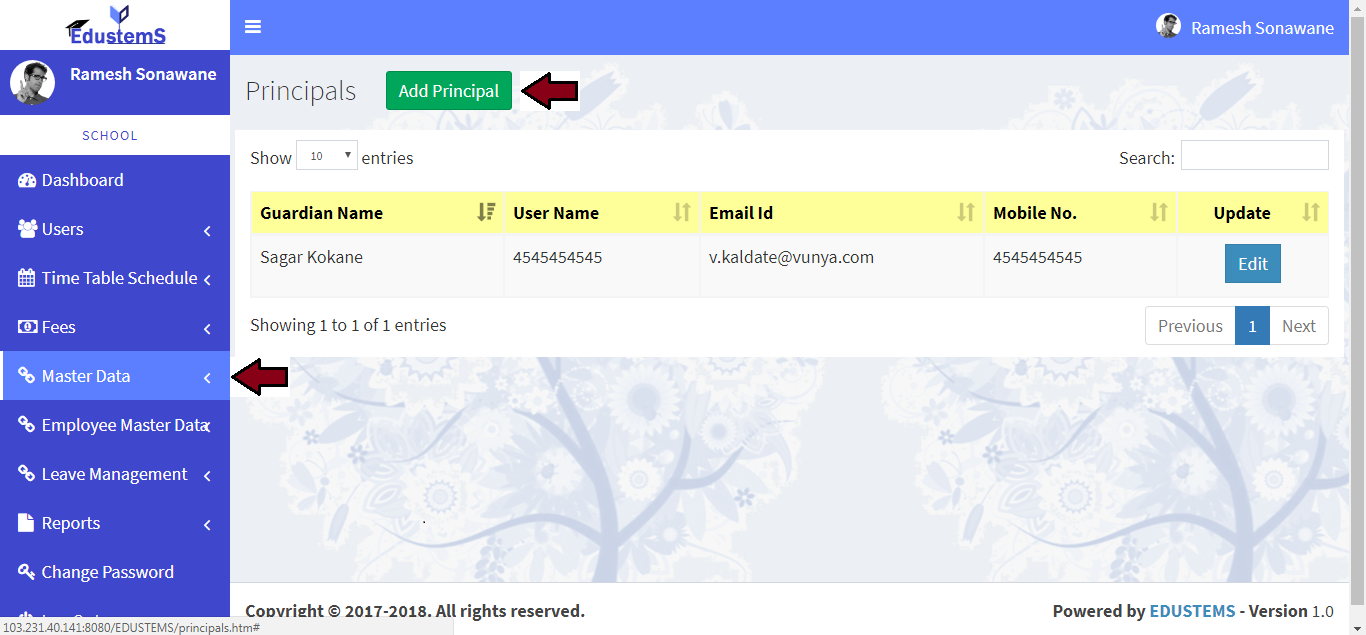
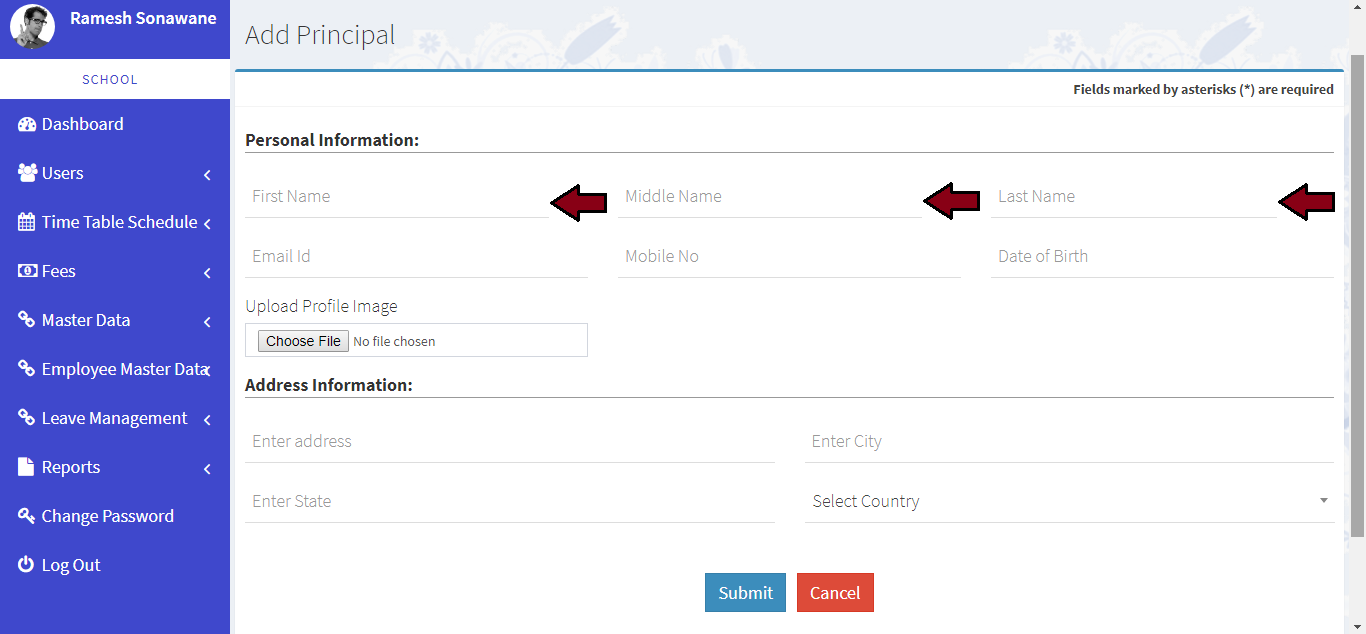
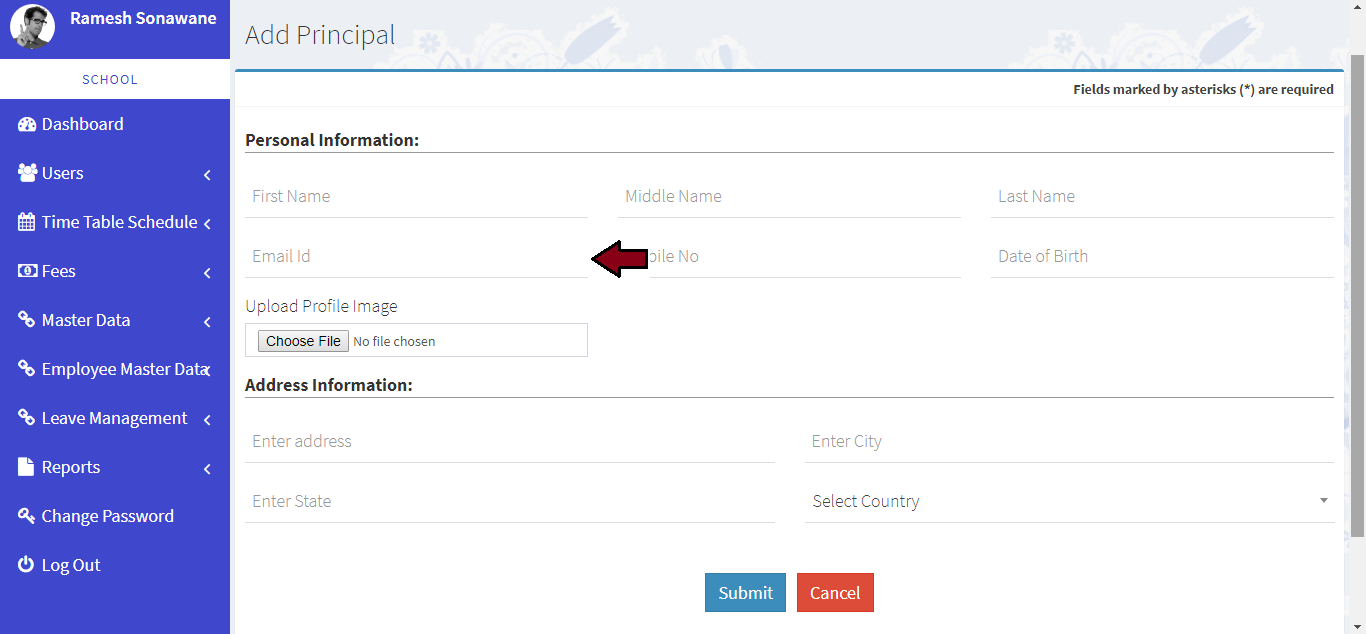
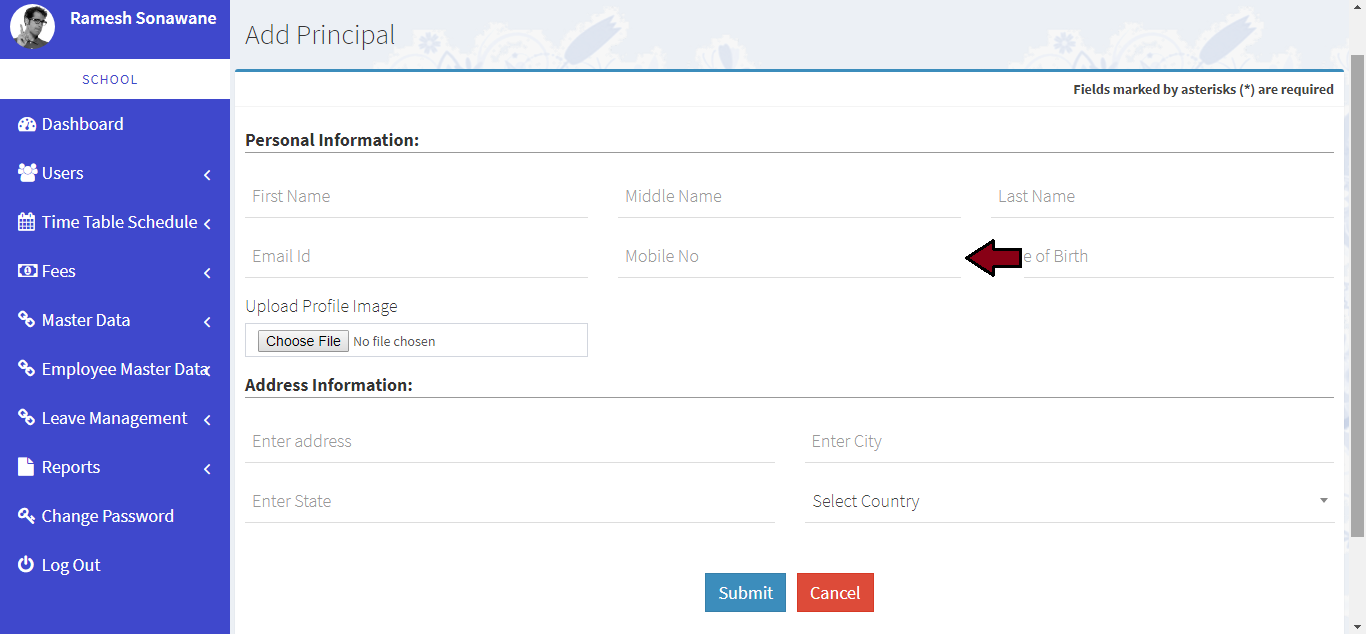
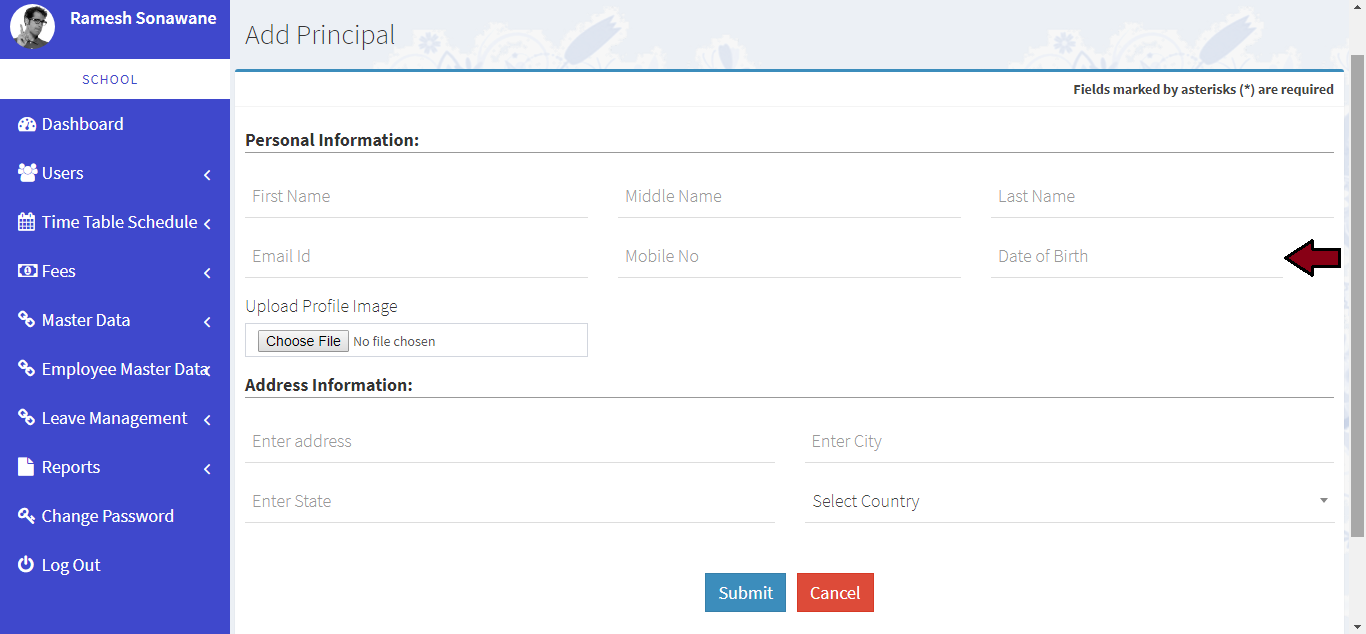
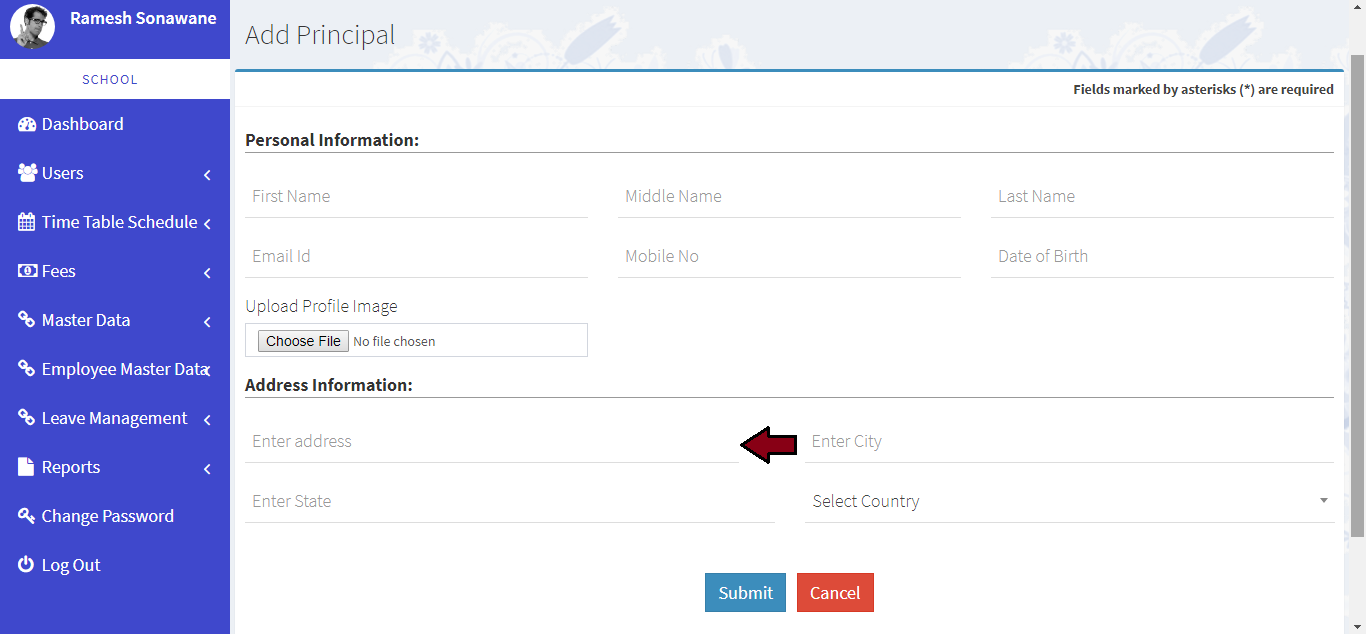
Learn how to add principal
-
Click on Users >> Principal link from left navigation Panel. Then click on Add Principal button
-
Please enter first name, middle name and last name
-
Please enter email Id
-
Please enter mobile number
-
Please enter date of birth
-
Please upload you profile image
-
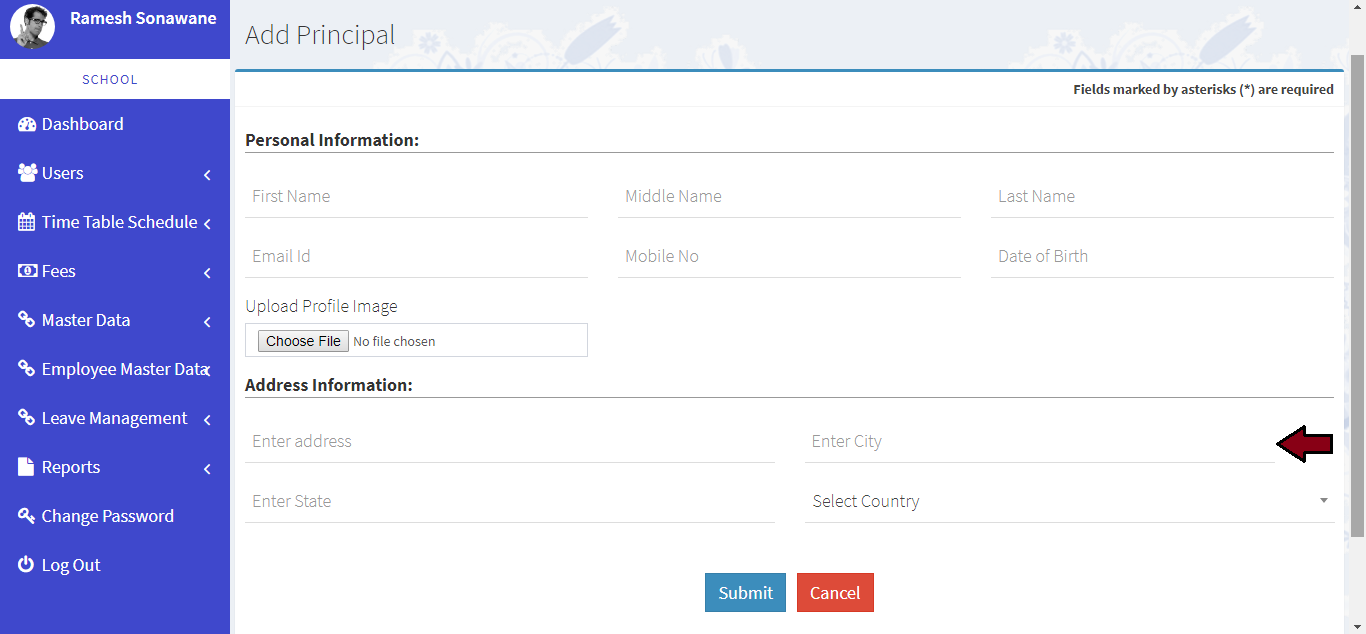
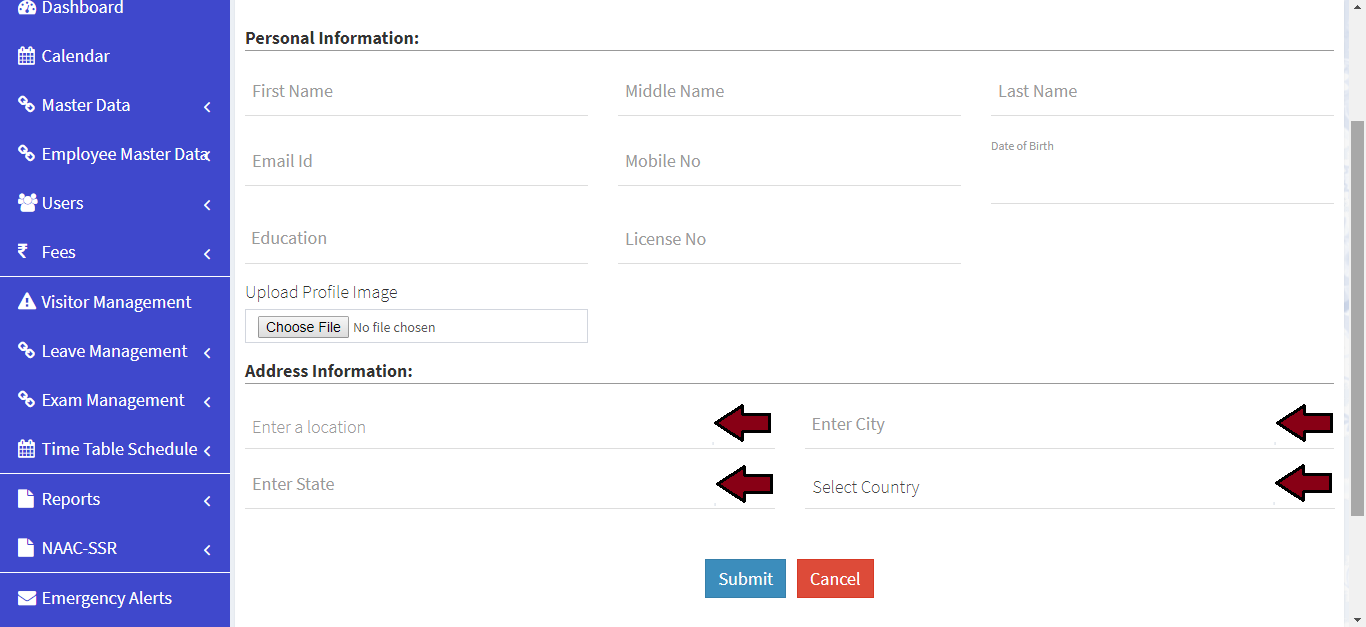
Please enter your full address
-
Please enter your city
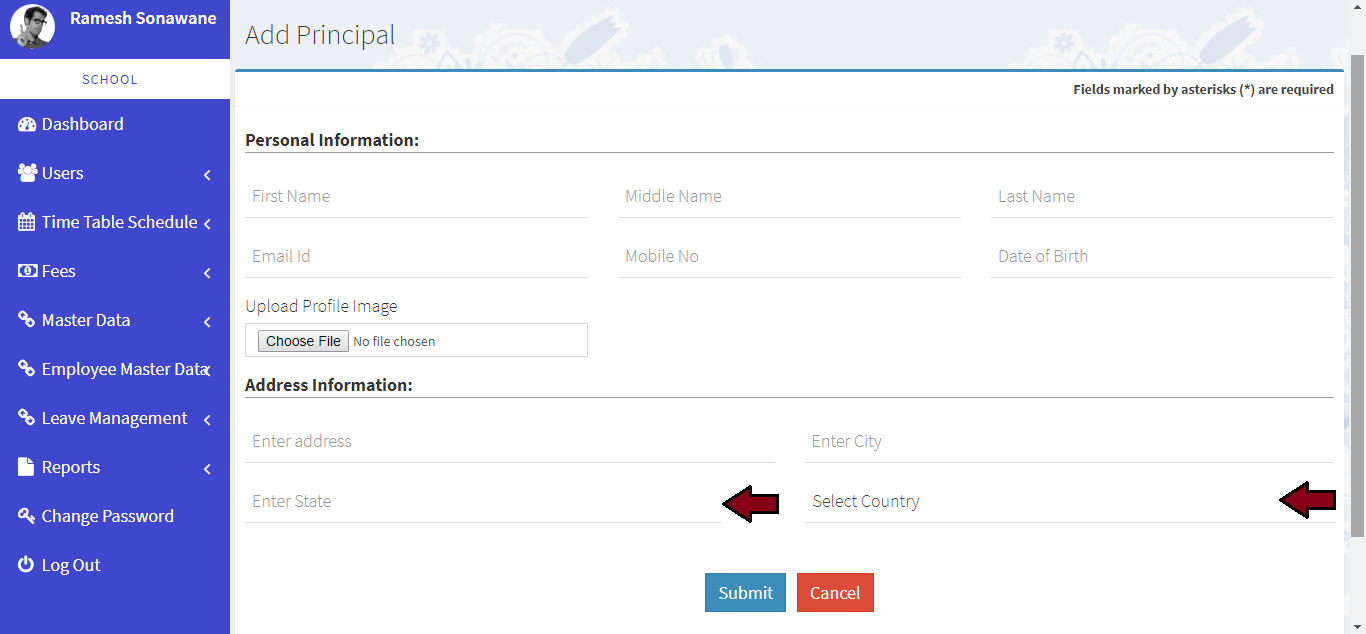
-
Please enter your state name and select coutry
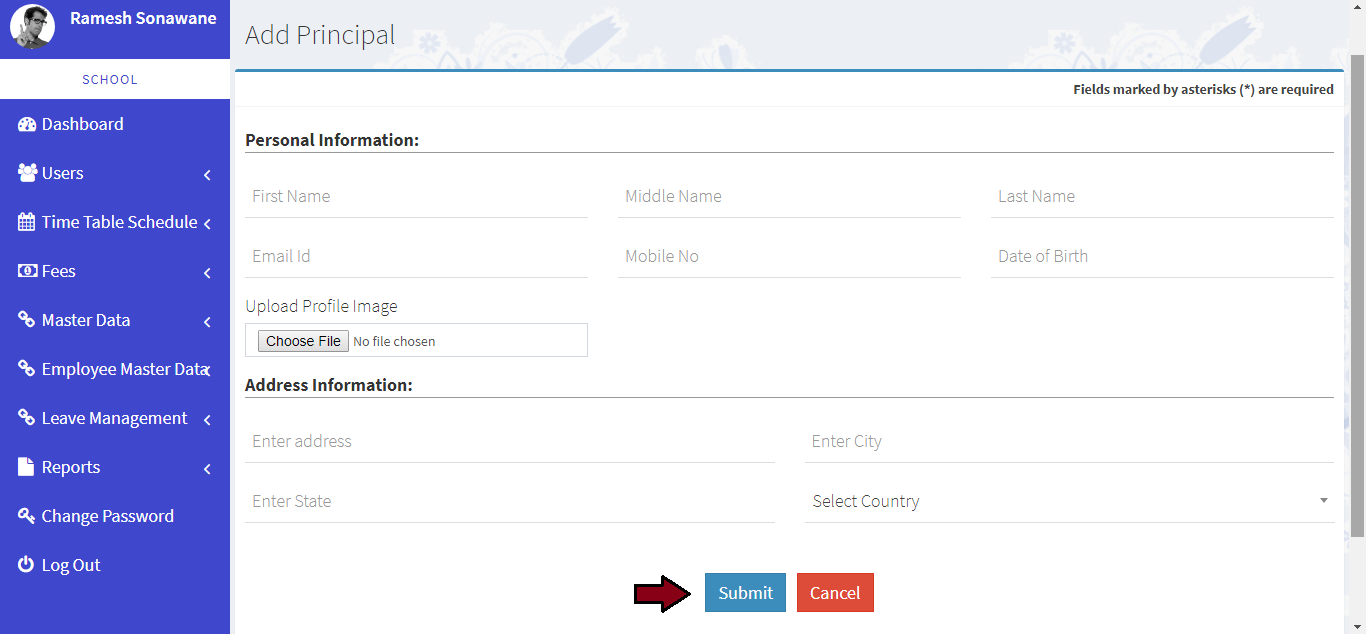
-
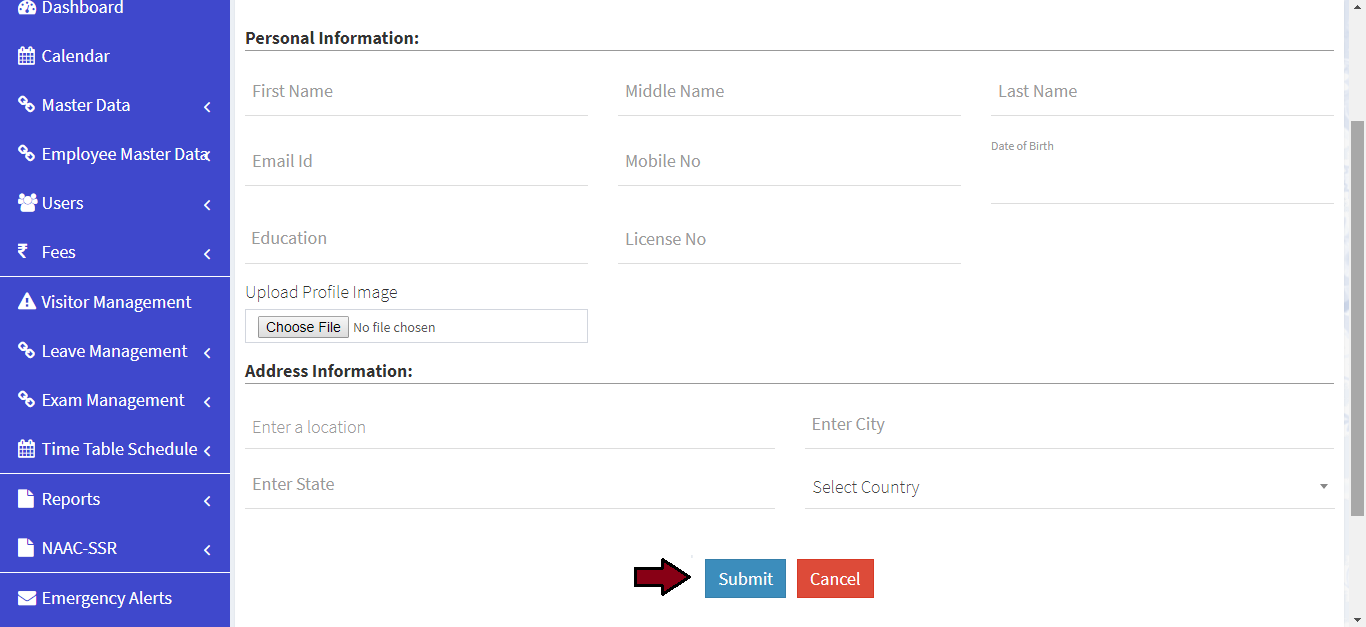
Click on Submit button

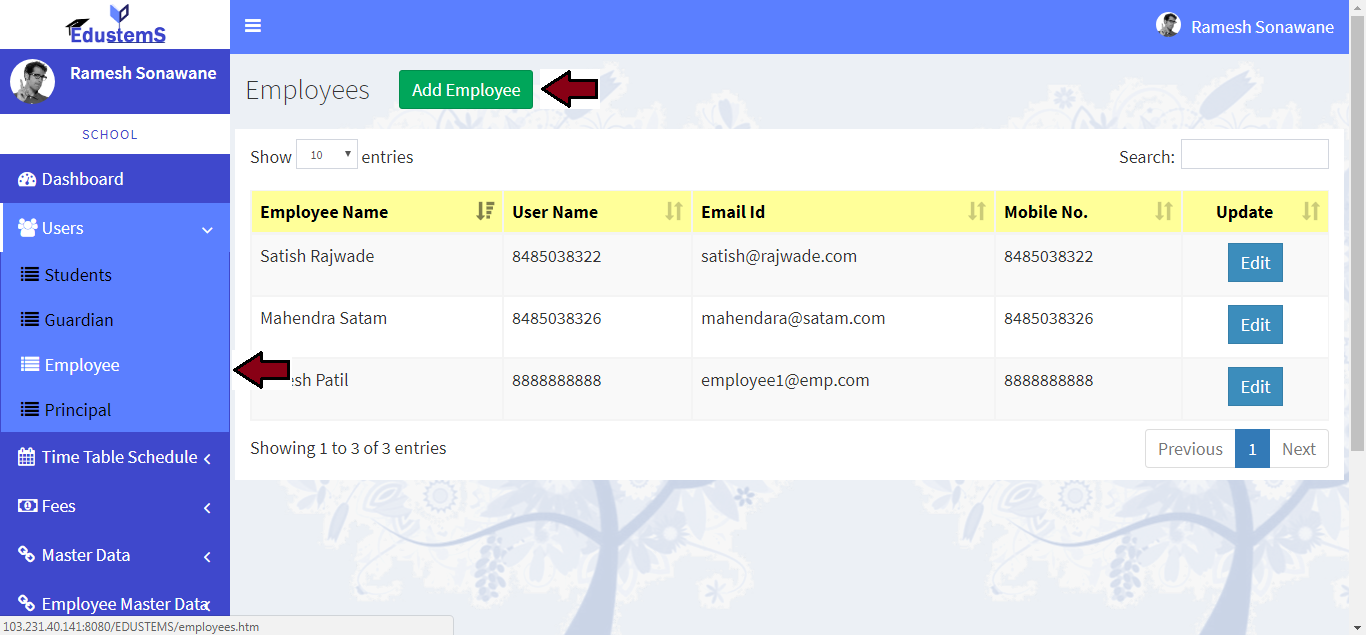
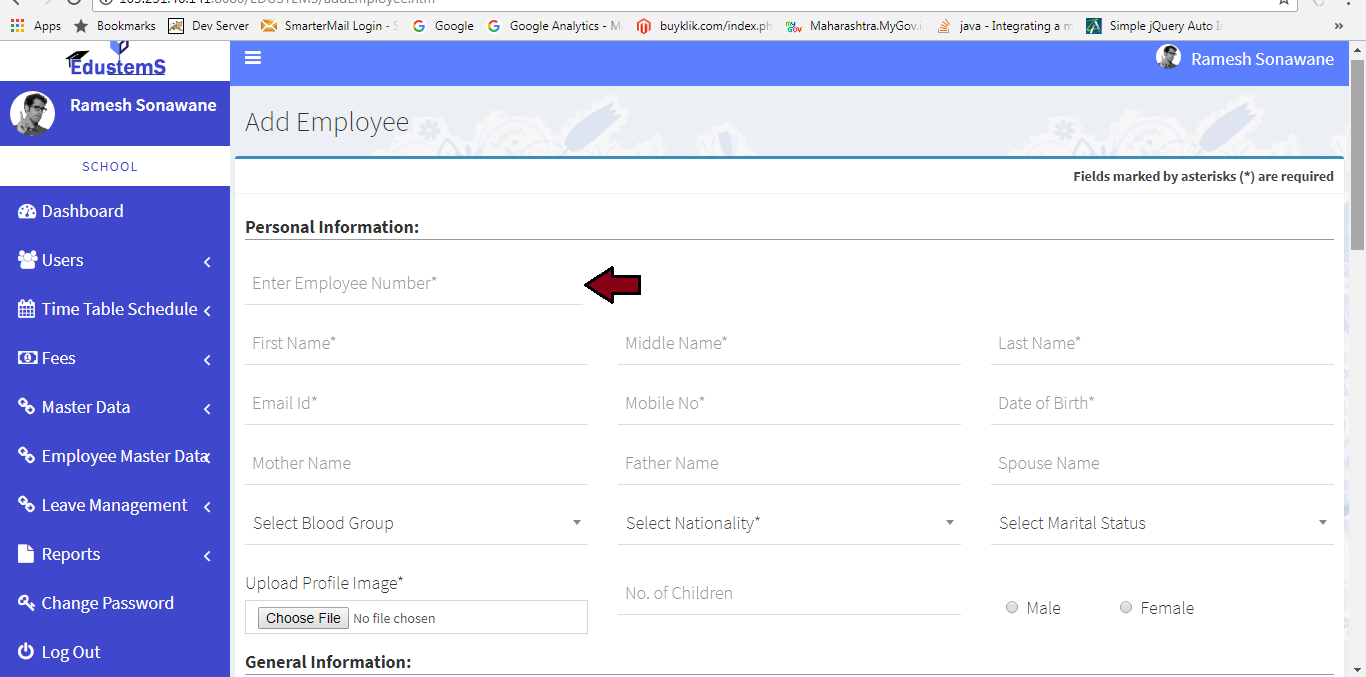
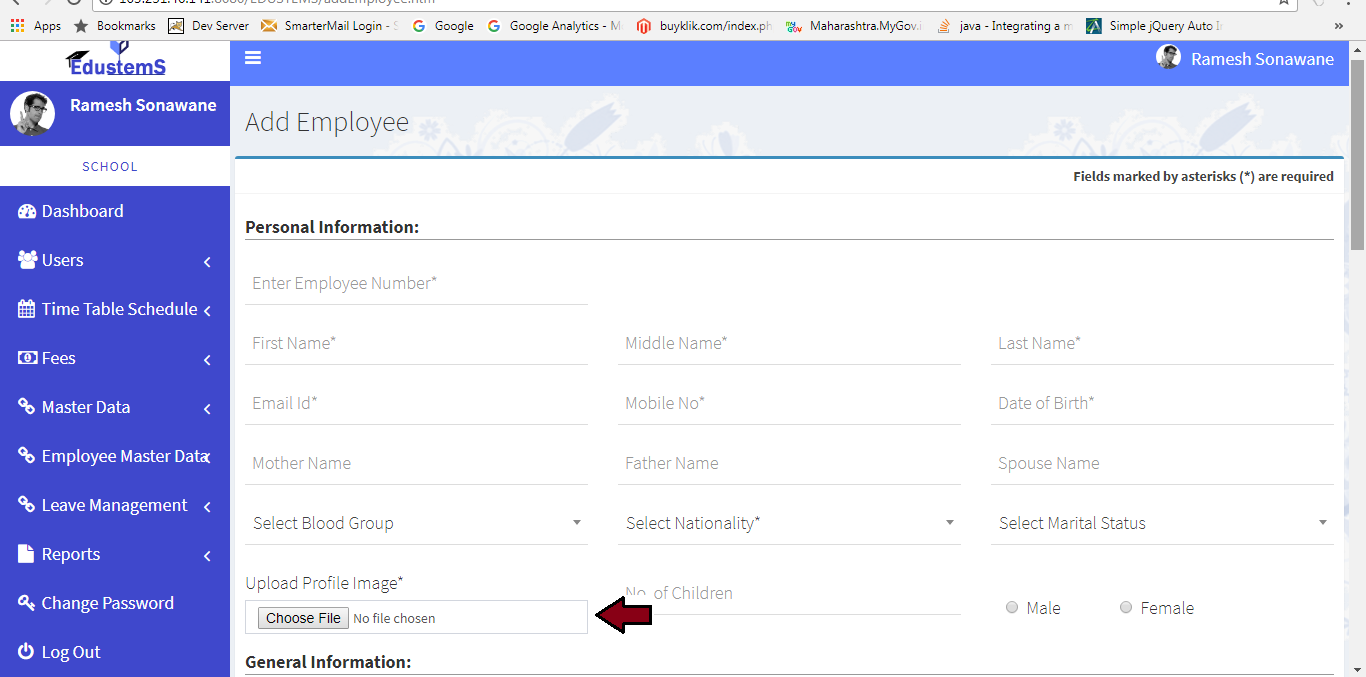
Learn how to add employee / teacher
-
Click on Users >> Employee link from left navigation Panel. Then click on Add Employee button
-
Please enter employee number
-
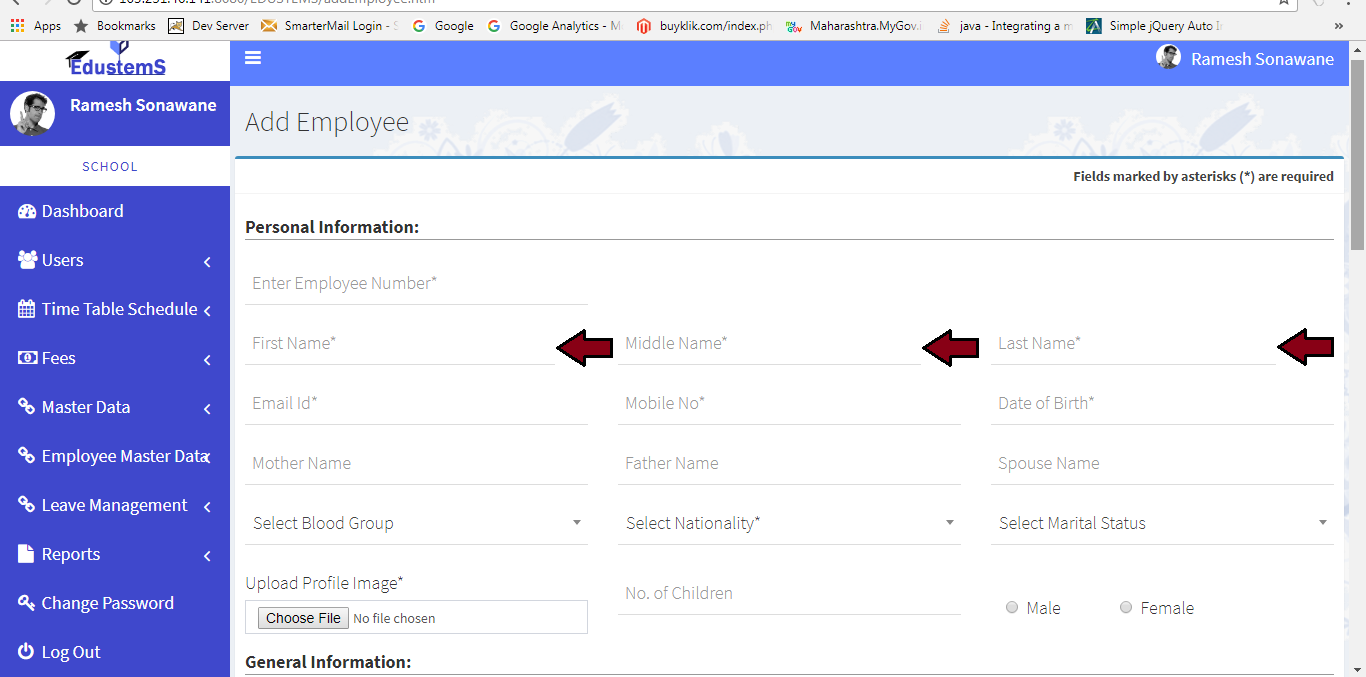
Please enter first name, middle name, last name
-
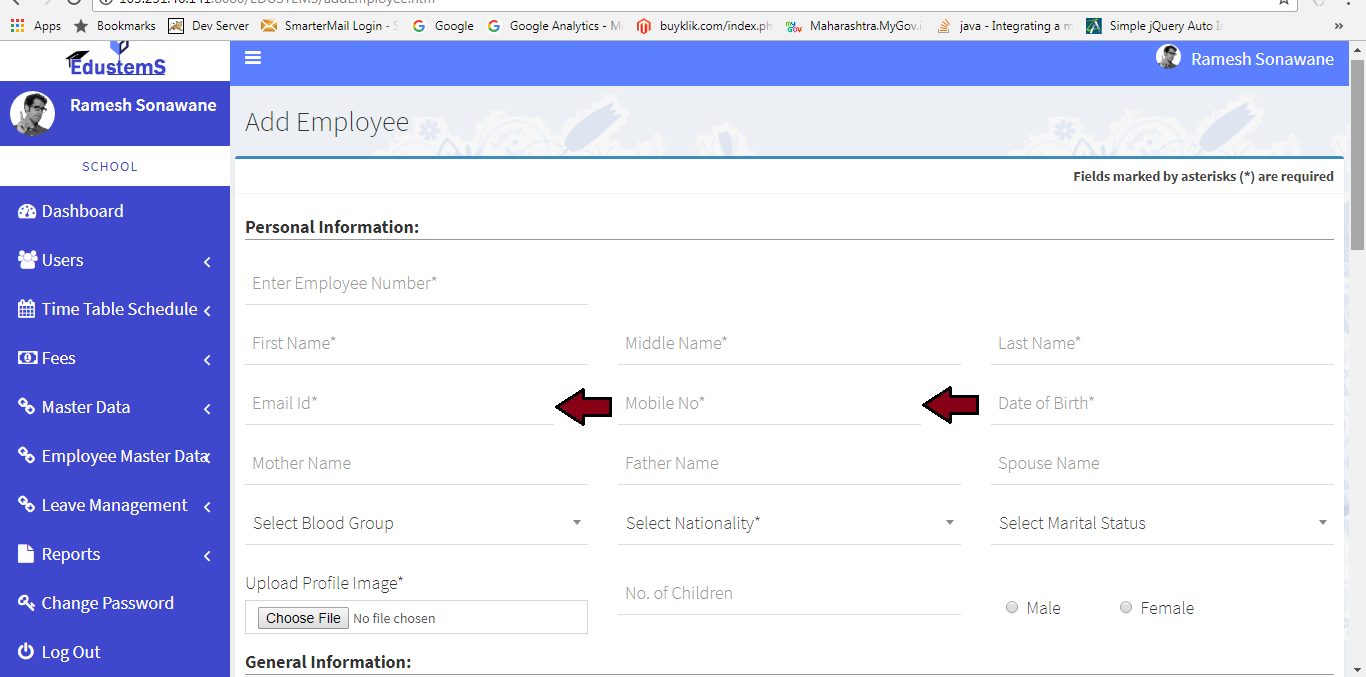
Please enter email Id and mobile number
-
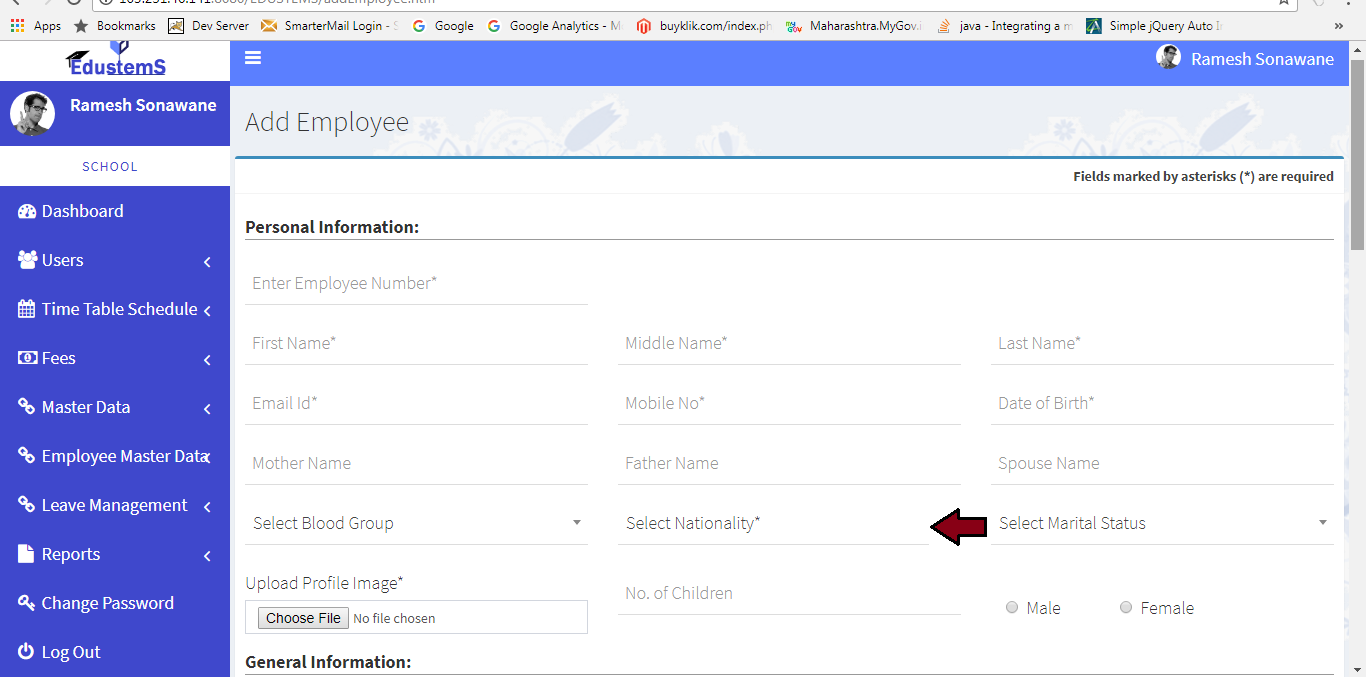
Please select nationality
-
Please upload profile image
-
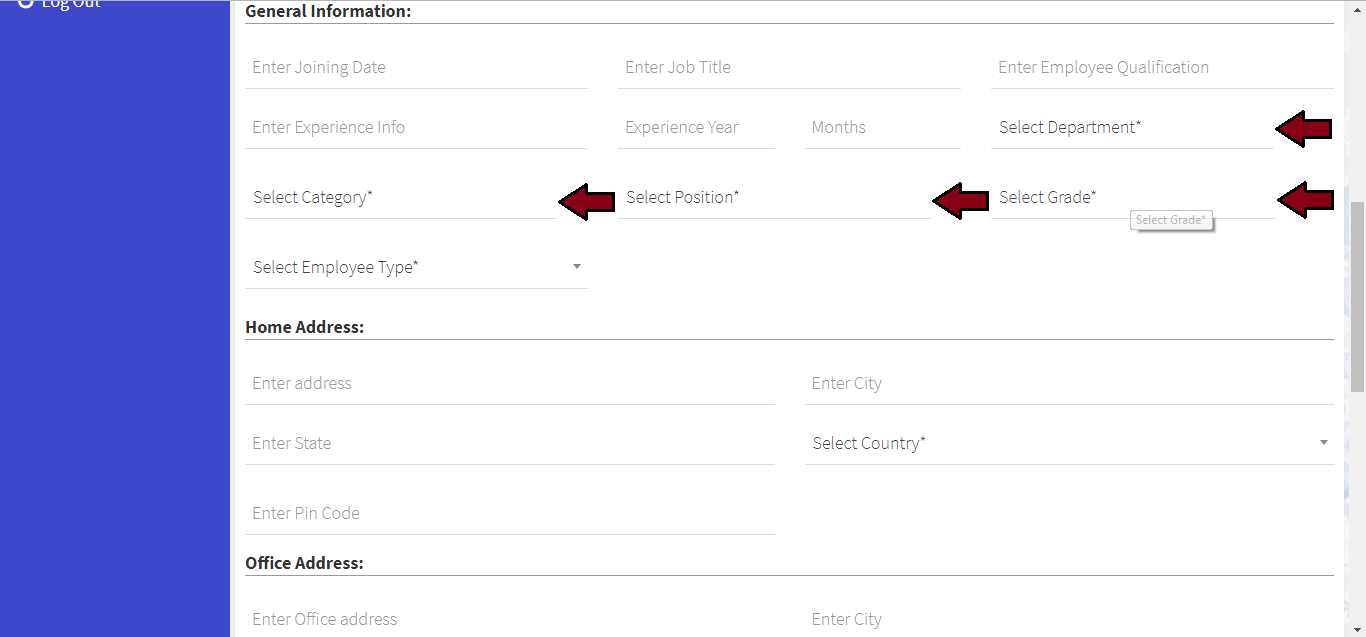
Please select proper employee department, category, position and grade.
-
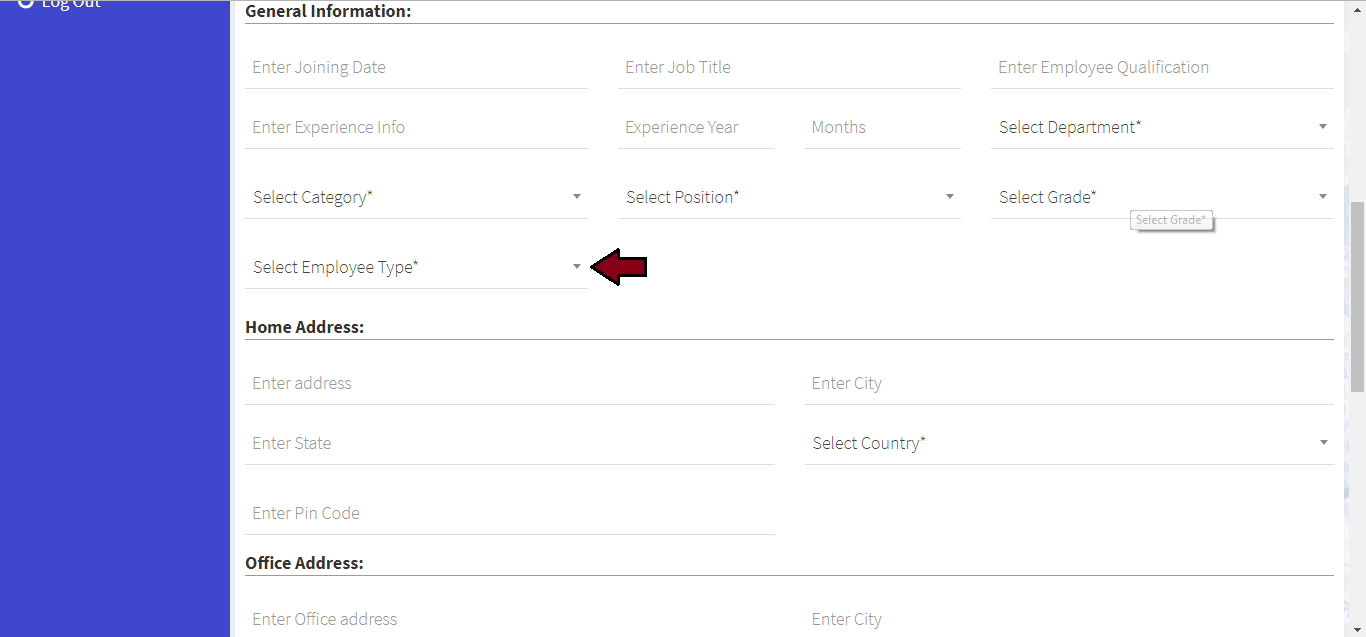
Please select employee type
-
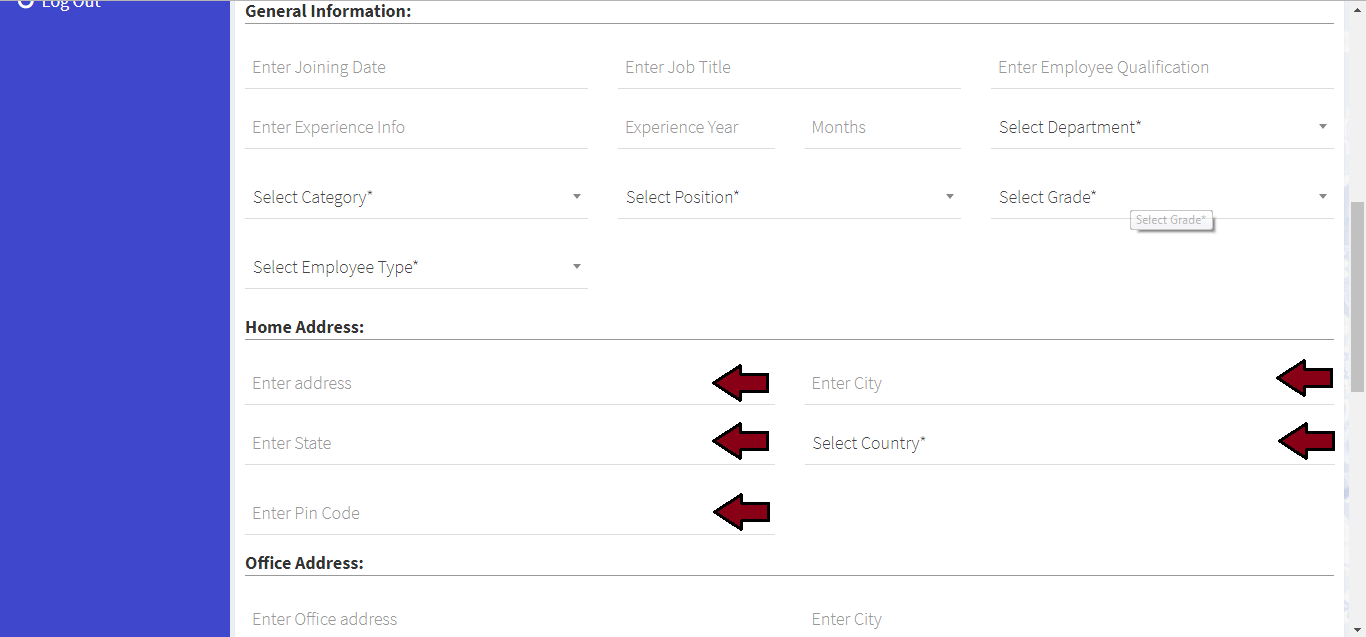
Please enter home address(optional) and select country
-
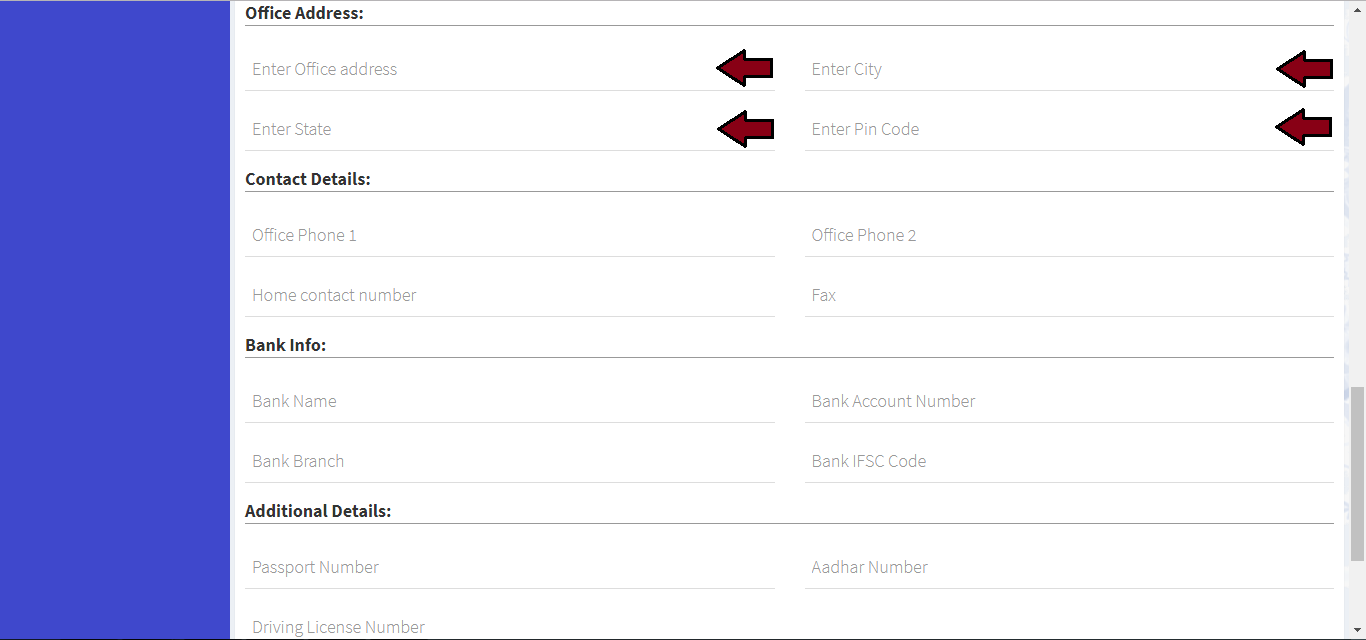
Please enter office address(optional)
-
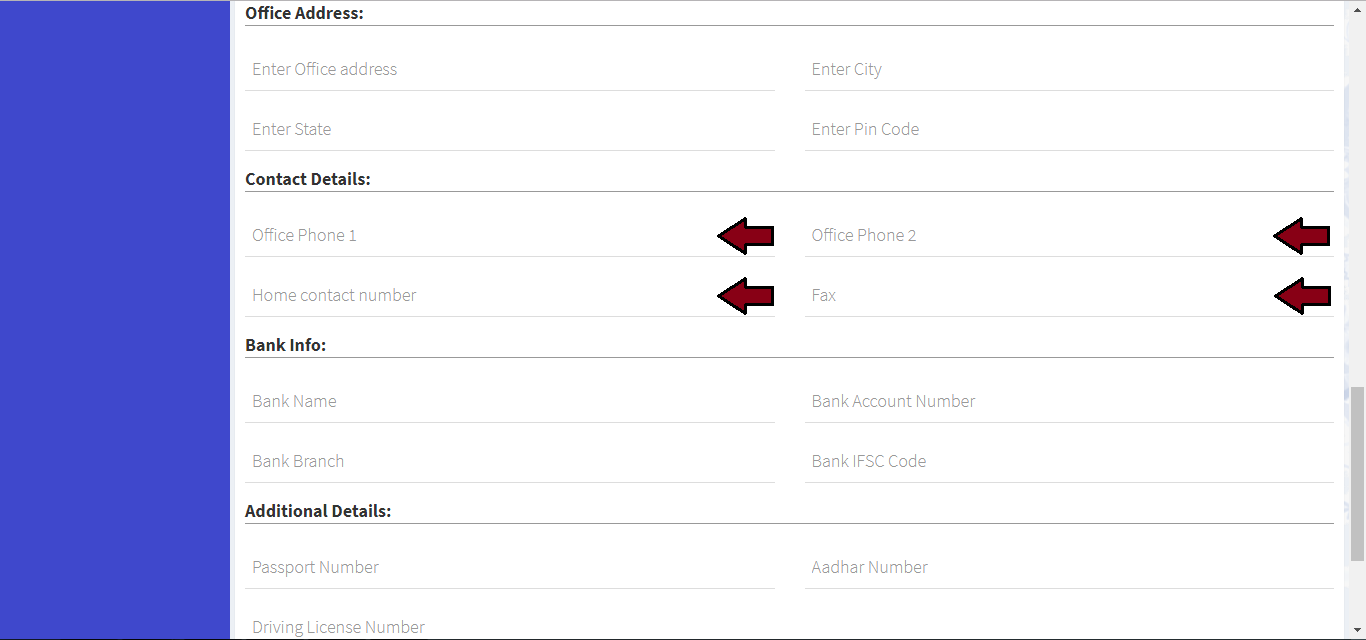
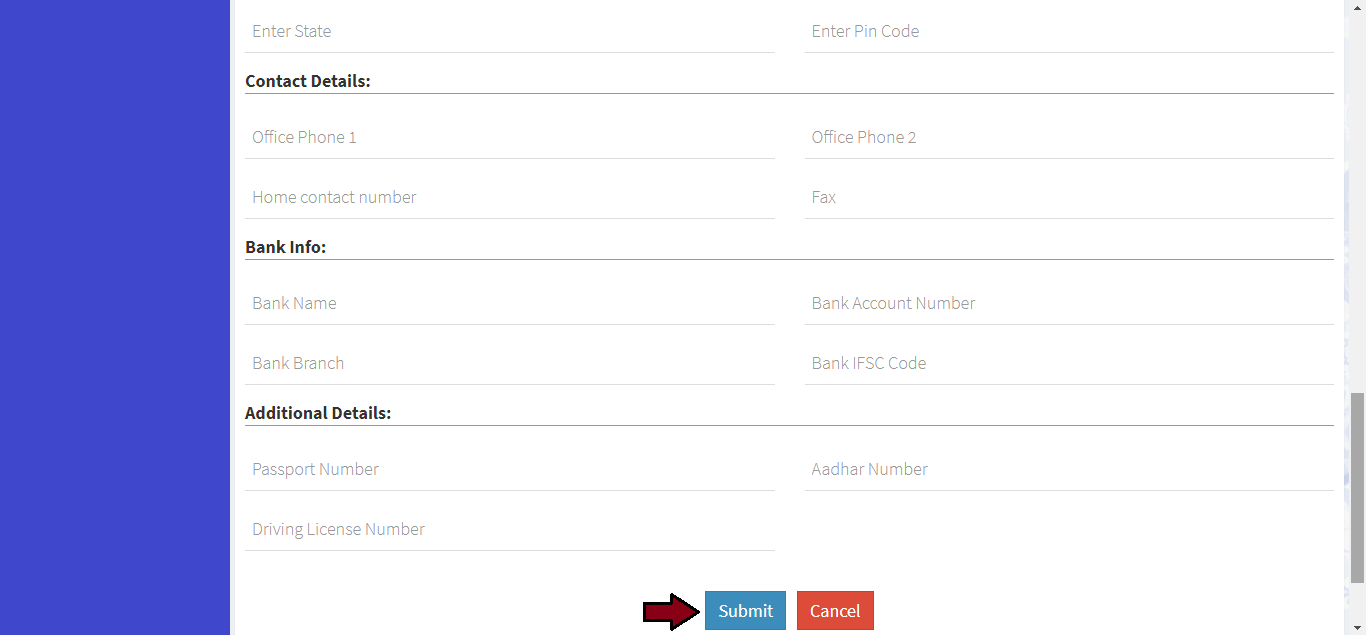
Please enter contact details(optional)
-
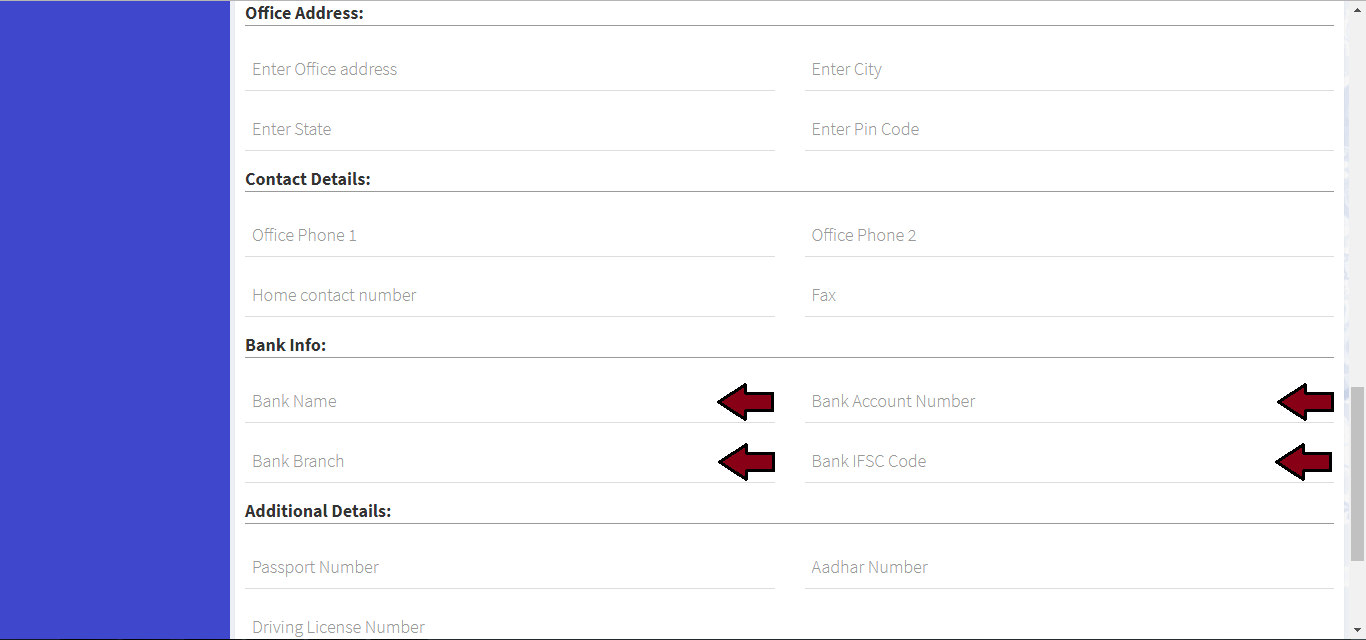
Please enter bank information (optional)
-
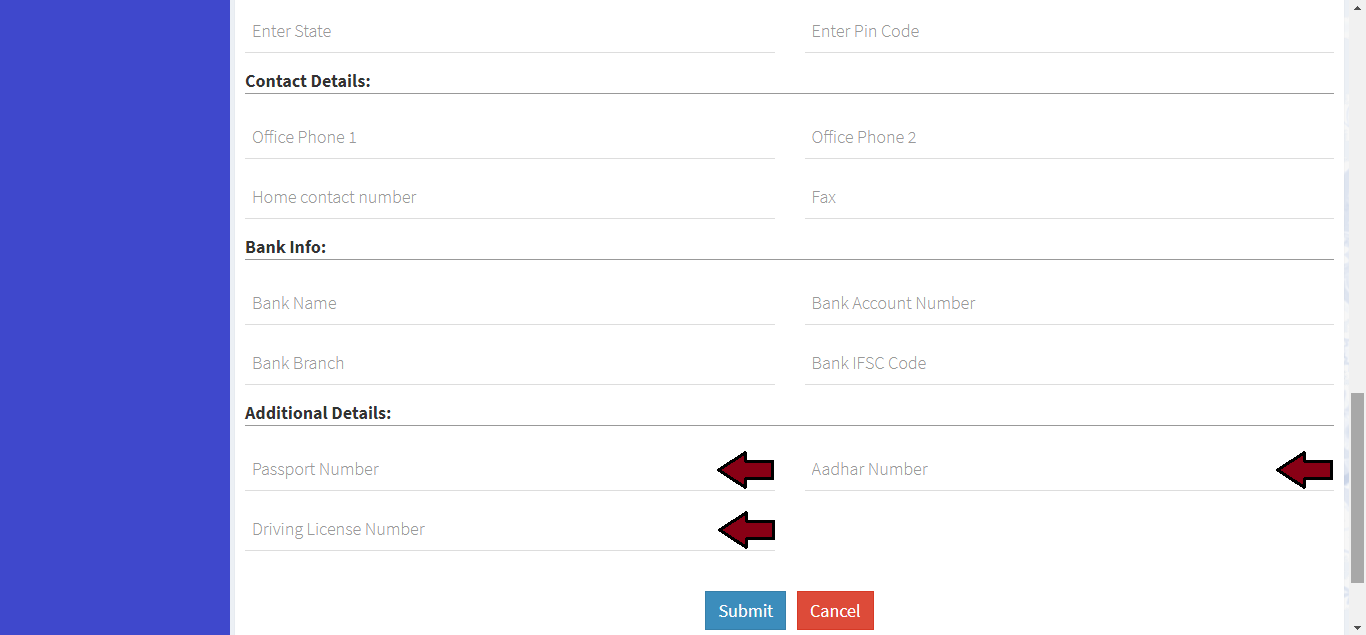
Please enter additional details (optional)
-
Click on Submit button
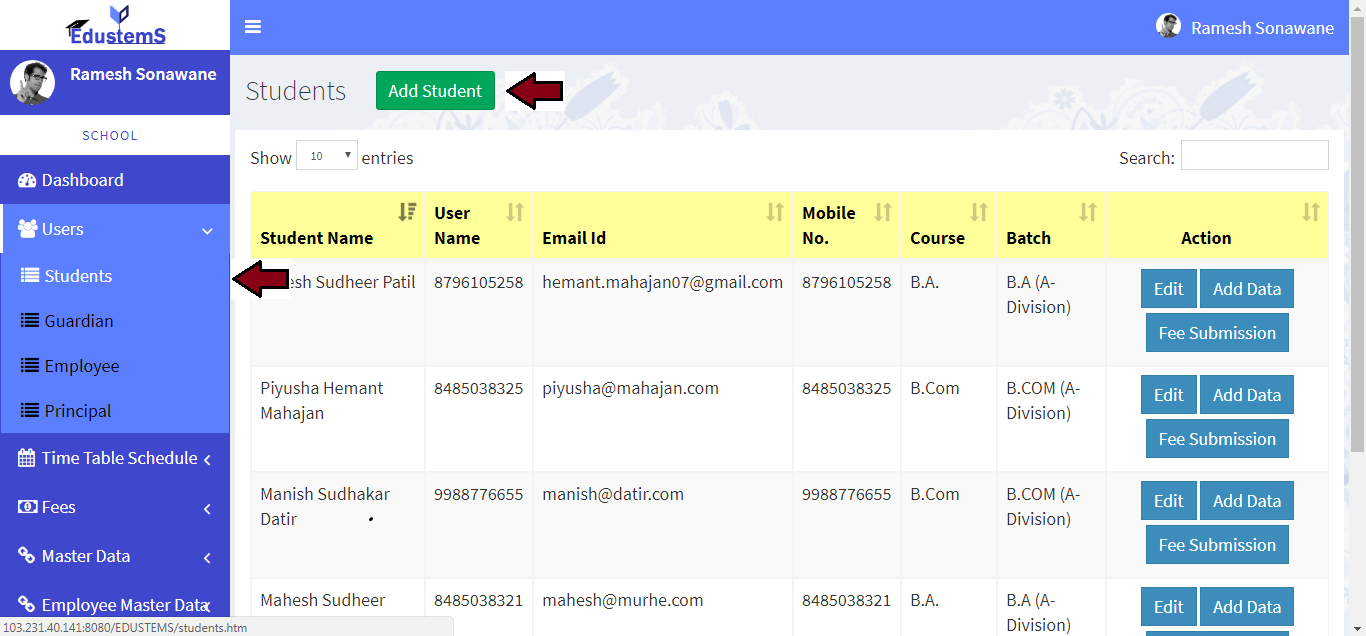
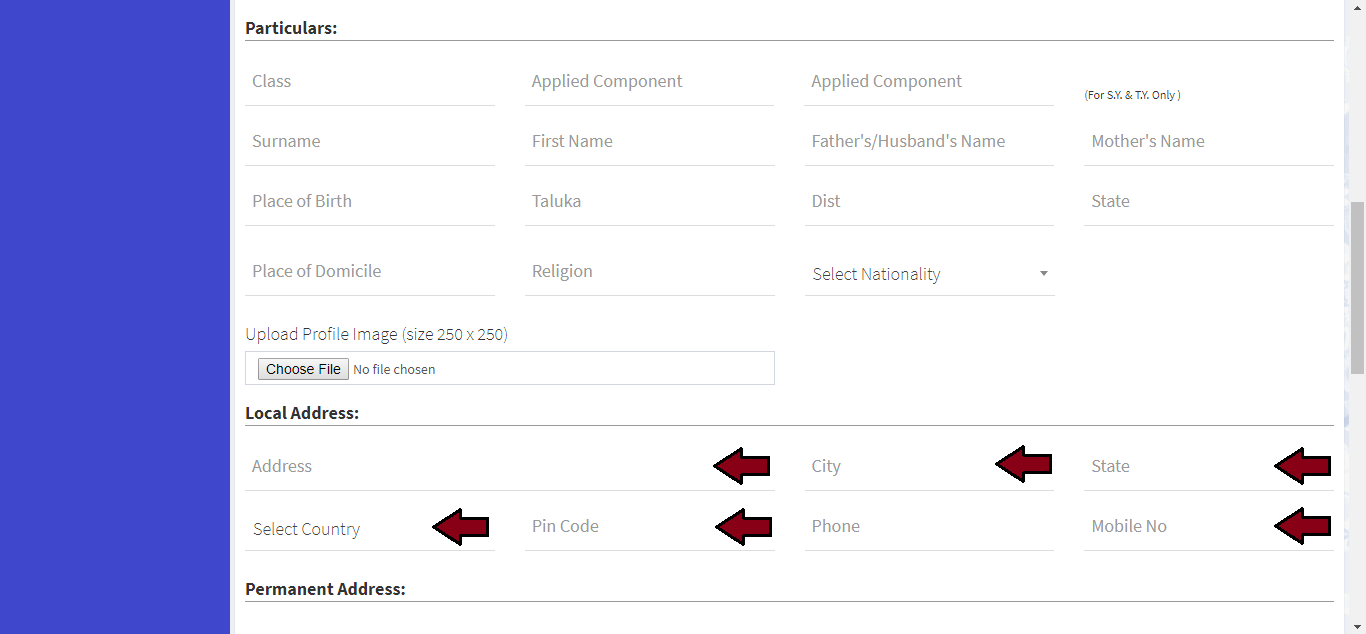
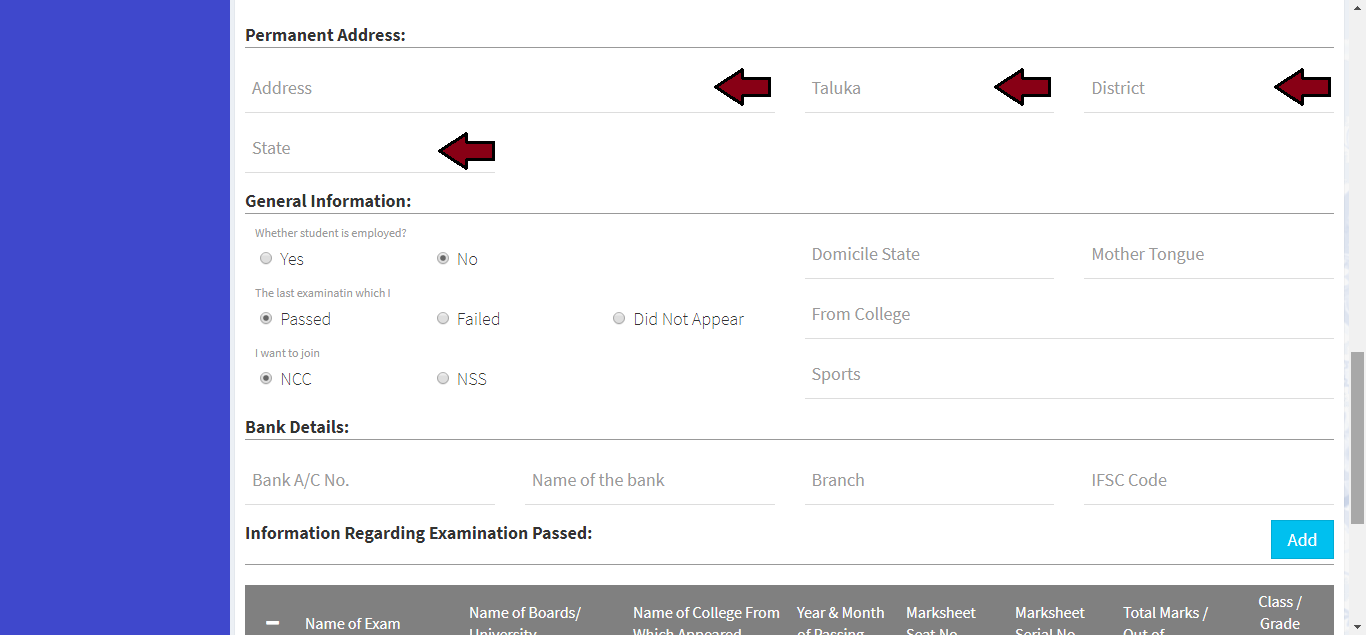
Learn how to add student
-
Click on Users >> Student link from left navigation Panel. Then click on Add Student button
-
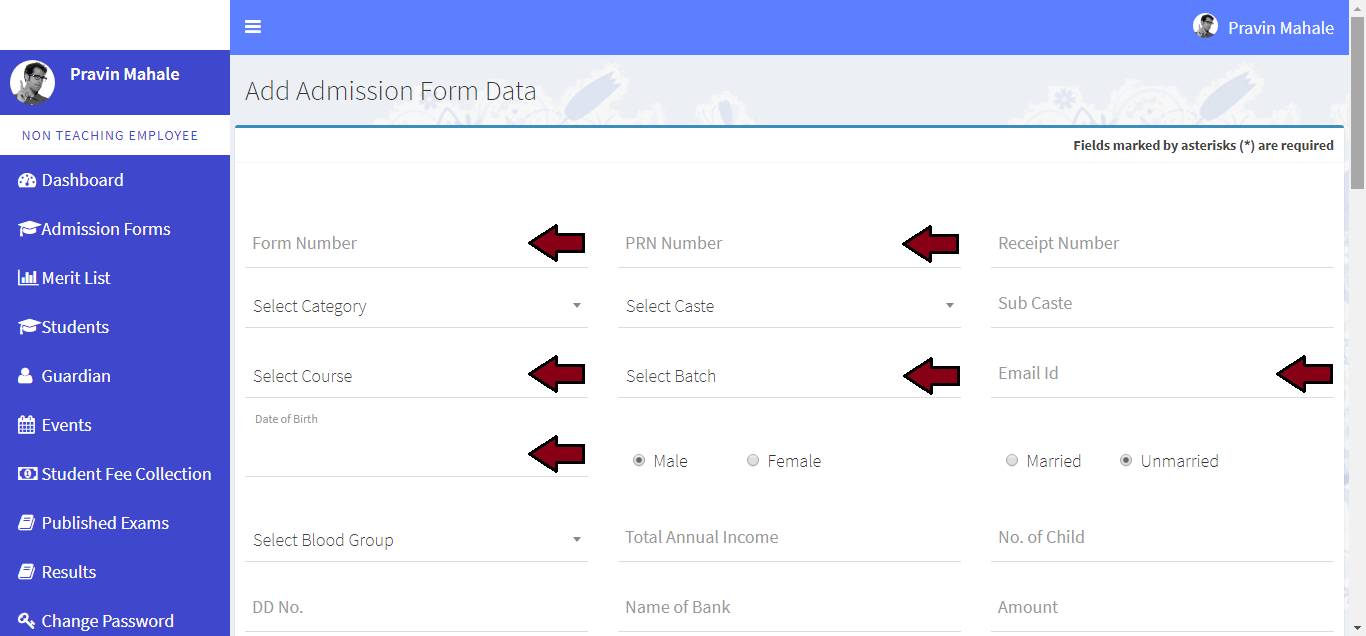
Please enter the form number and all the fields are required for this section
-
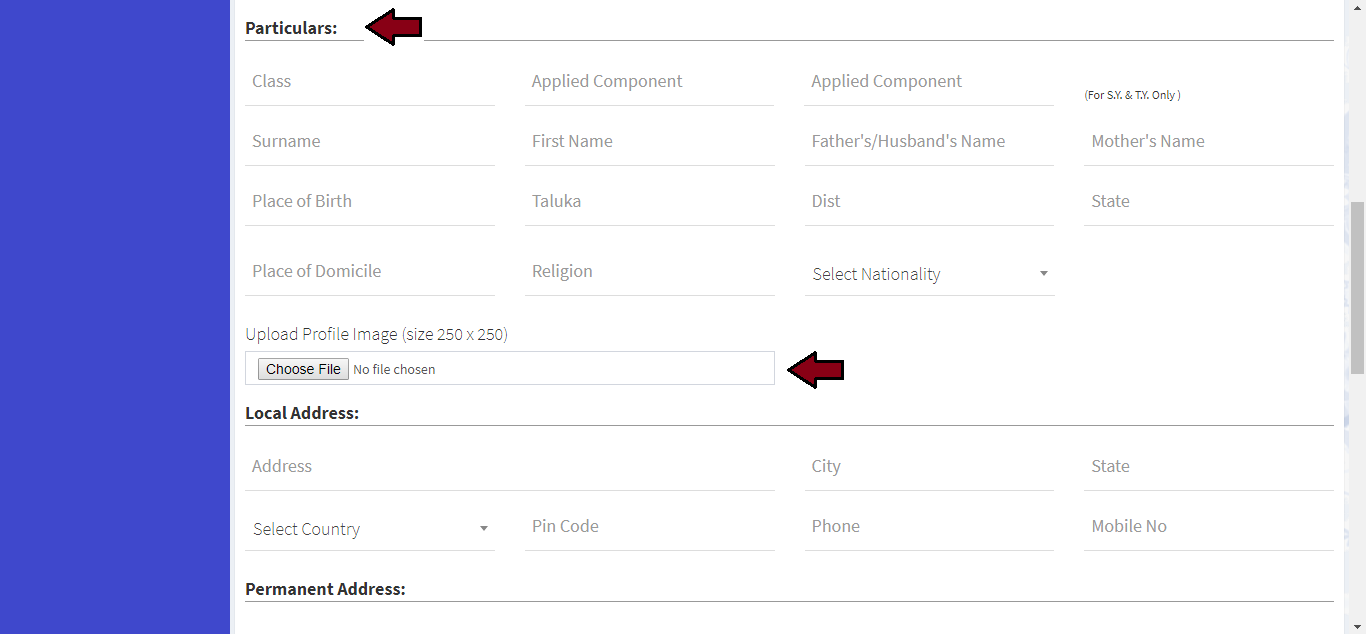
Please enter all the fields in Particulars section and upload candidate photo
-
Please enter the local address
-
Please enter the permanent address
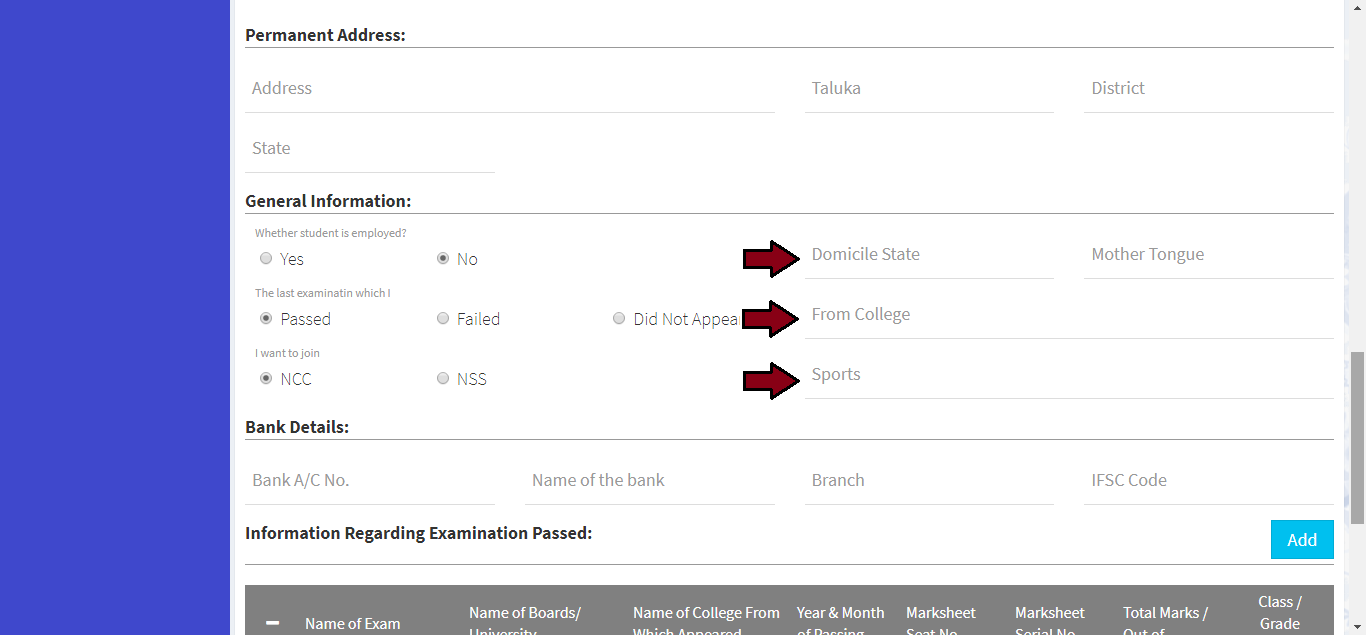
-
Please enter the general information
-
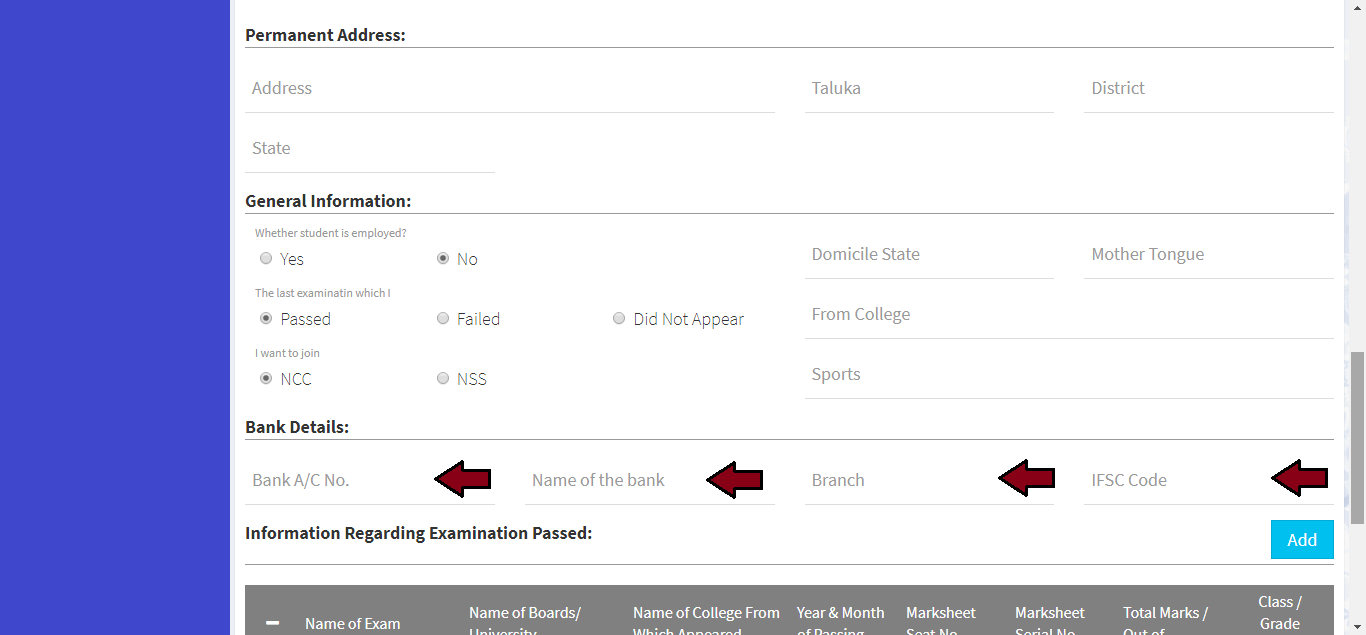
Please enter the bank details
-
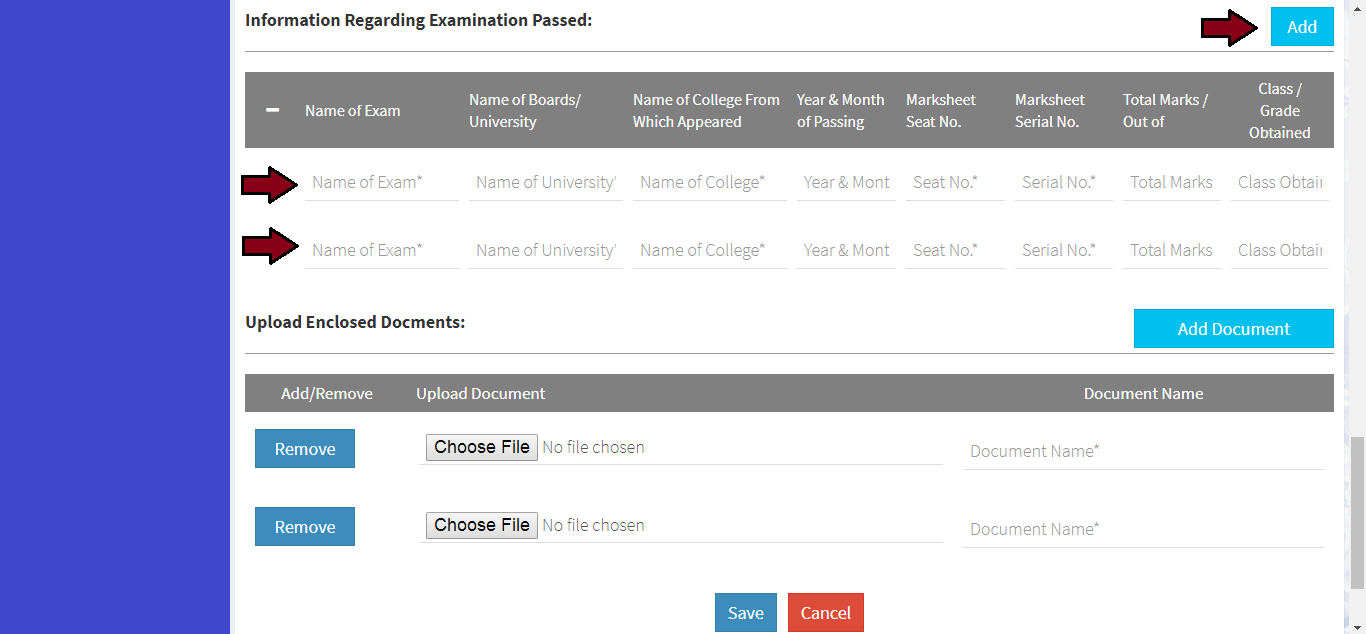
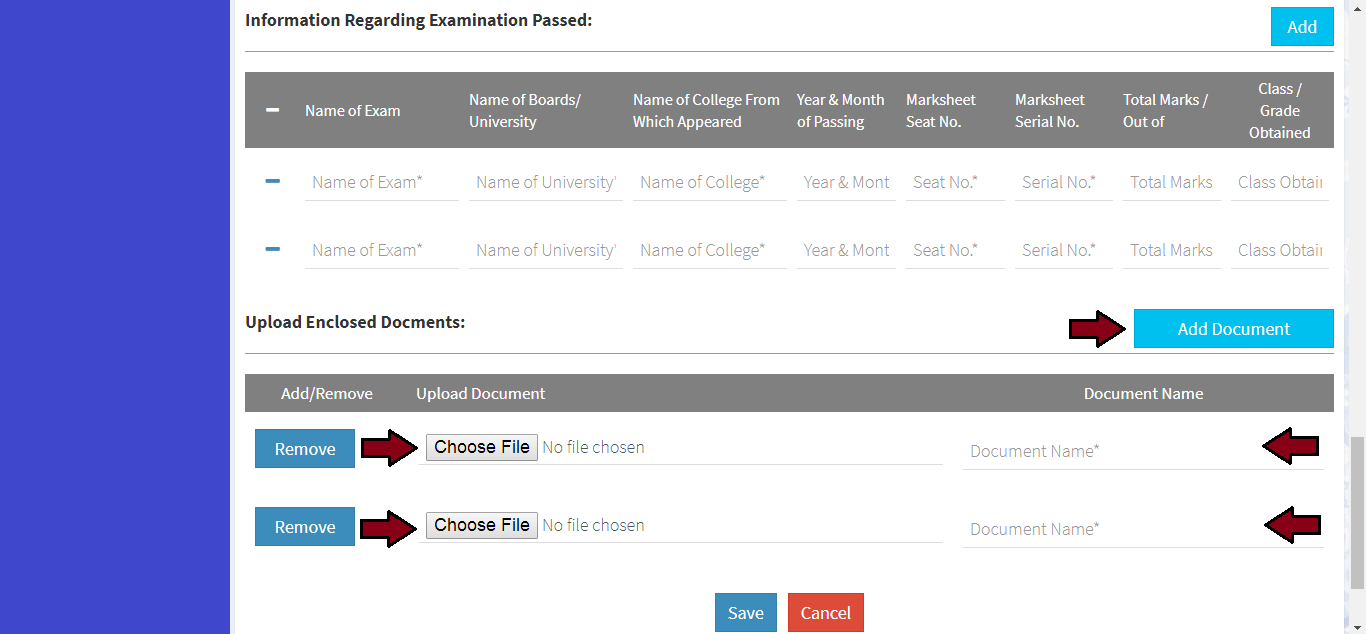
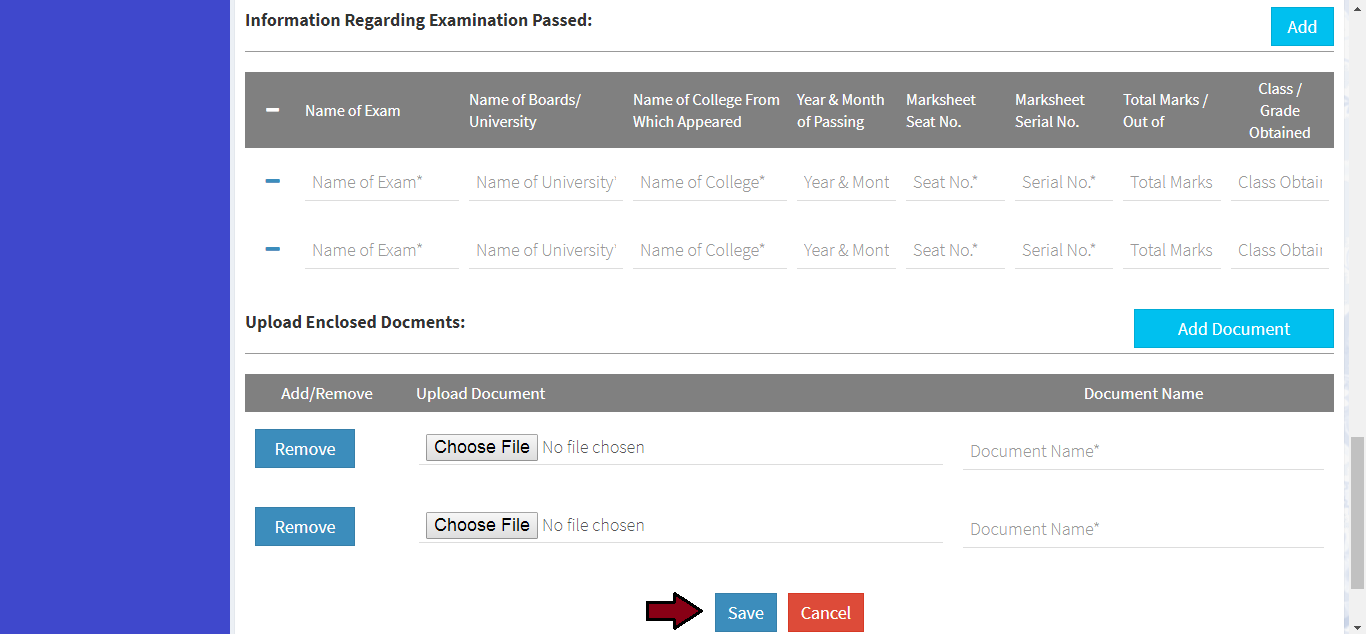
Please enter the information regarding examination passed
-
Please upload the enclosed documents
-
Click on Save button
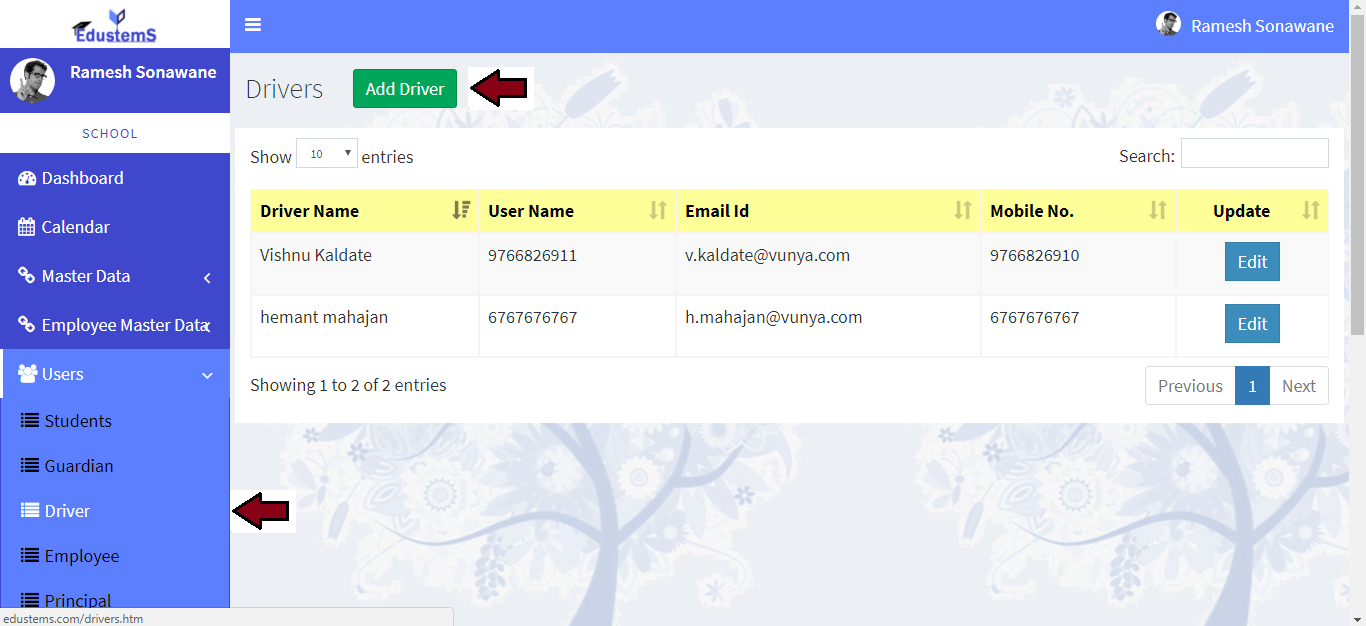
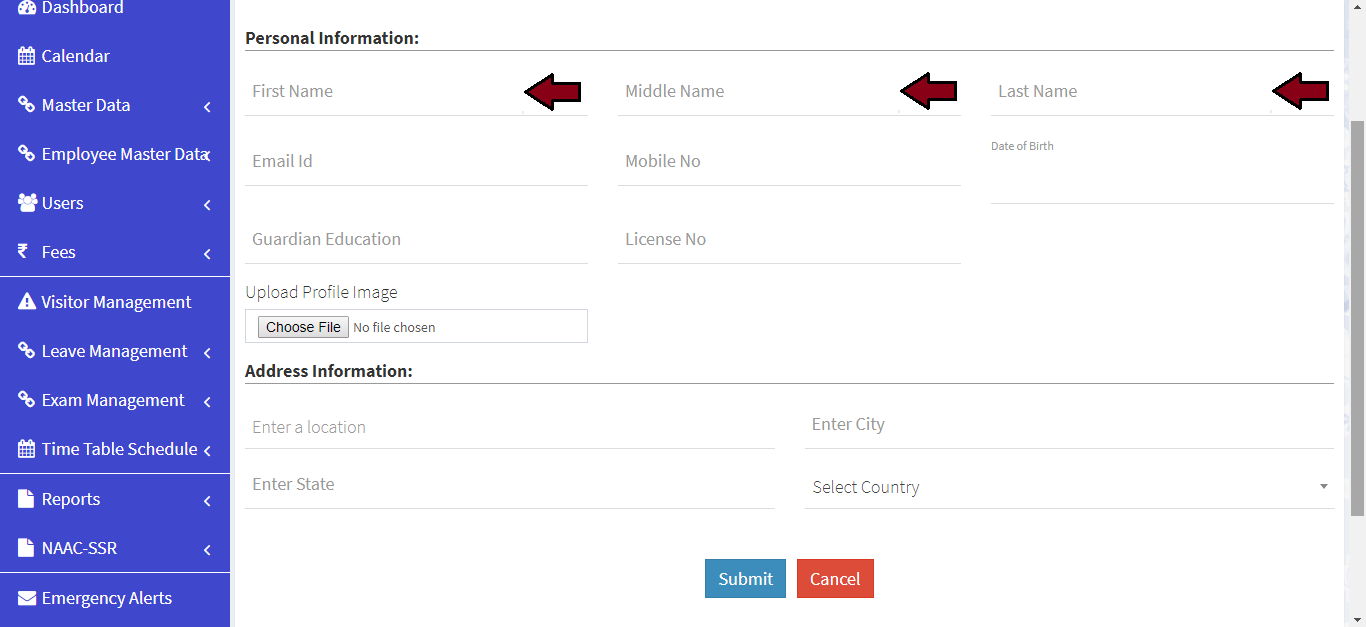
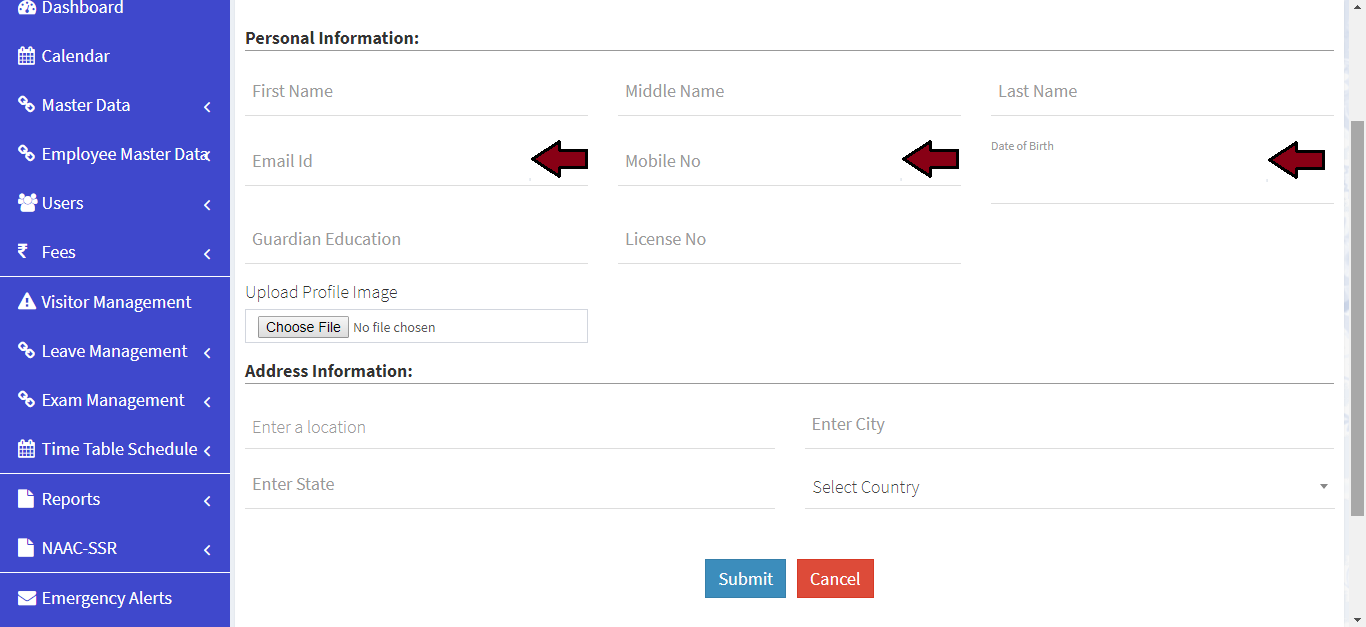
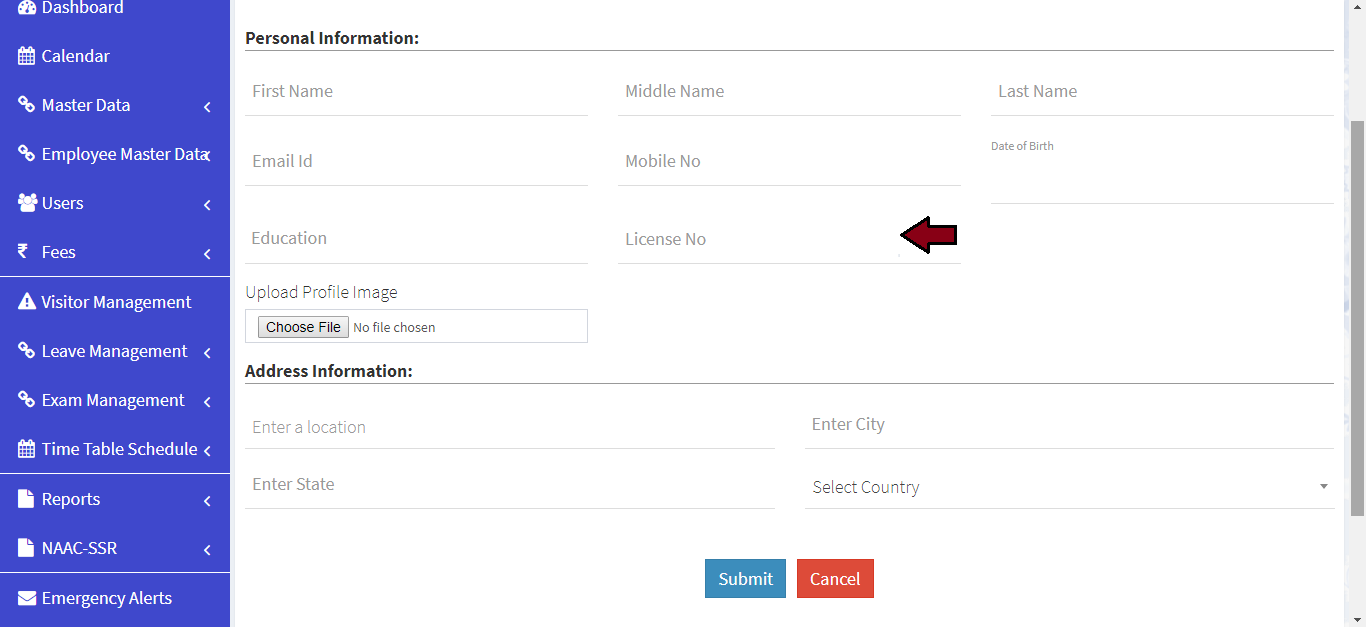
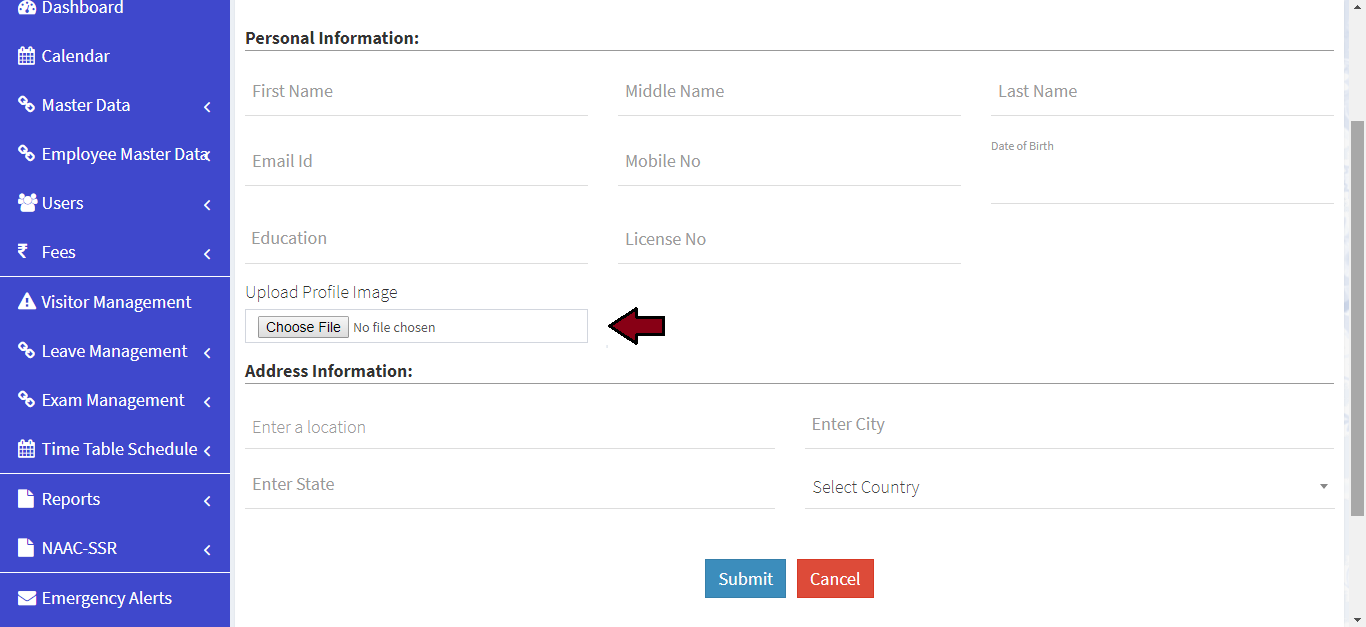
Learn how to add driver
-
For add Drivers. Click on Users >> Driver link from left navigation Panel. Then click on Add Driver button
-
Please enter first name, middle name and last name of driver
-
please enter mobile no., email id and date of birth of driver
-
Please enter license no. of driver
-
Please upload driver photo
-
Please enter address inforation of driver
-
Click on Subit button
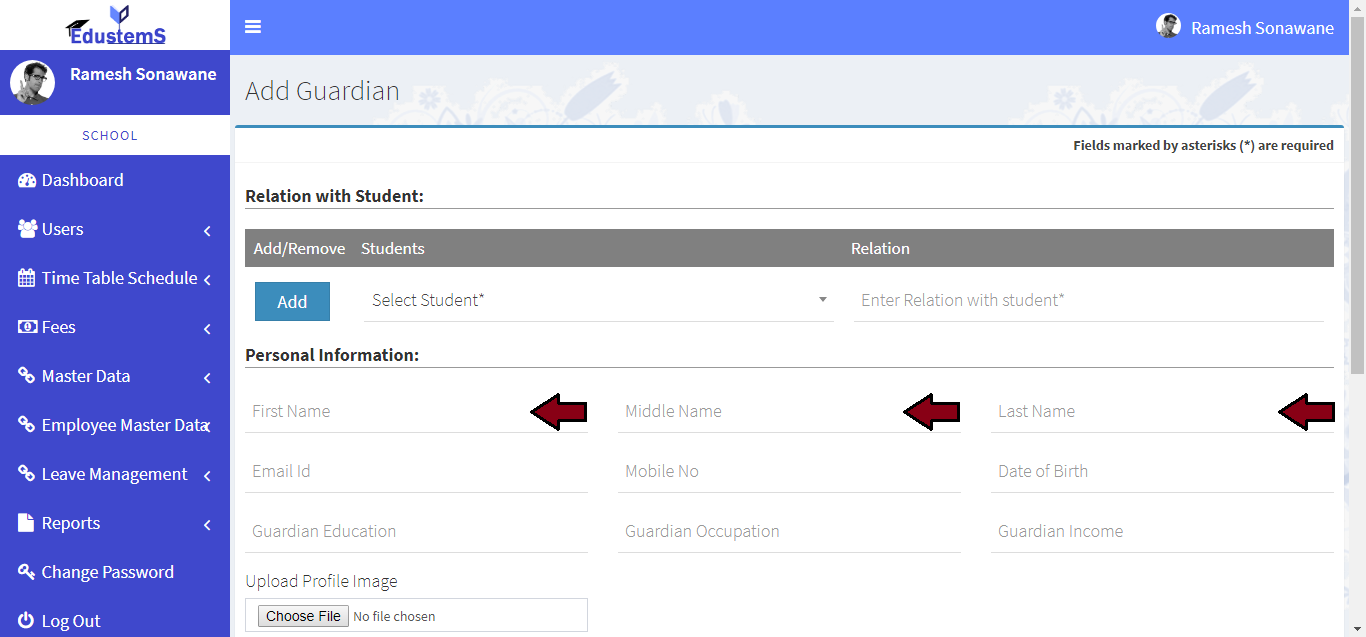
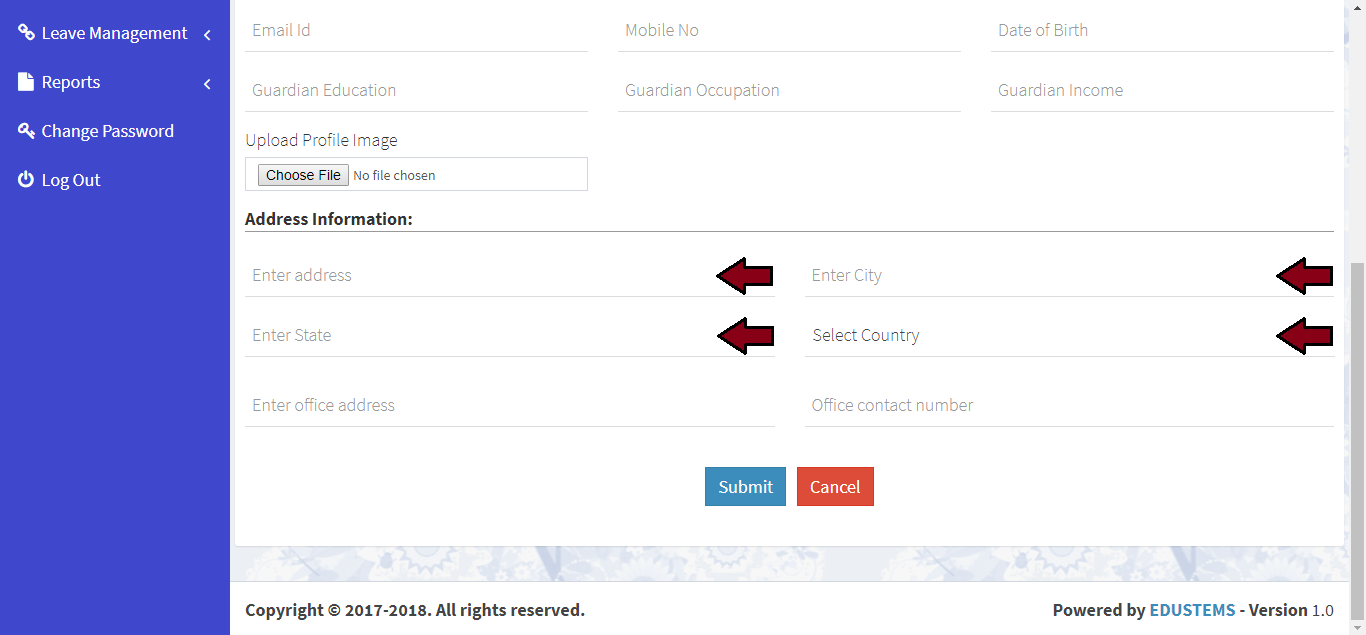
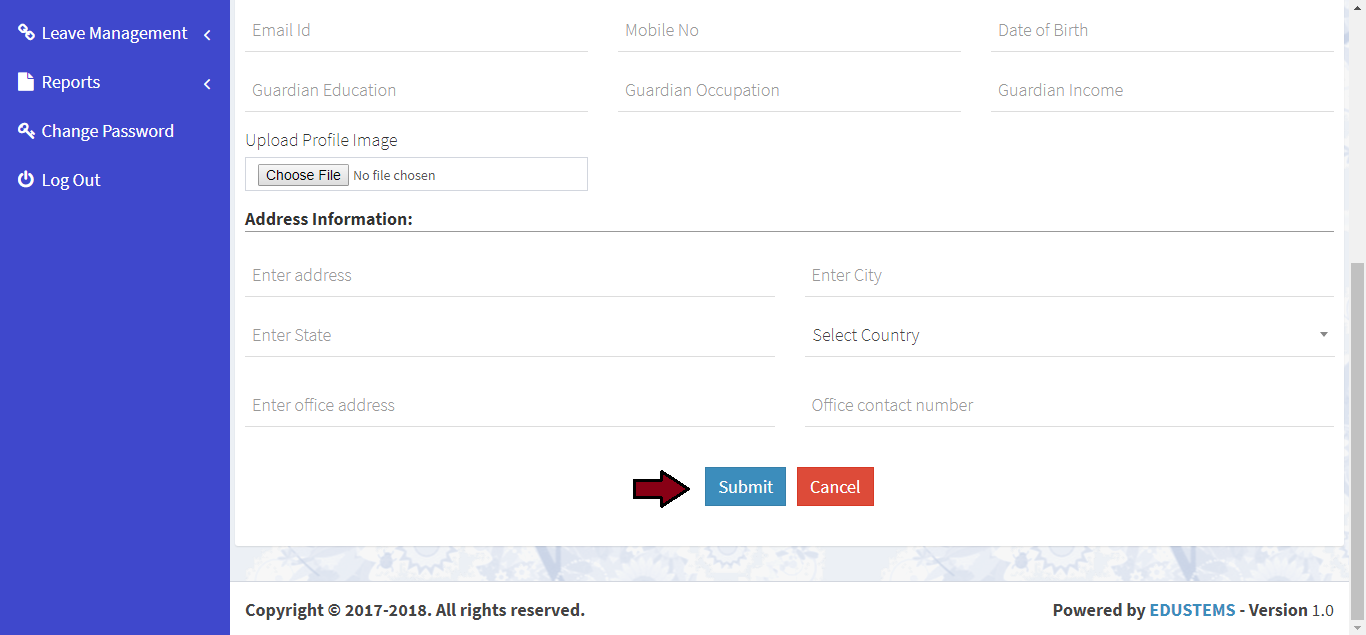
Learn how to add guardian
-
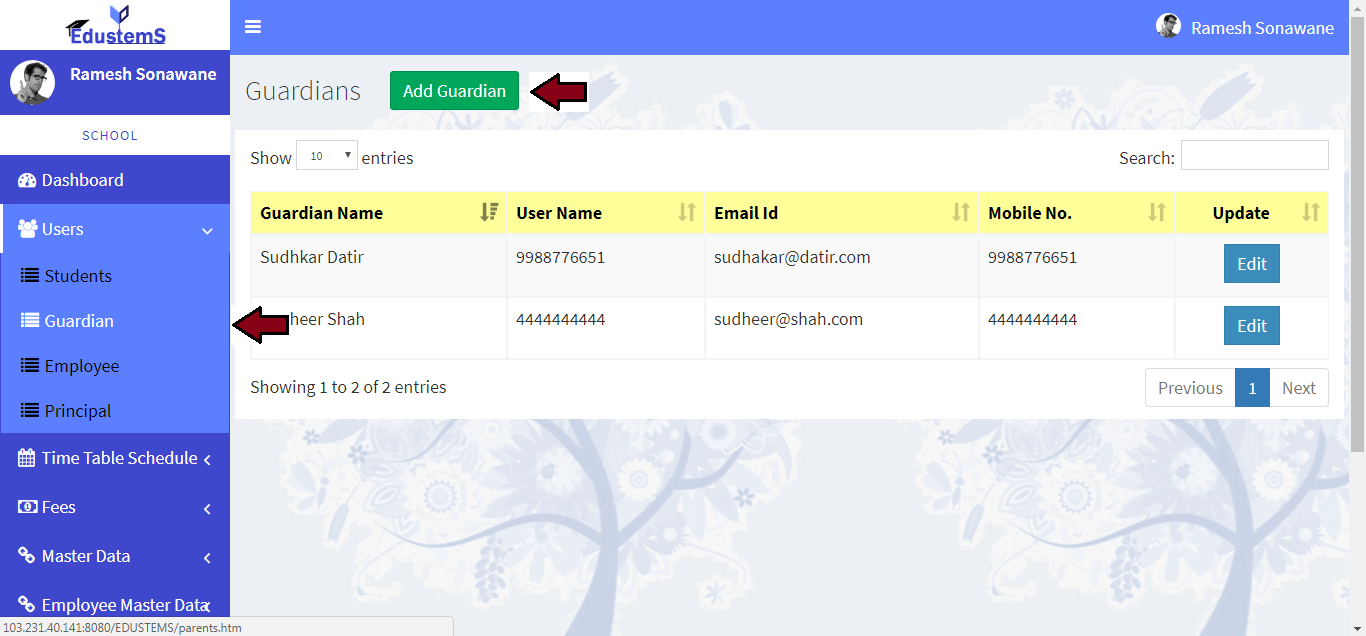
Click on Users >> Guardian link from left navigation Panel. Then click on Add Guardian button
-
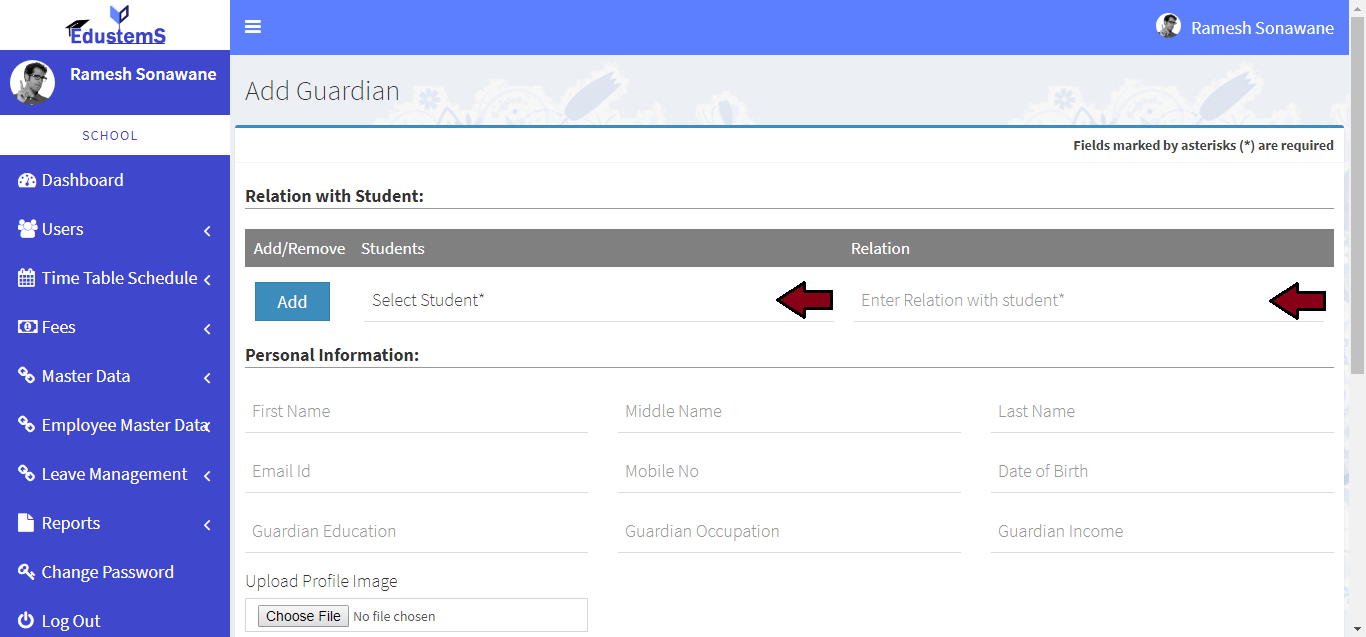
Please select student and relation with guardian
-
Please enter first name, middle name, last name
-
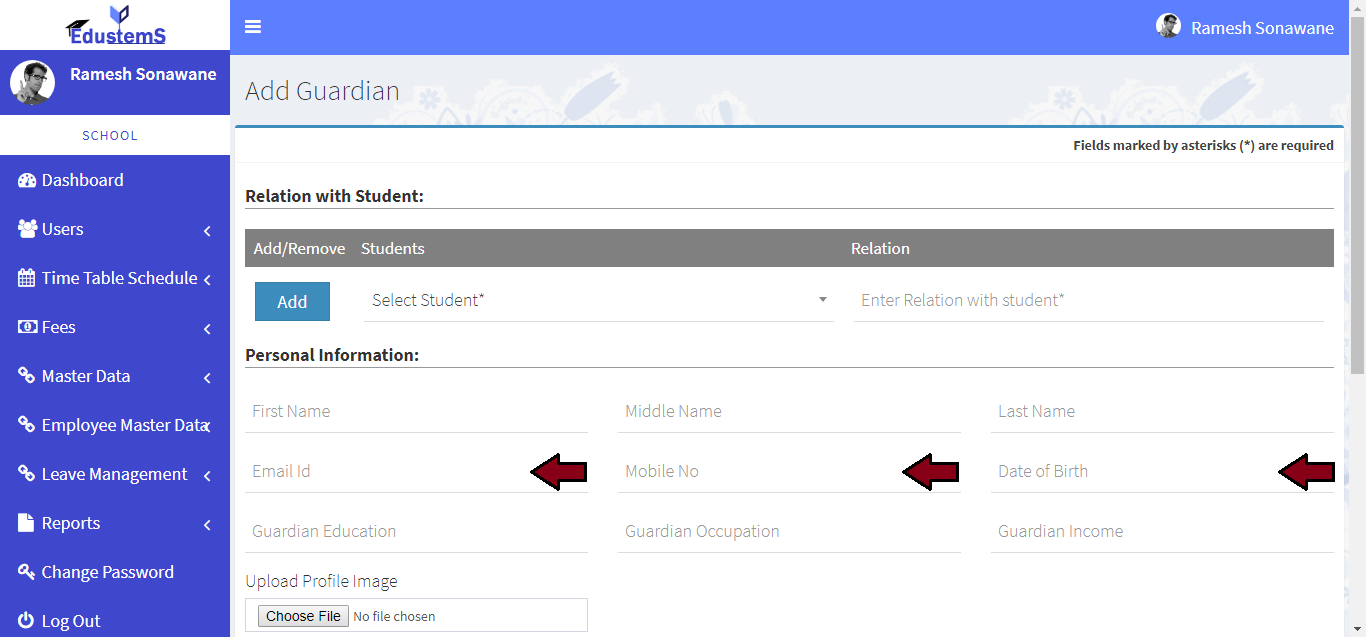
Please enter email Id, mobile number and date of birth of guardian
-
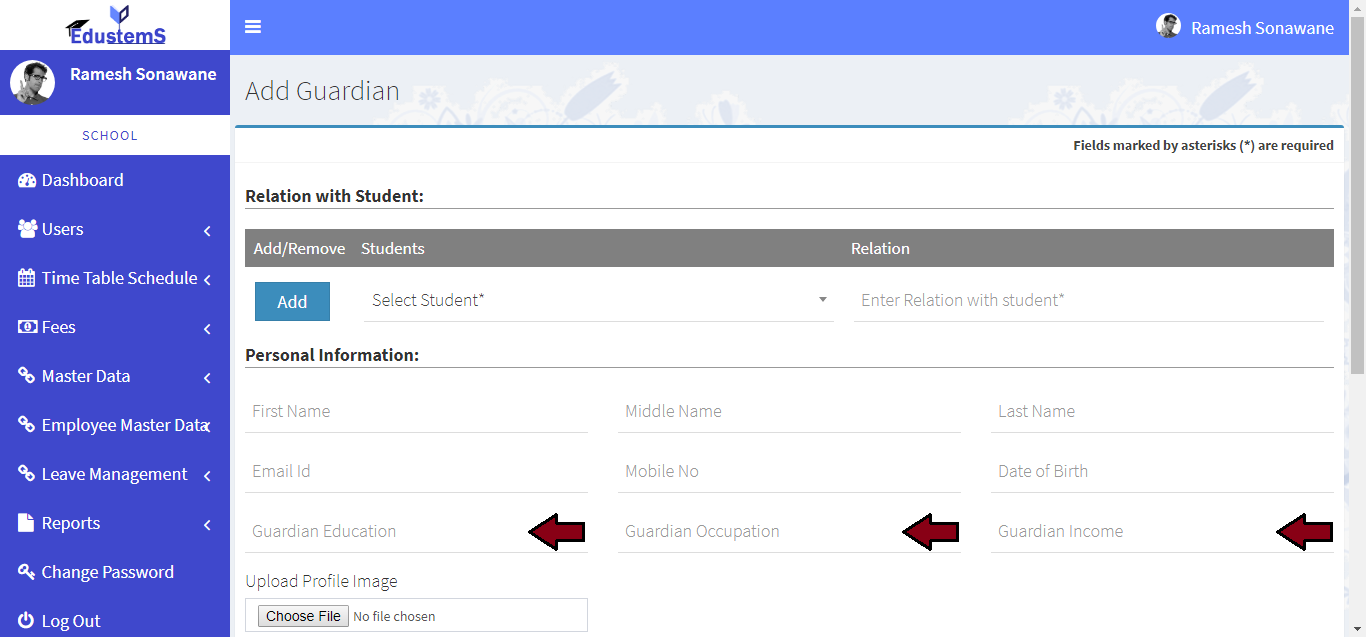
Please enter education, occupation and income of guardian
-
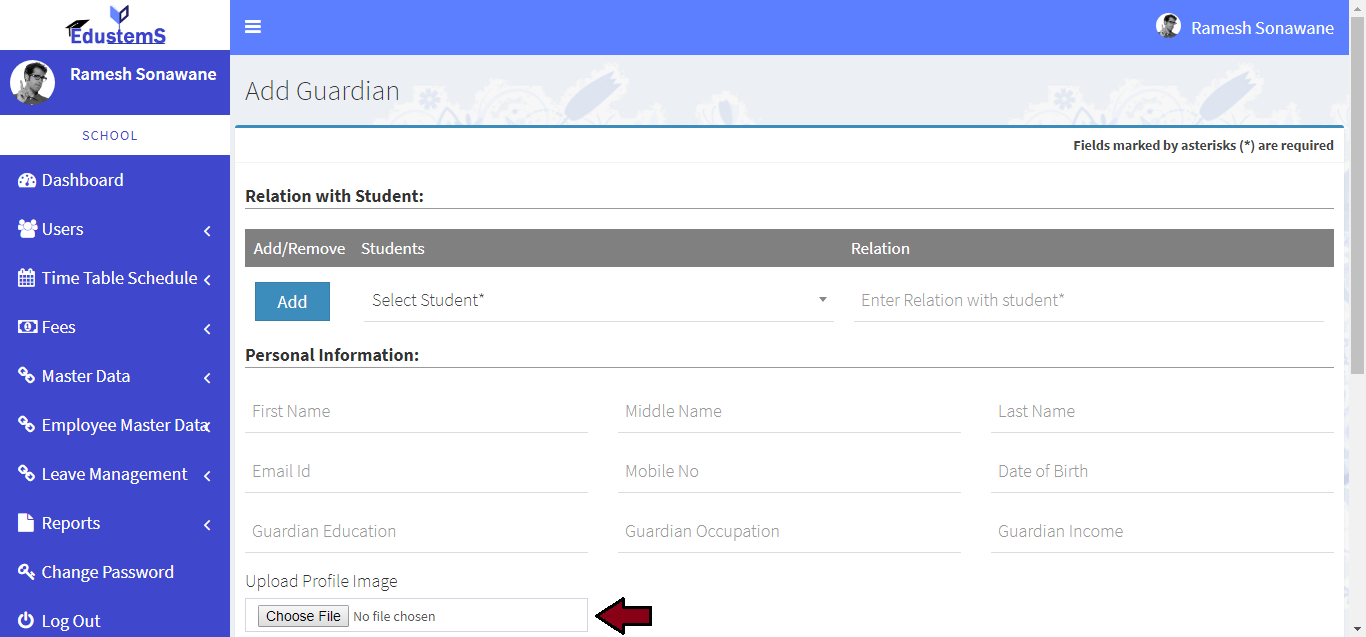
Please upload guardian profile image
-
Please enter your address, city, state and select your country
-
Click on Submit button
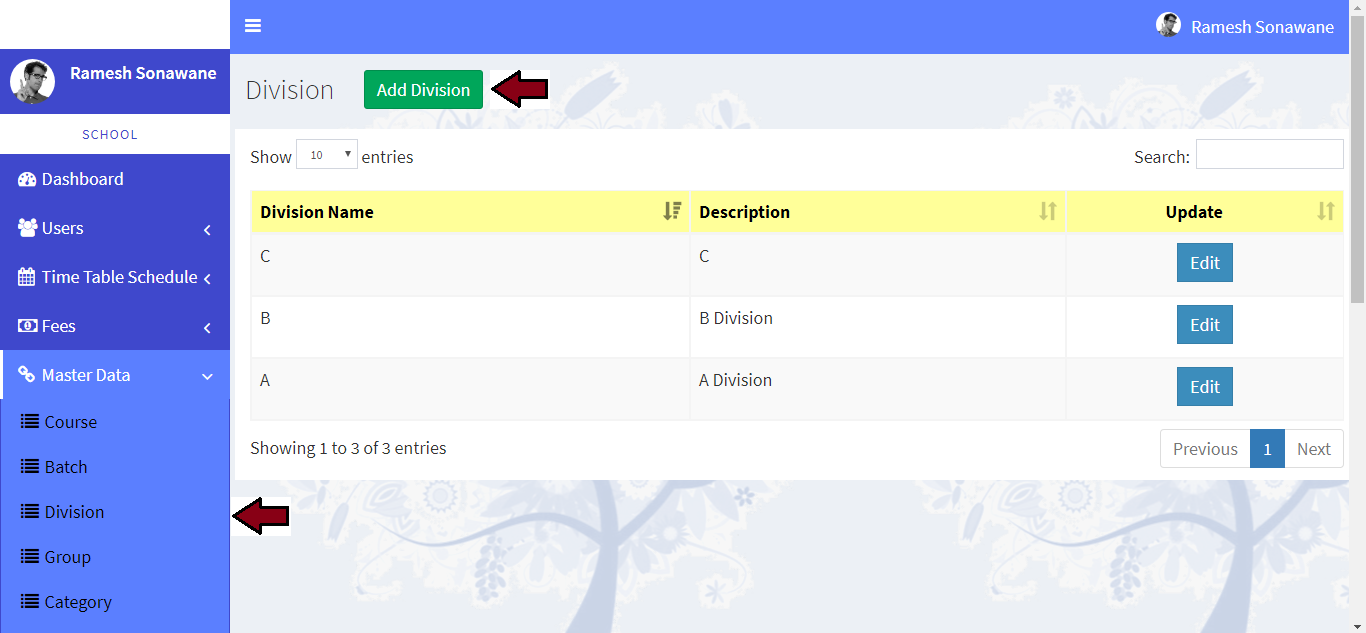
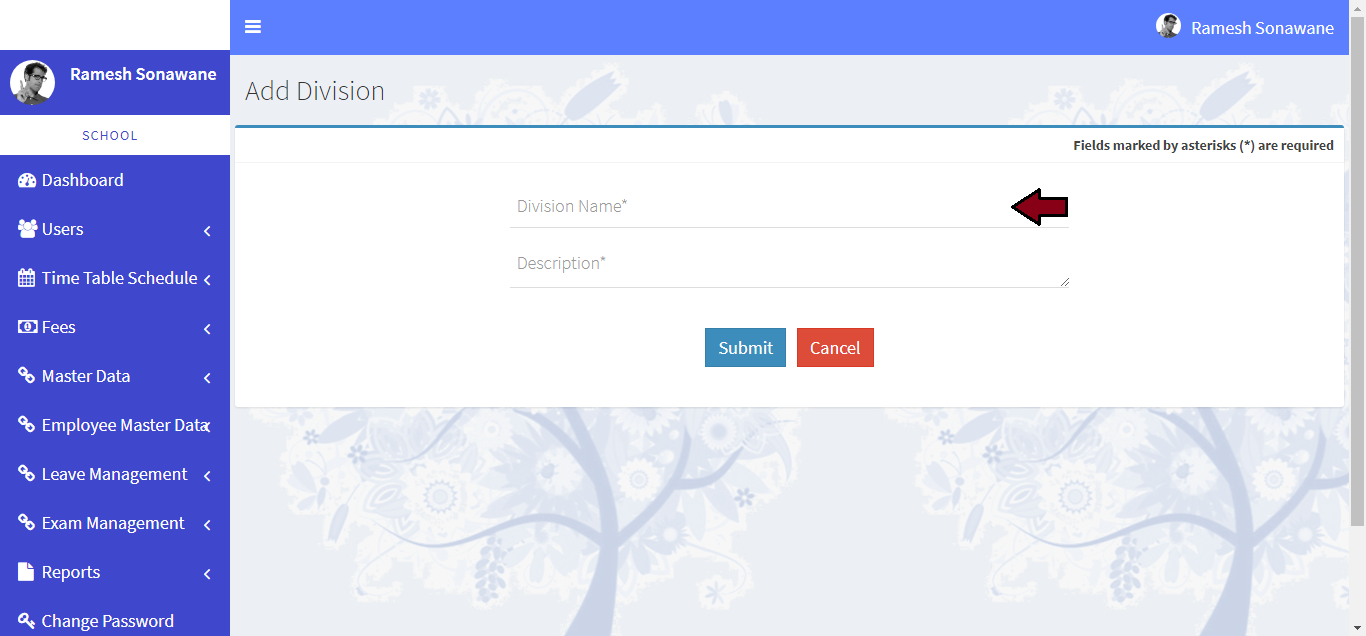
Learn how to add divisions
-
For add divisions. Click on Master Data >> Division link from left navigation Panel. Then click on Add Division button
-
Please enter division name
-
Please enter description
-
Click on Submit button


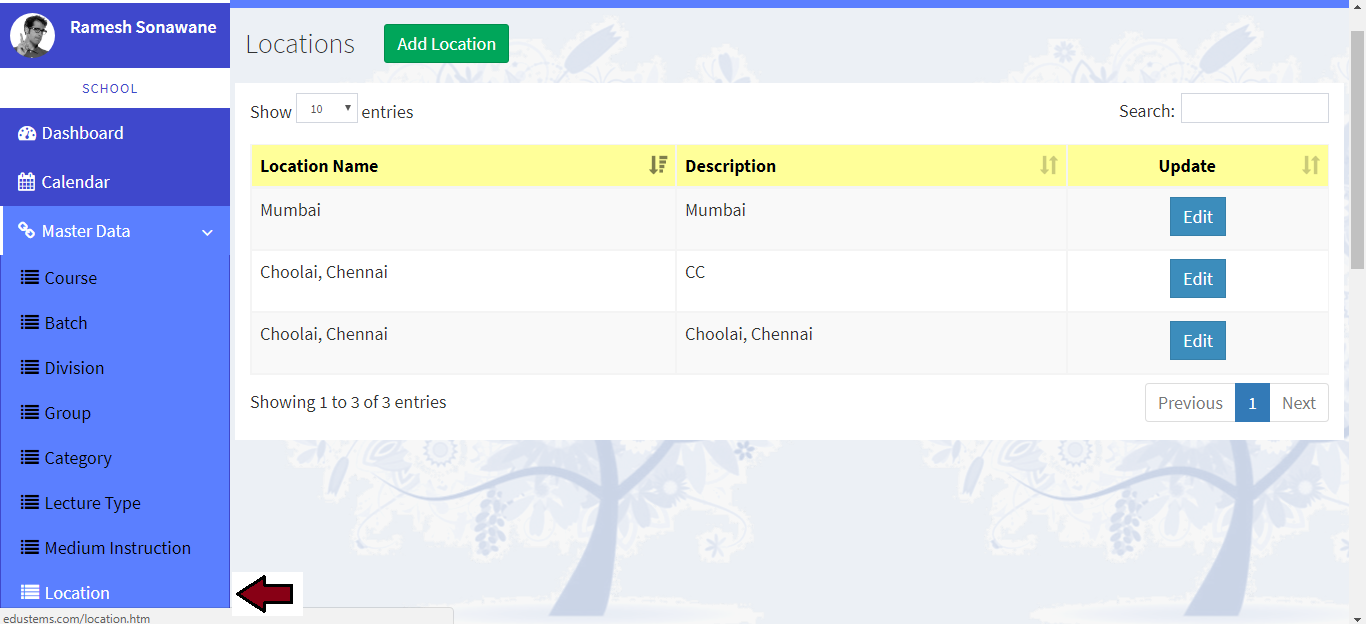
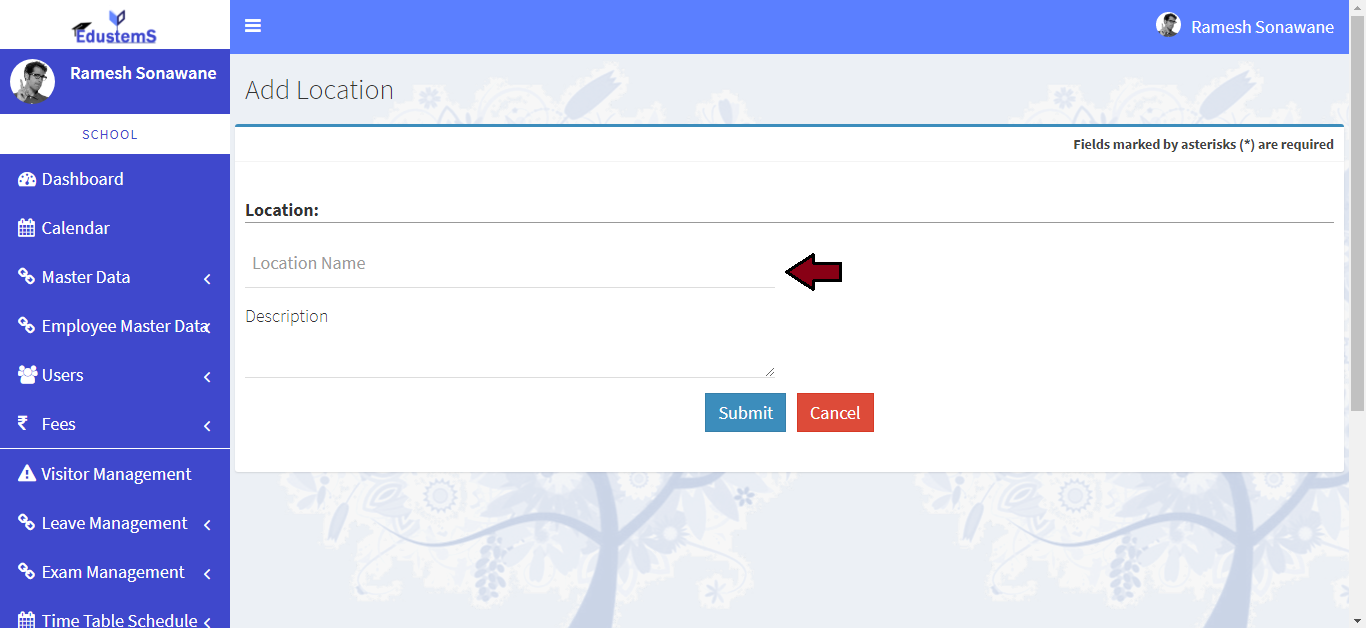
Learn how to add location
-
For add location. Click on Master Data >> Location link from left navigation Panel. Then click on Add Location button
-
Please enter location name
-
Please enter description
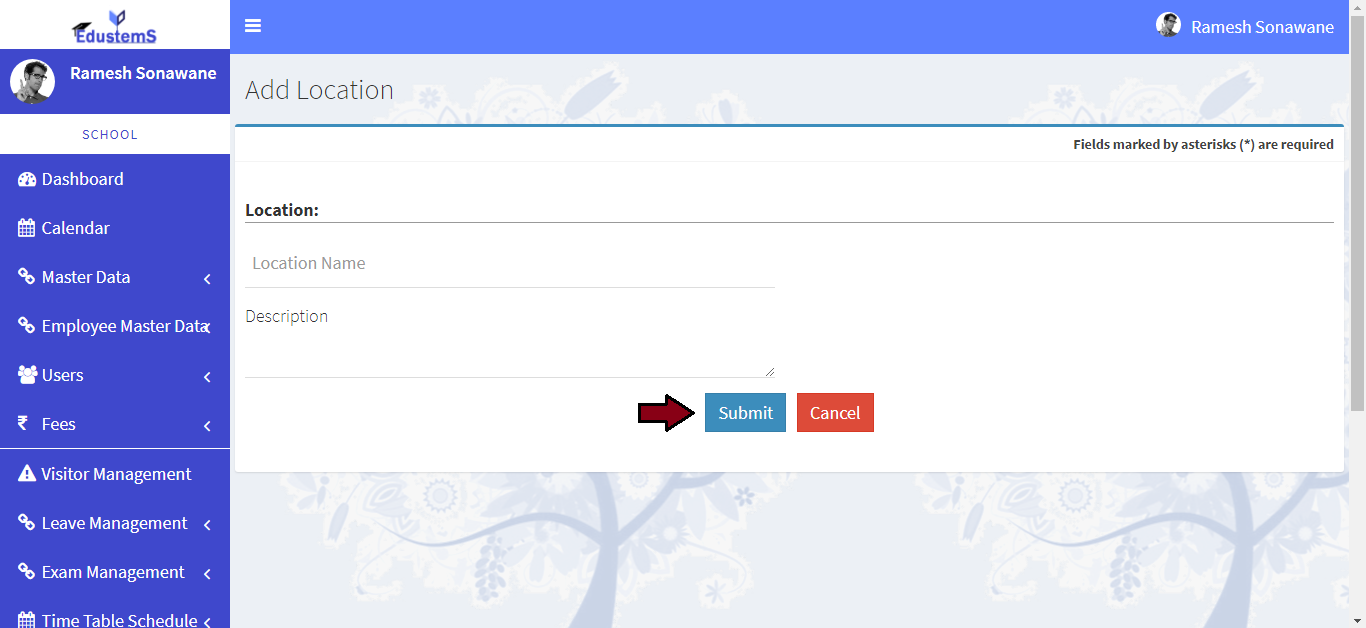
-
Click on Submit button

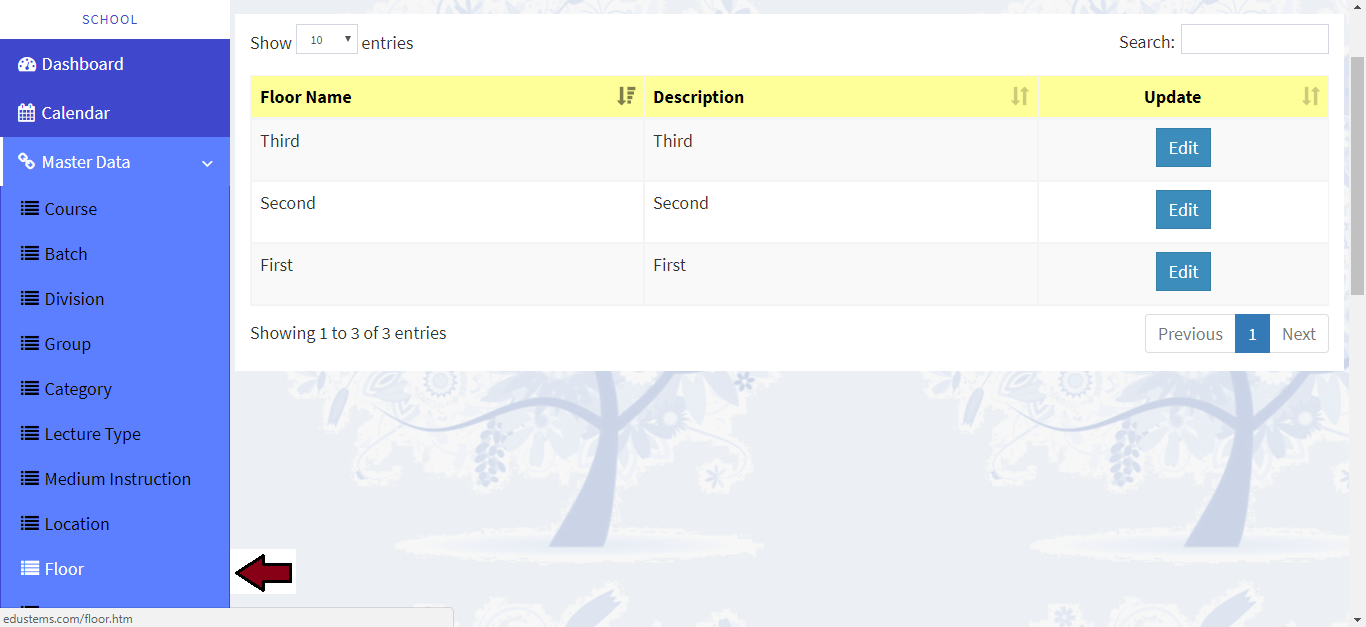
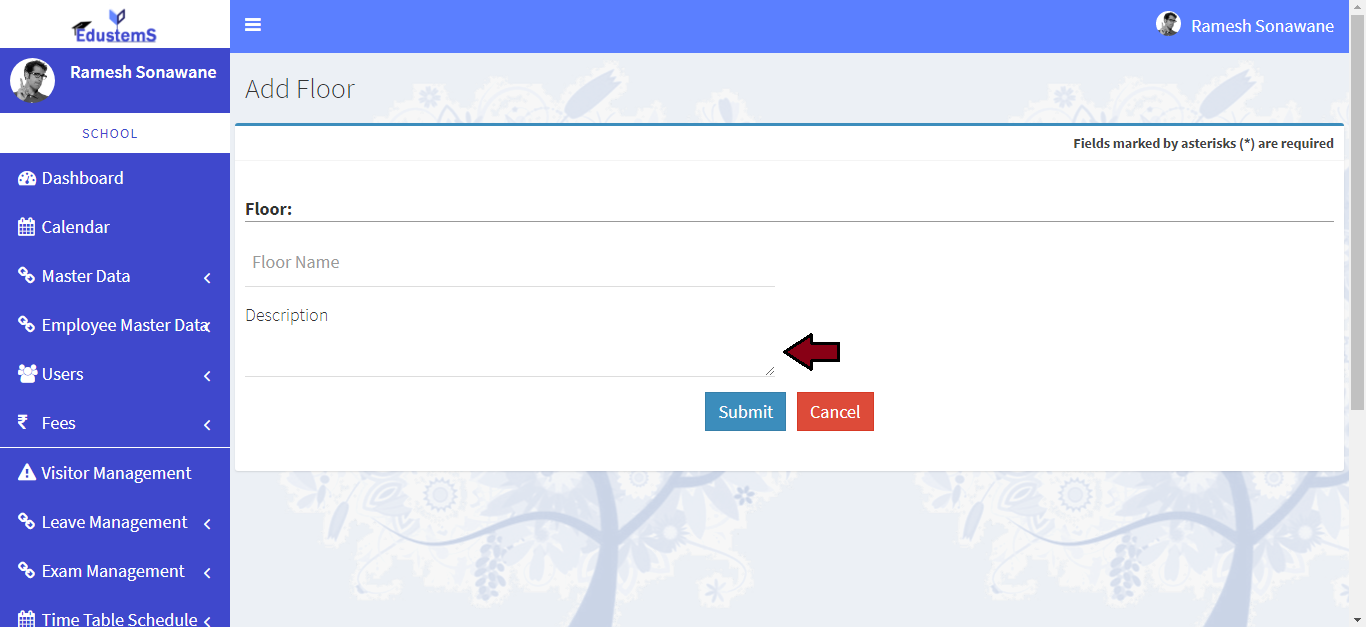
Learn how to add floor
-
For add floor. Click on Master Data >> Floor link from left navigation Panel. Then click on Add Floor button
-
Please enter floor name
-
Please enter description
-
Click on Submit button


Learn how to add room
-
For add divisions. Click on Master Data >> Room link from left navigation Panel. Then click on Add Room button
-
Please enter room name
-
Please select location
-
Please select floor
-
Click on Submit button


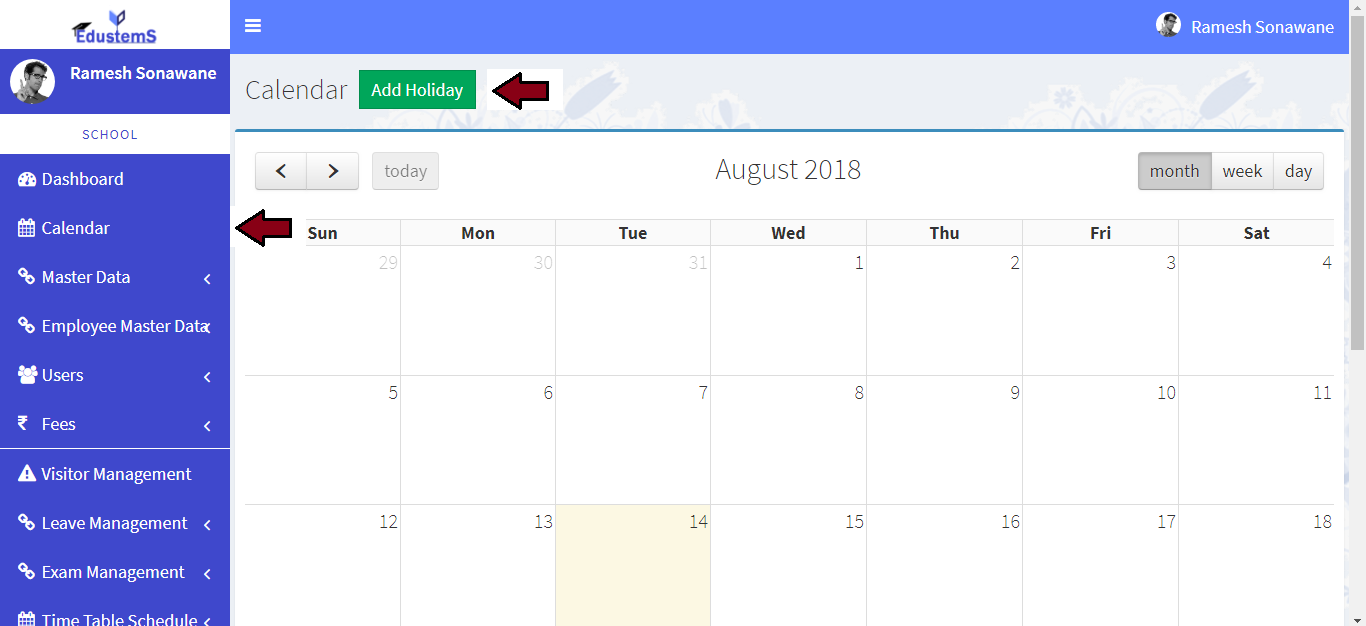
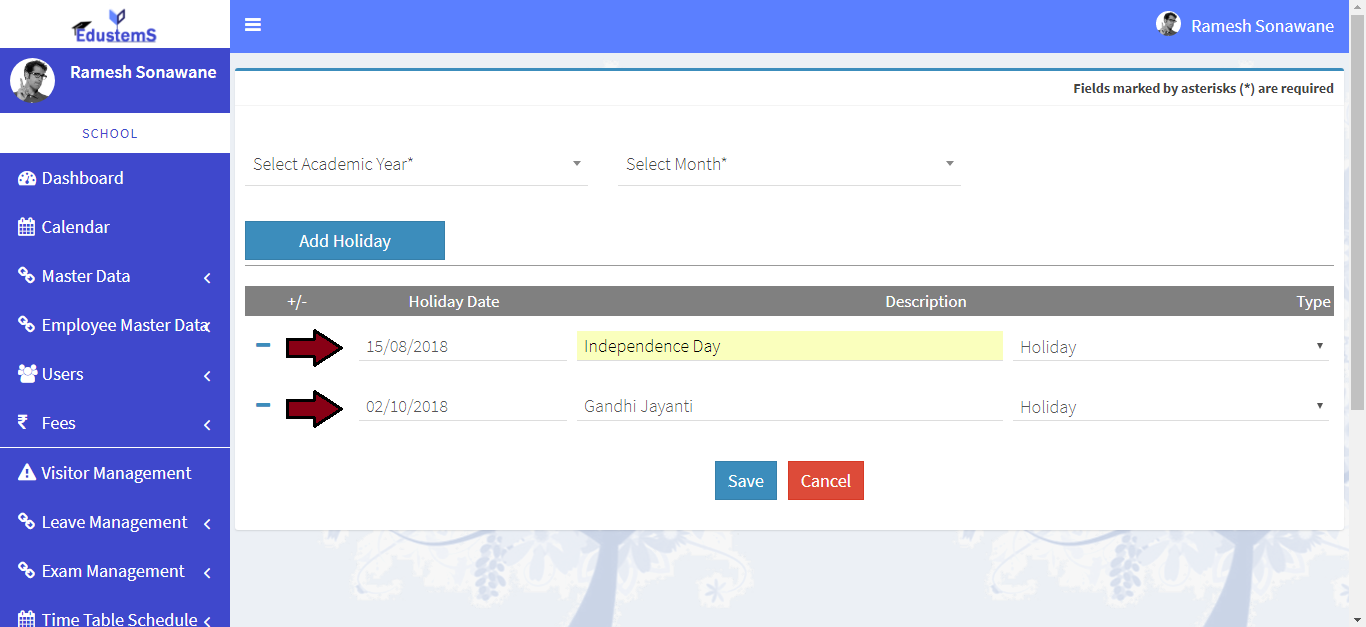
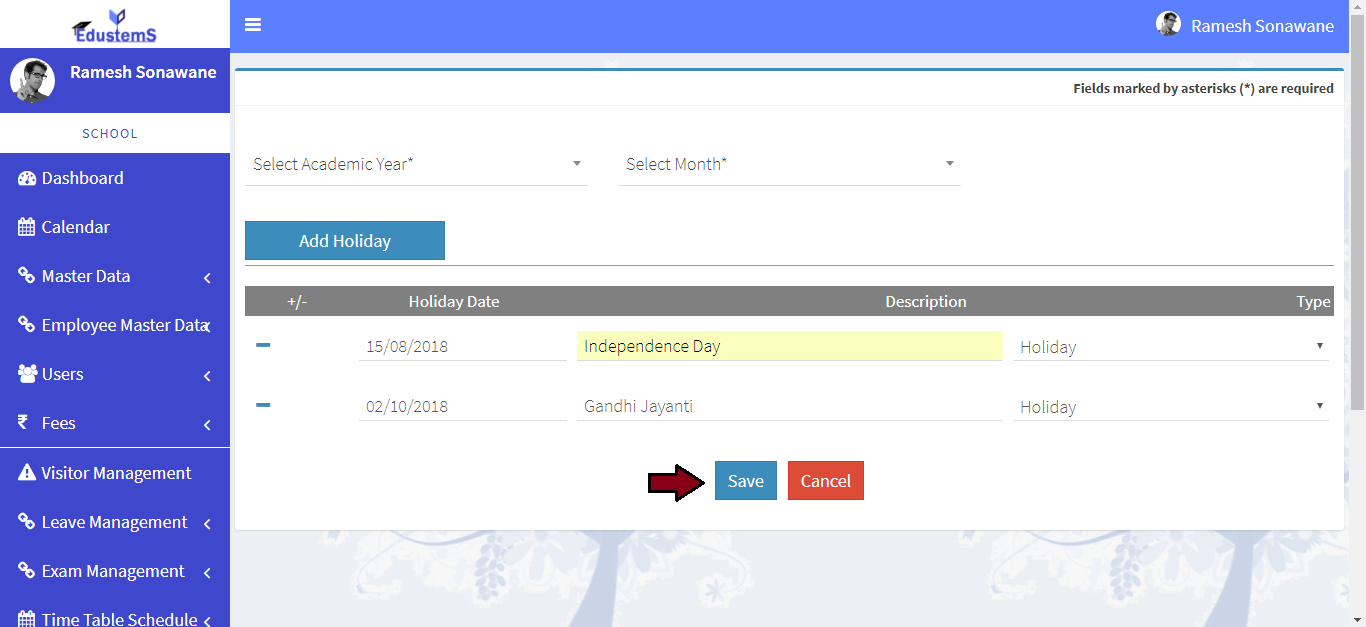
Learn how to add holiday
-
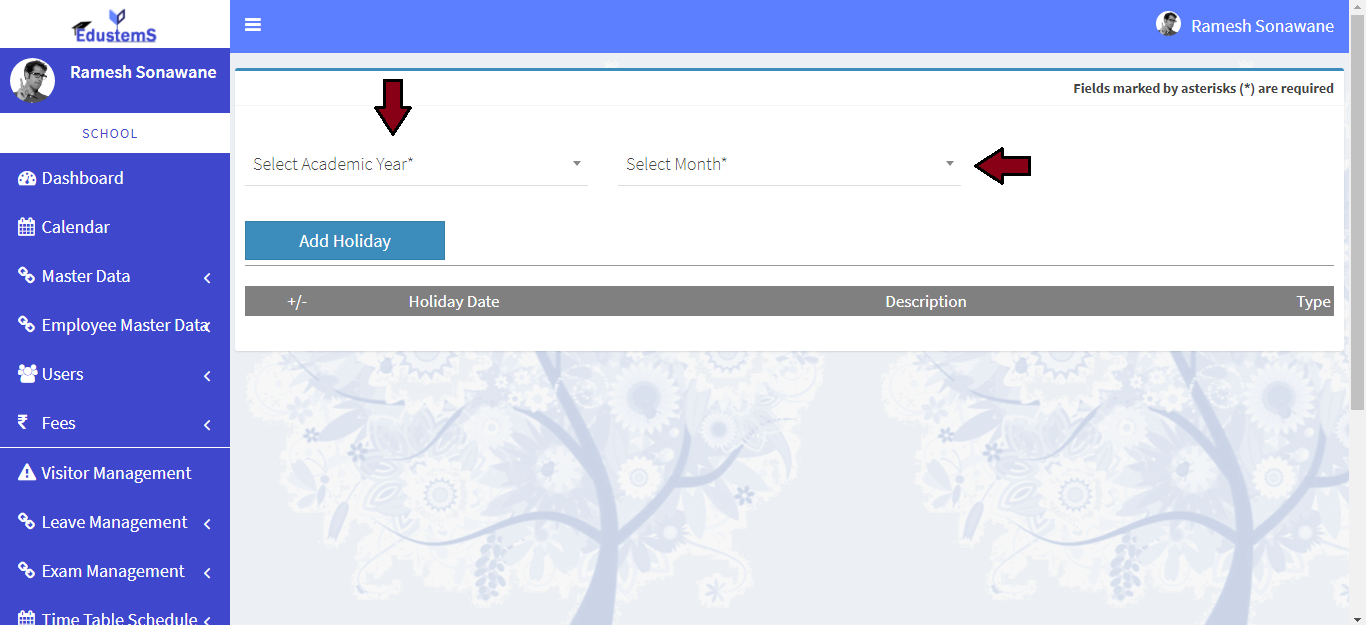
For add holidays. Click on Calendar link from left navigation Panel. Then click on Add Holiday button
-
Please select academic year and month of holiday
-
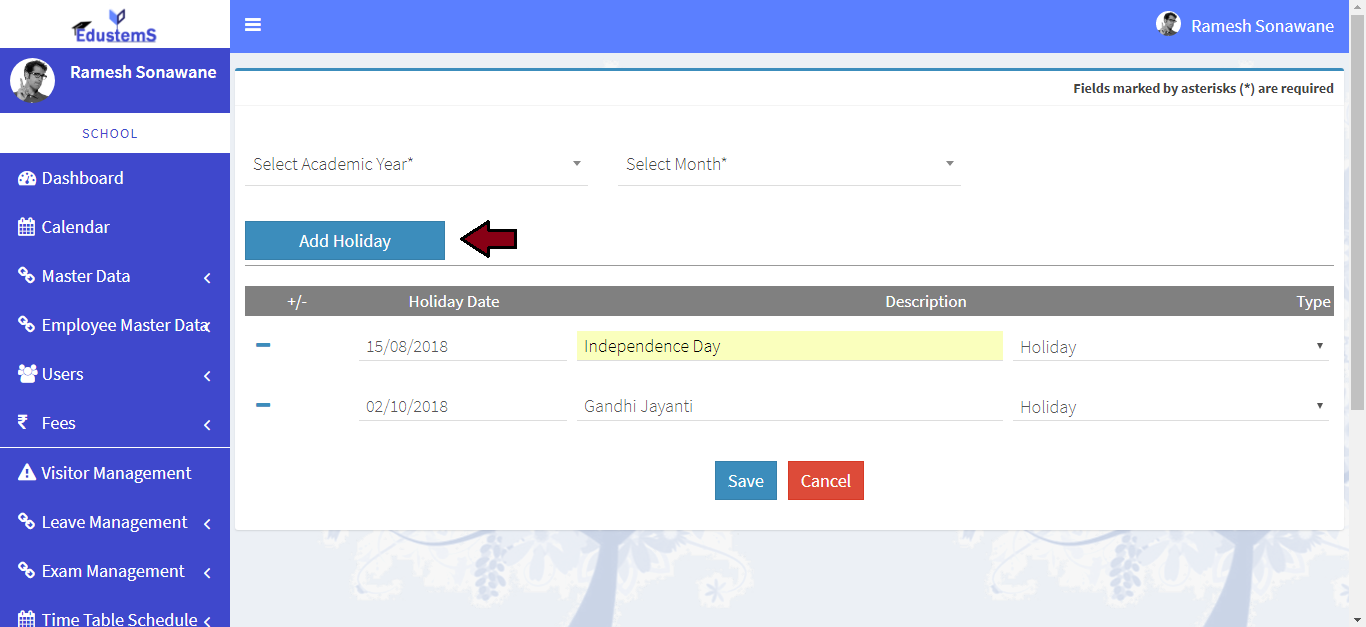
After that click on Add Holiday button, dynamic row will add
-
Please select date, enter title and select type of holiay
-
Click on Save button
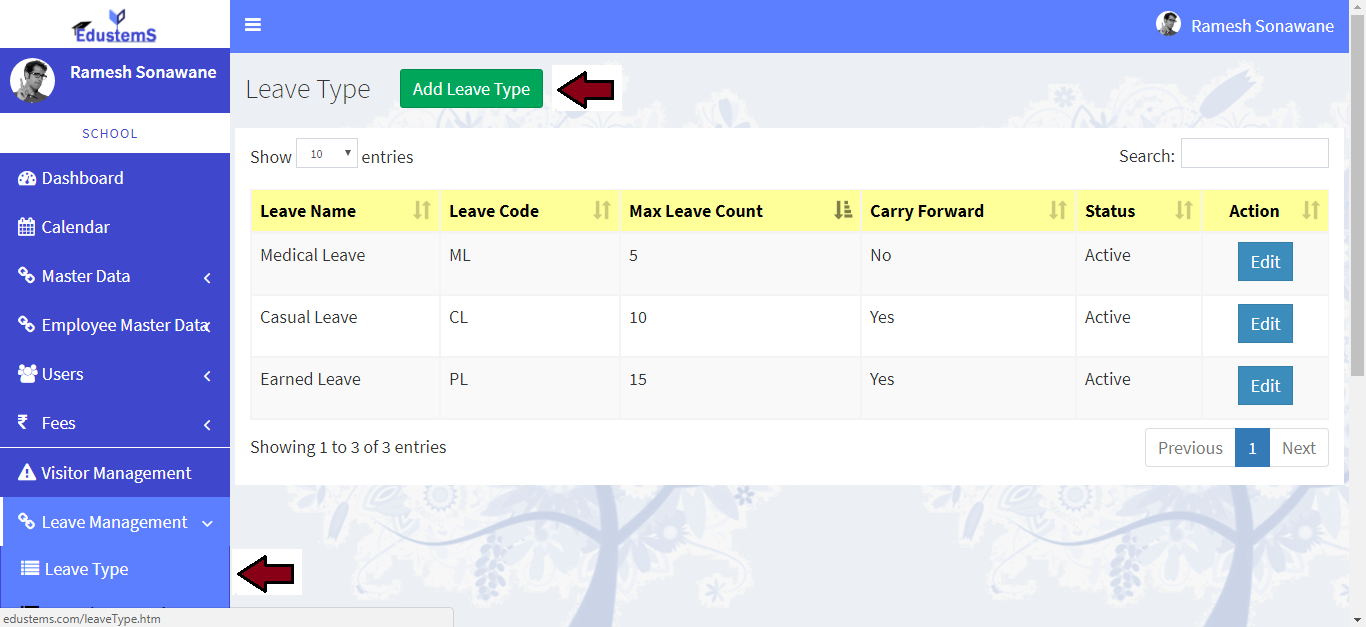
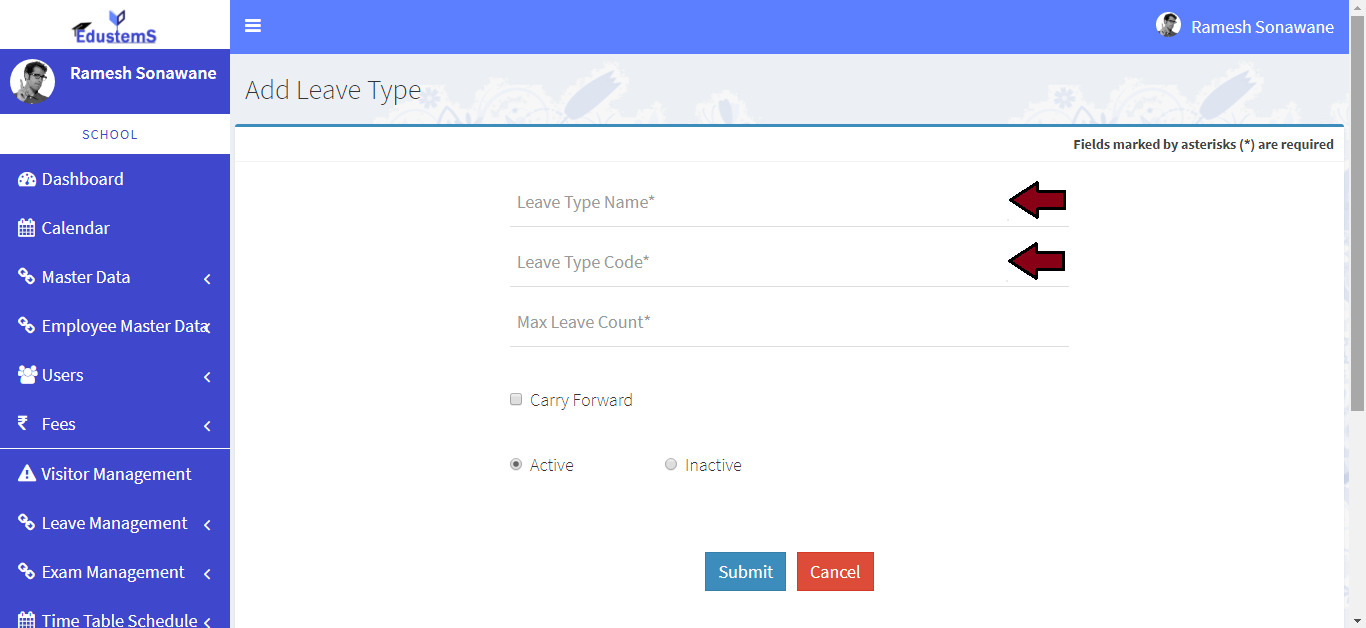
Learn how to add leave type
-
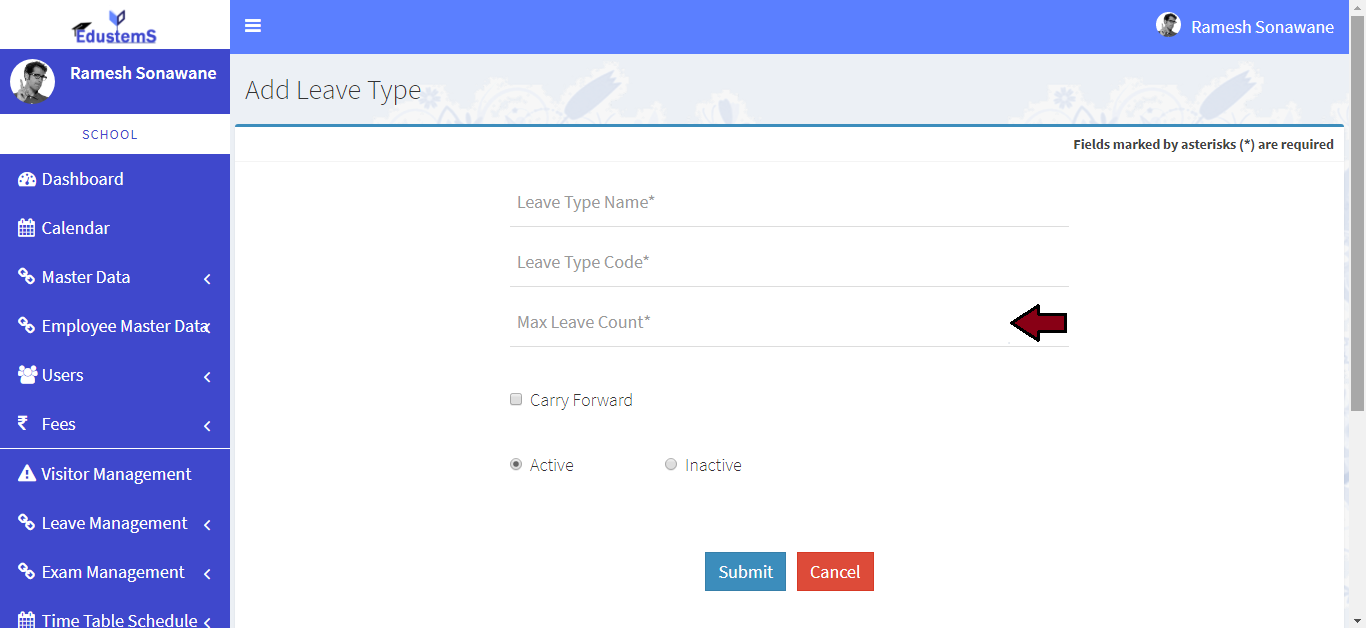
For add leave type. Click on Leave Management >> Leave Type link from left navigation Panel. Then click on Add Leave Type button
-
Please enter leave type name and code
-
Please enter max leaves count
-
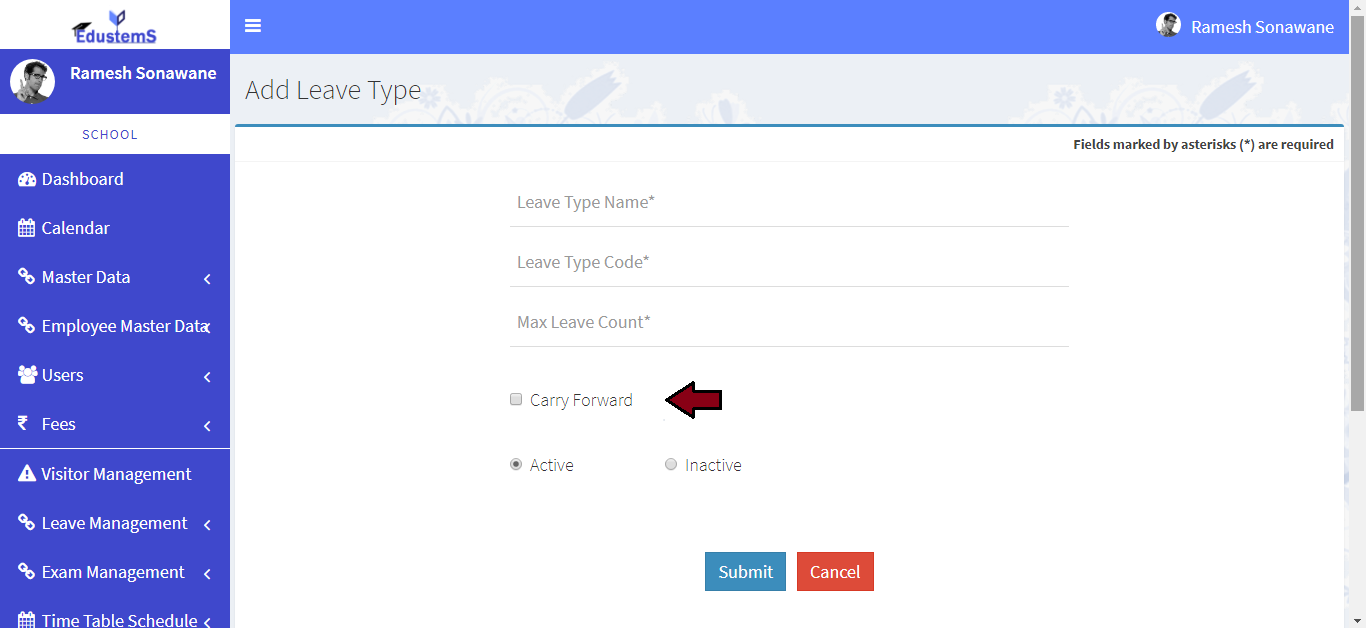
Please check if carry forward type of leave
-
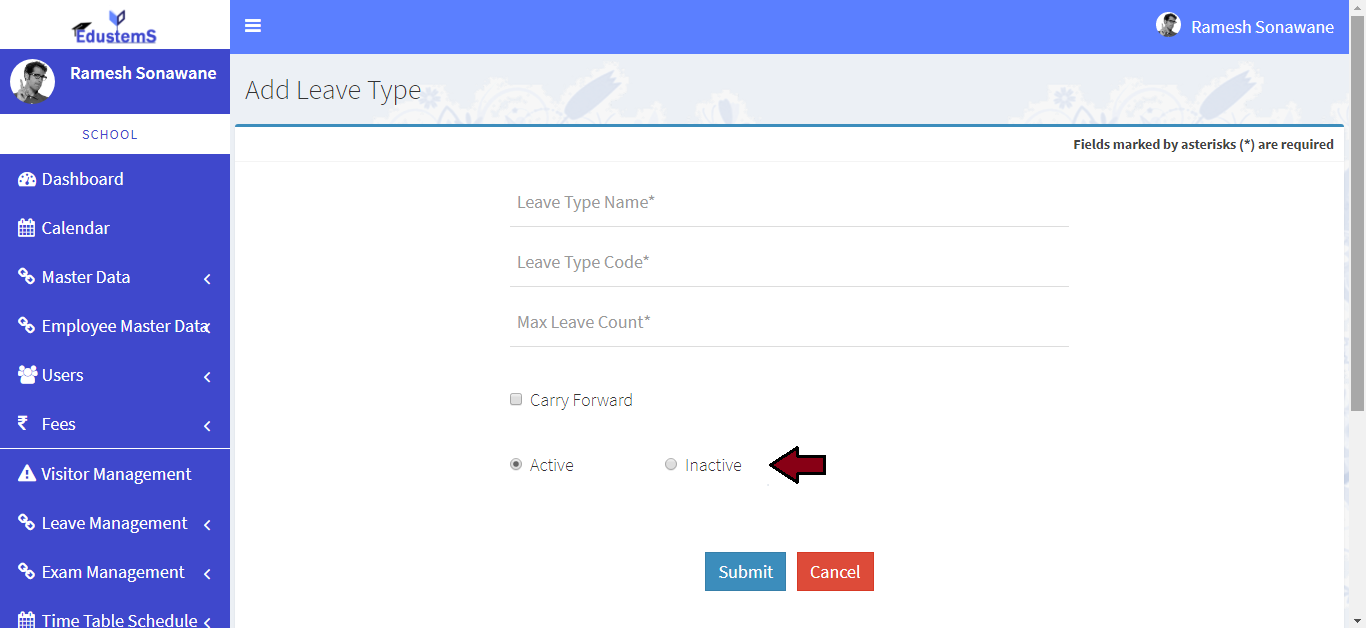
Please make this leave type active or inactive
-
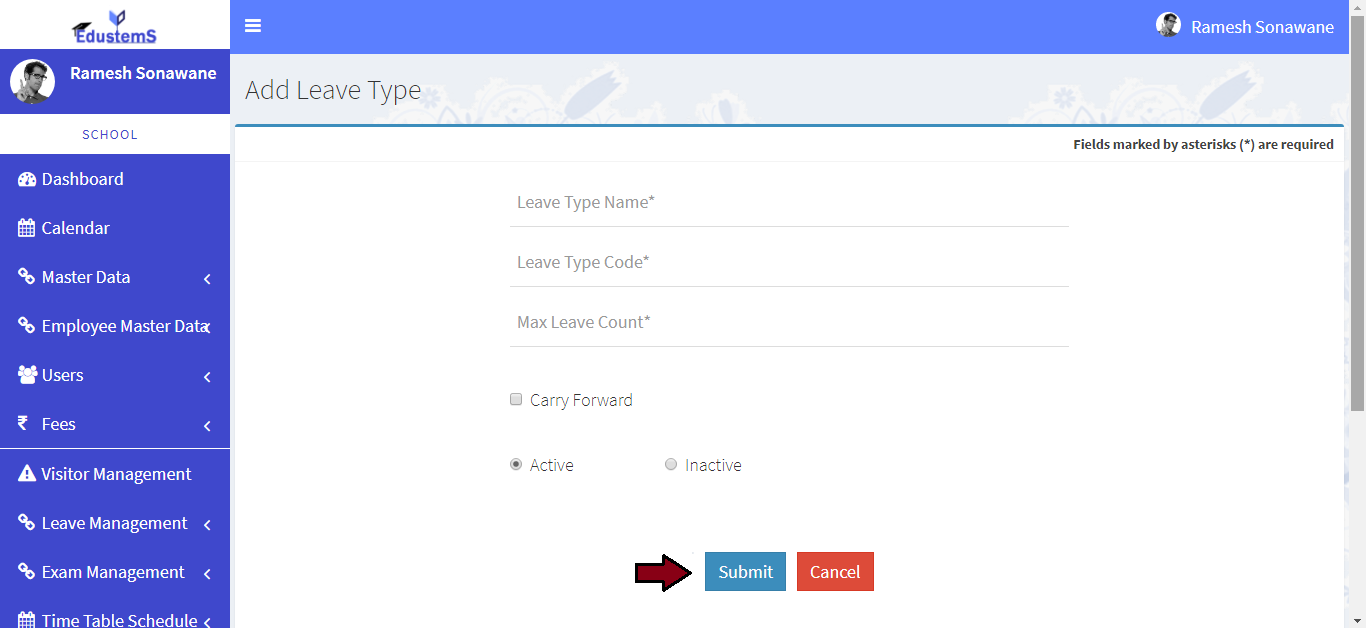
Click on Submit button
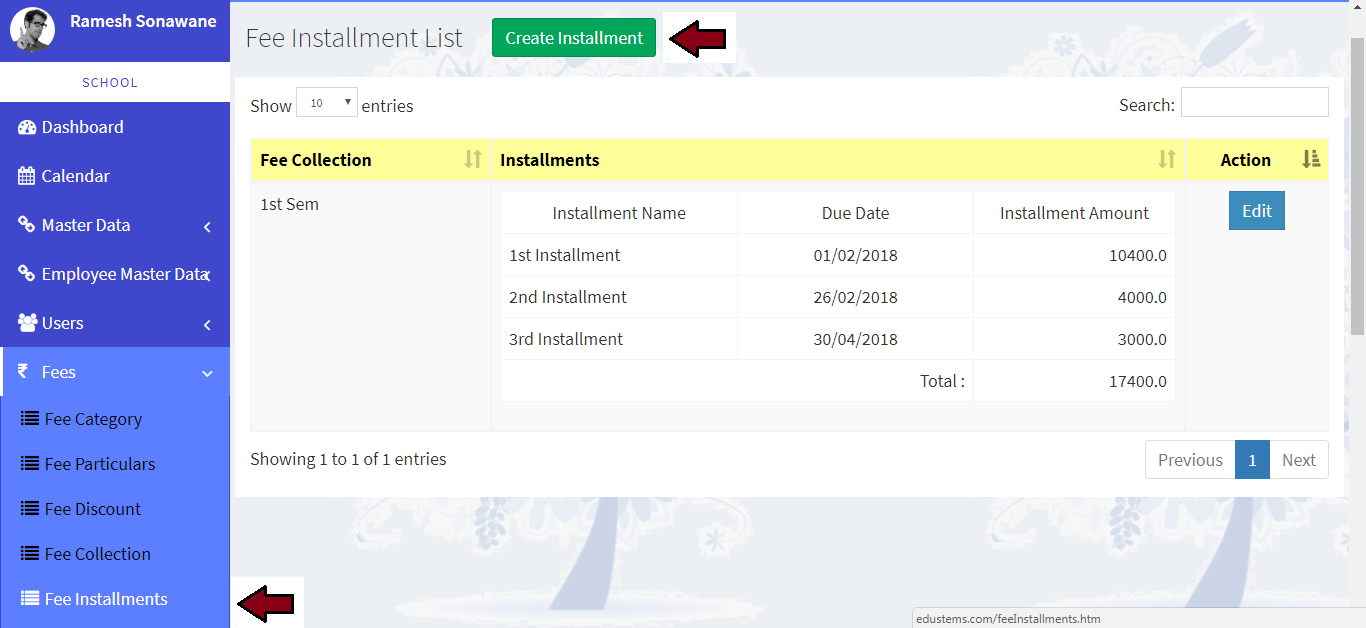
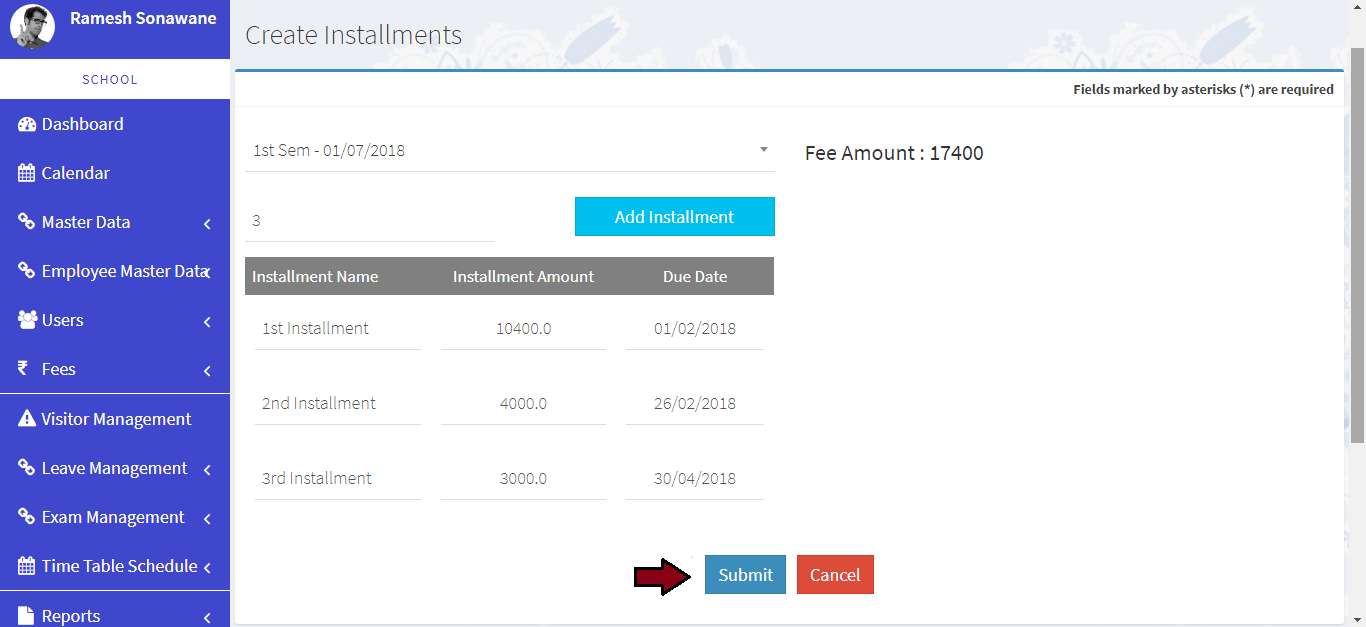
Learn how to create fee installments
-
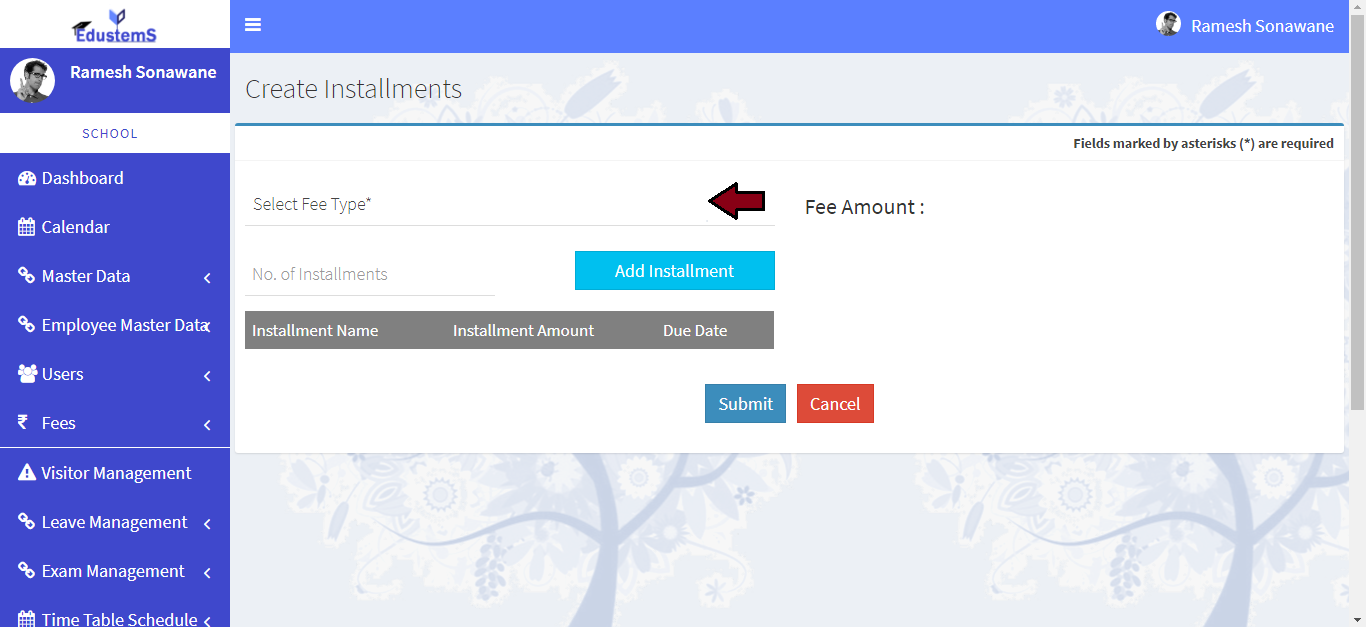
For create fee installment. Click on Fees >> Fee Installents link from left navigation Panel. Then click on Create Installment button
-
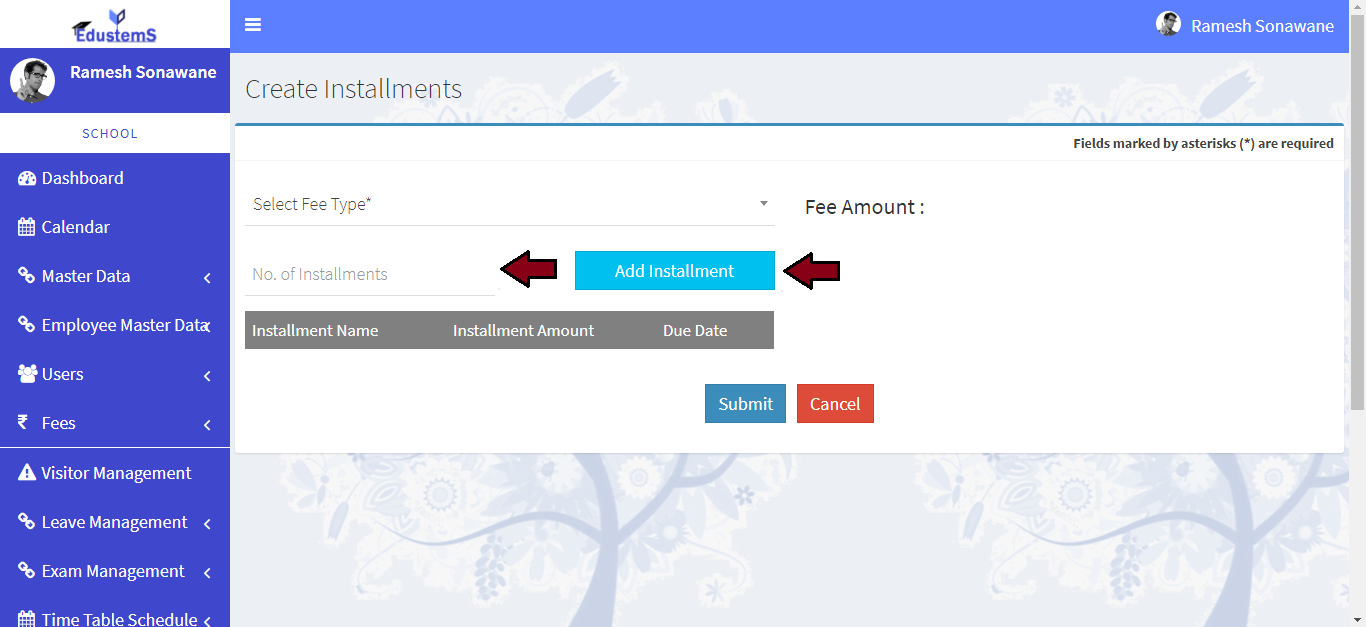
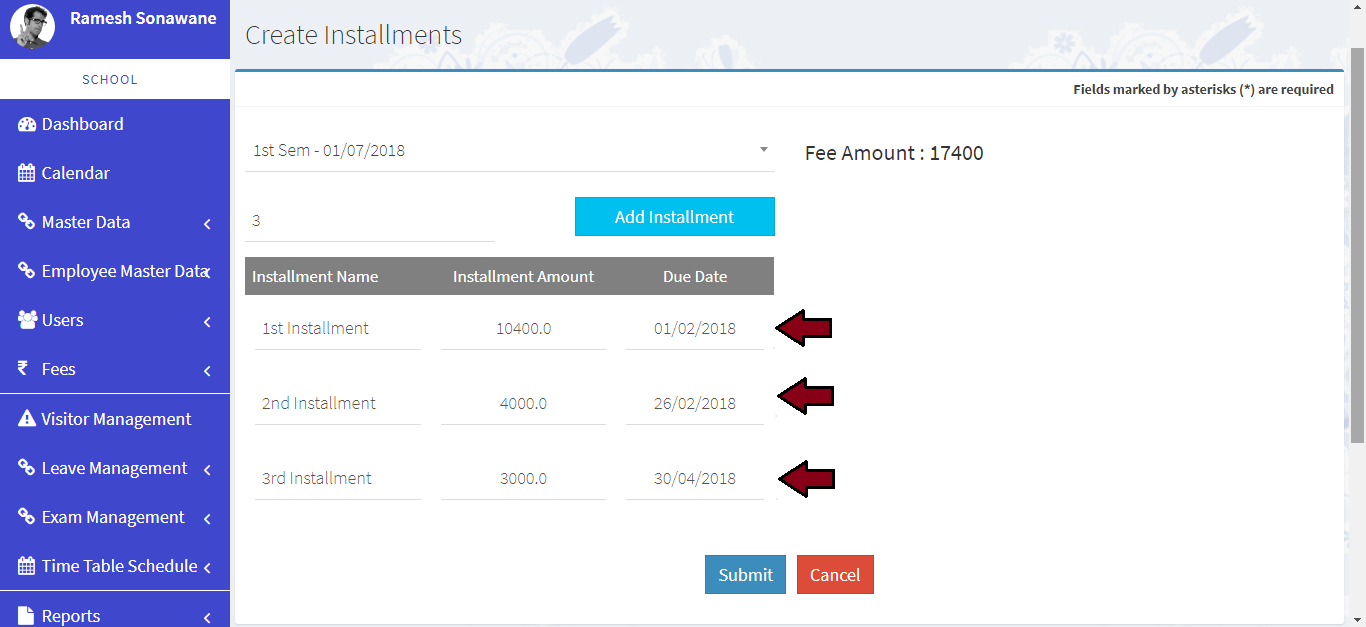
Please select fee type
-
Please enter No. of installments and then click on Add Installent button dynamic row will be added
-
Please divide the fee amount in no of installments
-
Click on Submit button
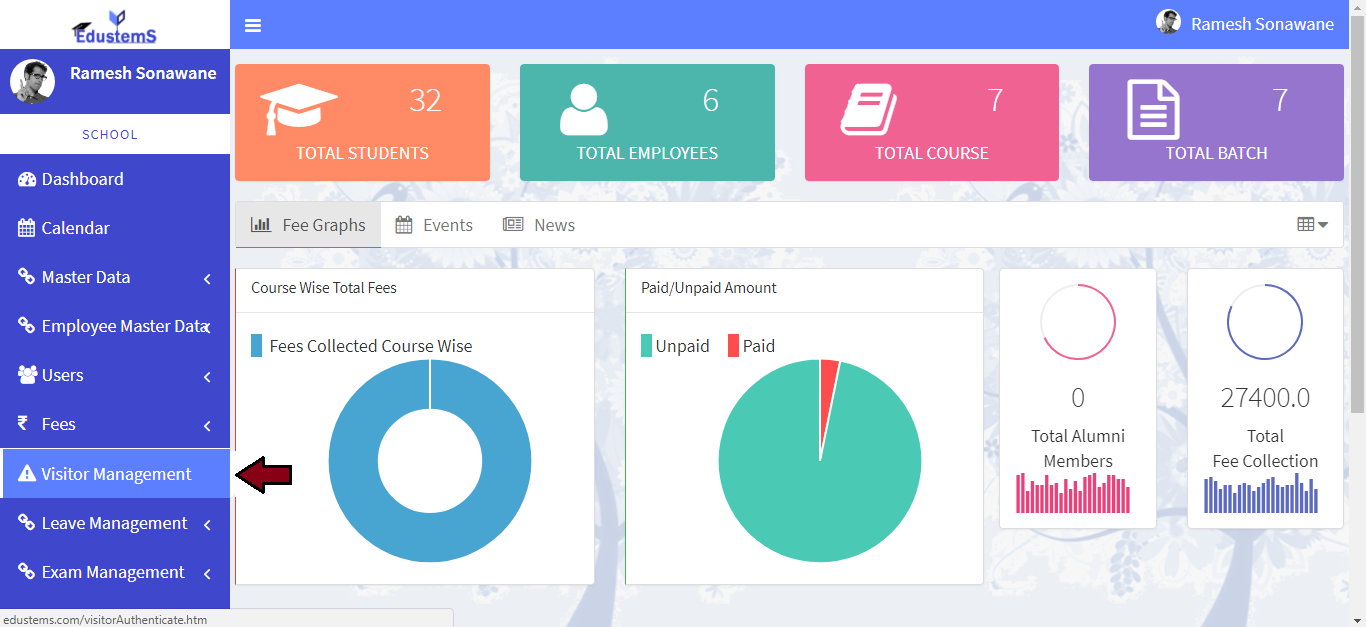
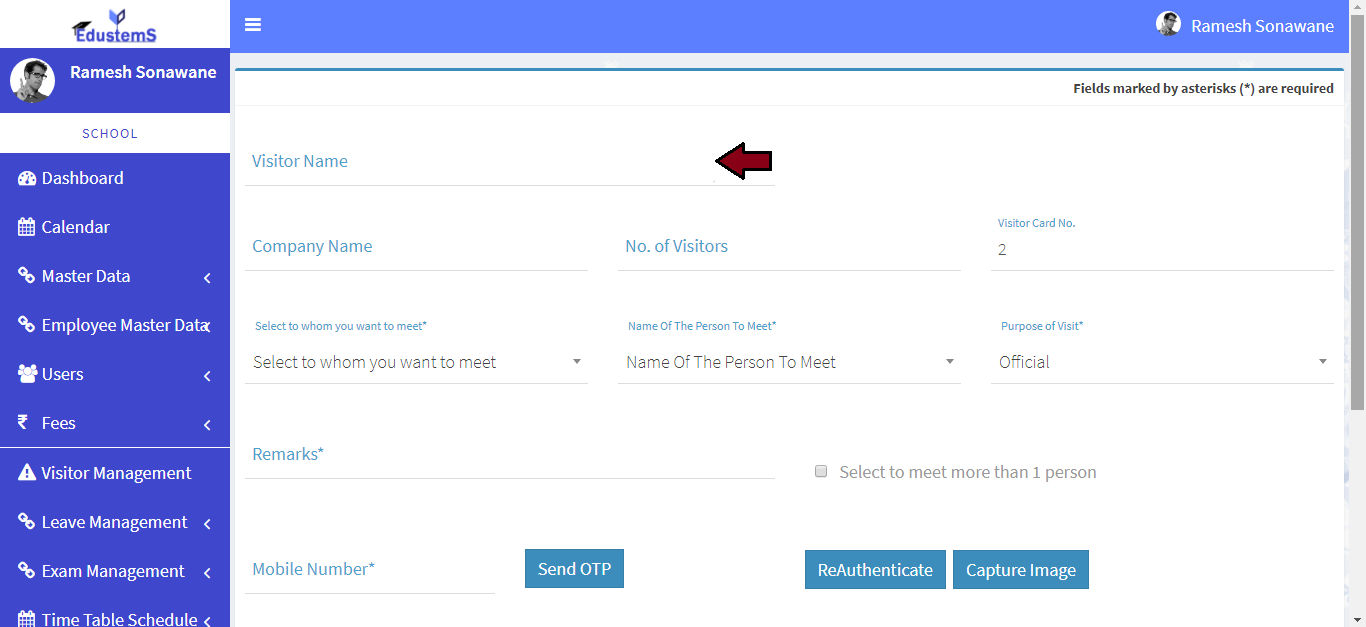
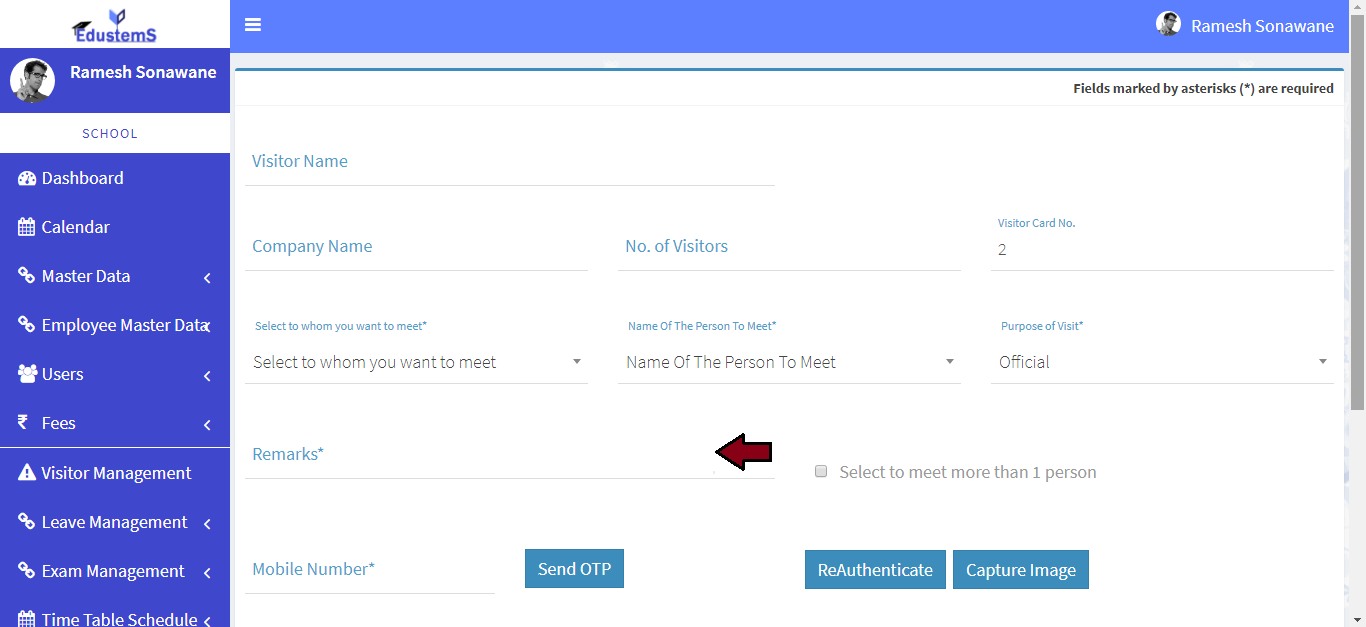
Learn how to authenticate visitor management
-
Click on Visitor Managment link from left navigation Panel.
-
Please enter visitor name
-
Please enter visitor company name and no. of visitors
-
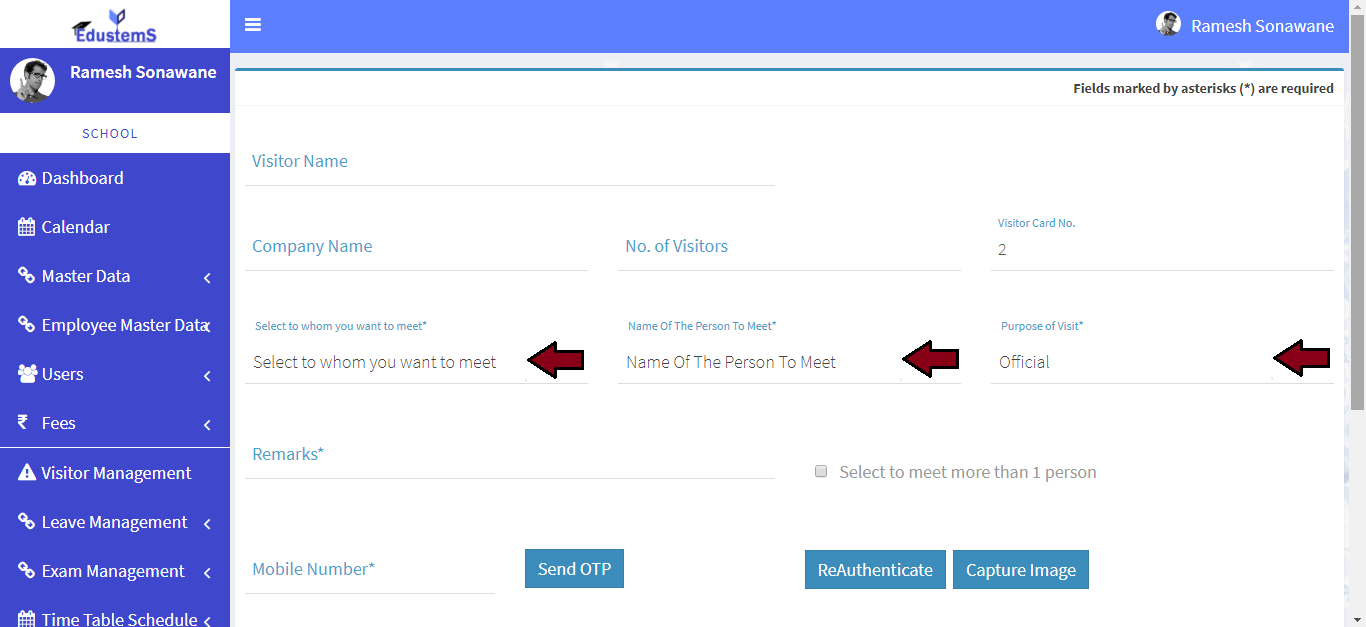
Please select to whom you want to meet, name of the person to meet and purpose of visit.
-
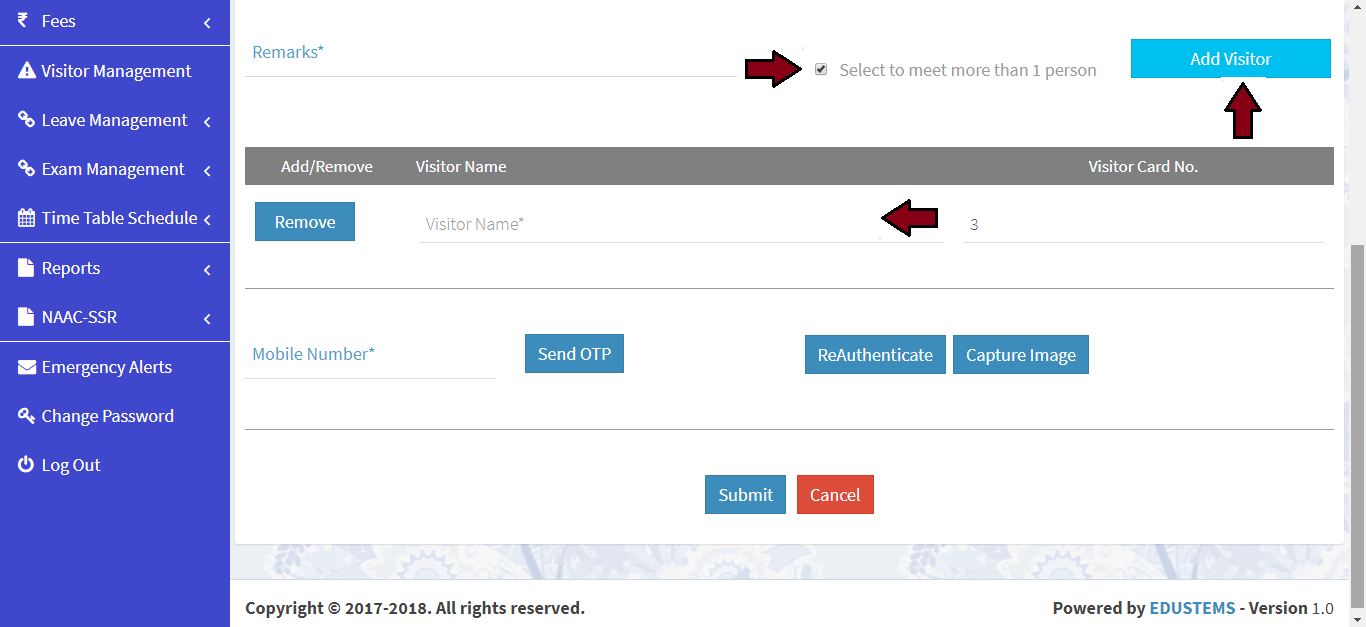
Please enter remarks
-
Please checked if more than 1 visitor and click on Add Visitor button. and enter visitor name
-
Please enter visitor mobile no. and click on Send Otp button. Otp will come to visitor mobile enter correct otp and authenticate mobile no.
-
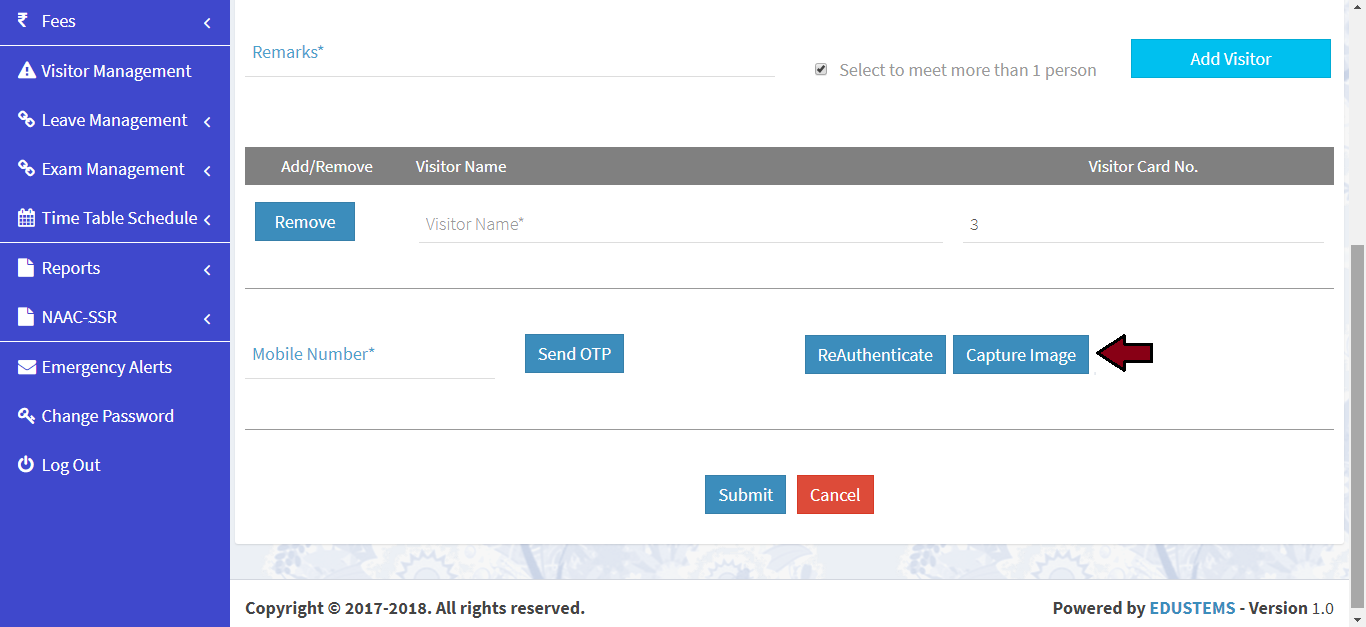
Please capture the visitor image. Click on Capture Image button
-
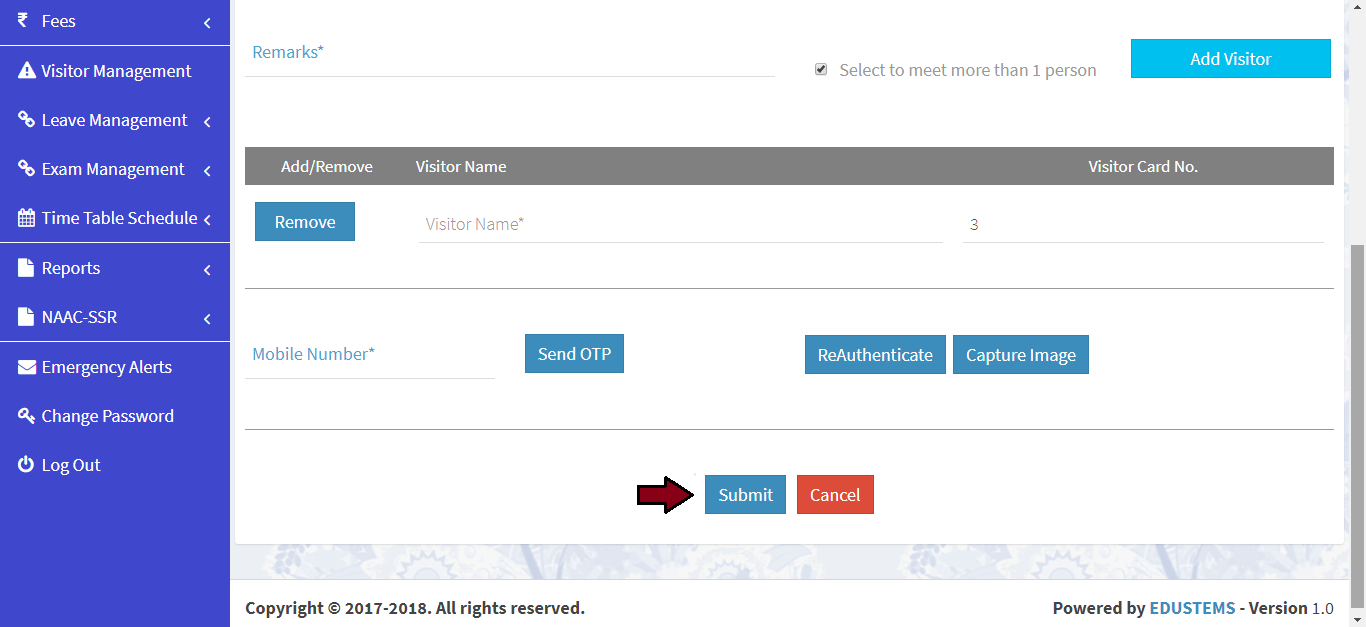
Click on Submit button


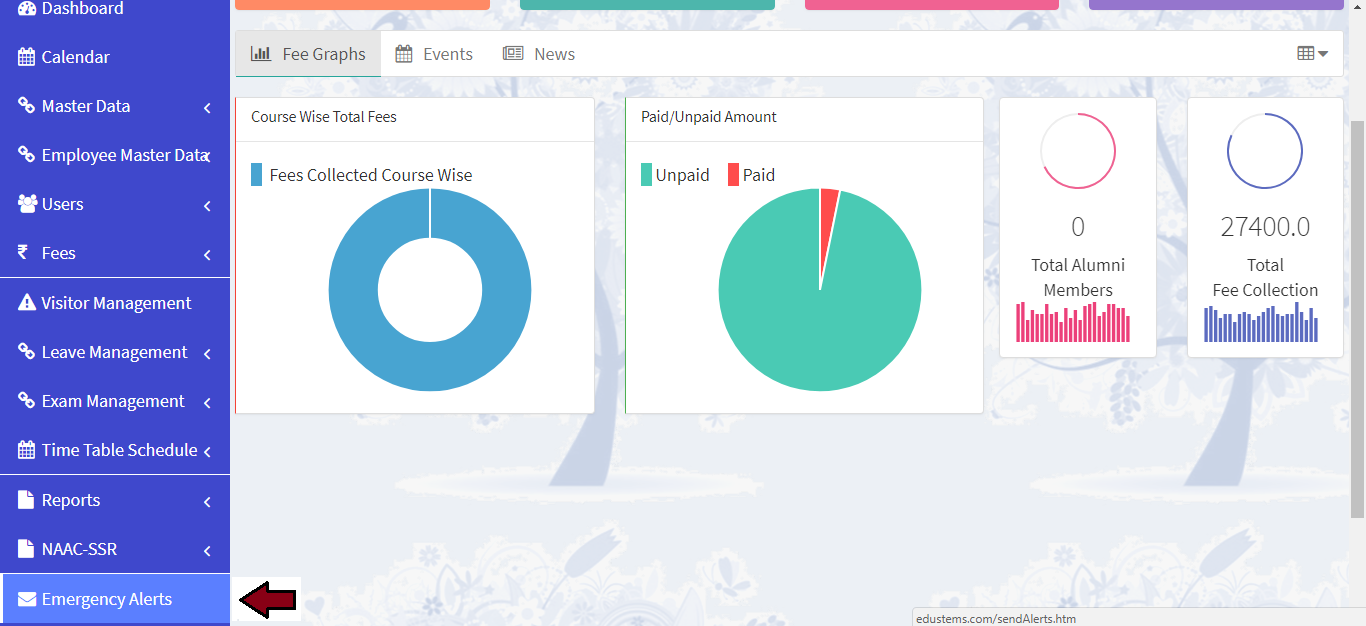
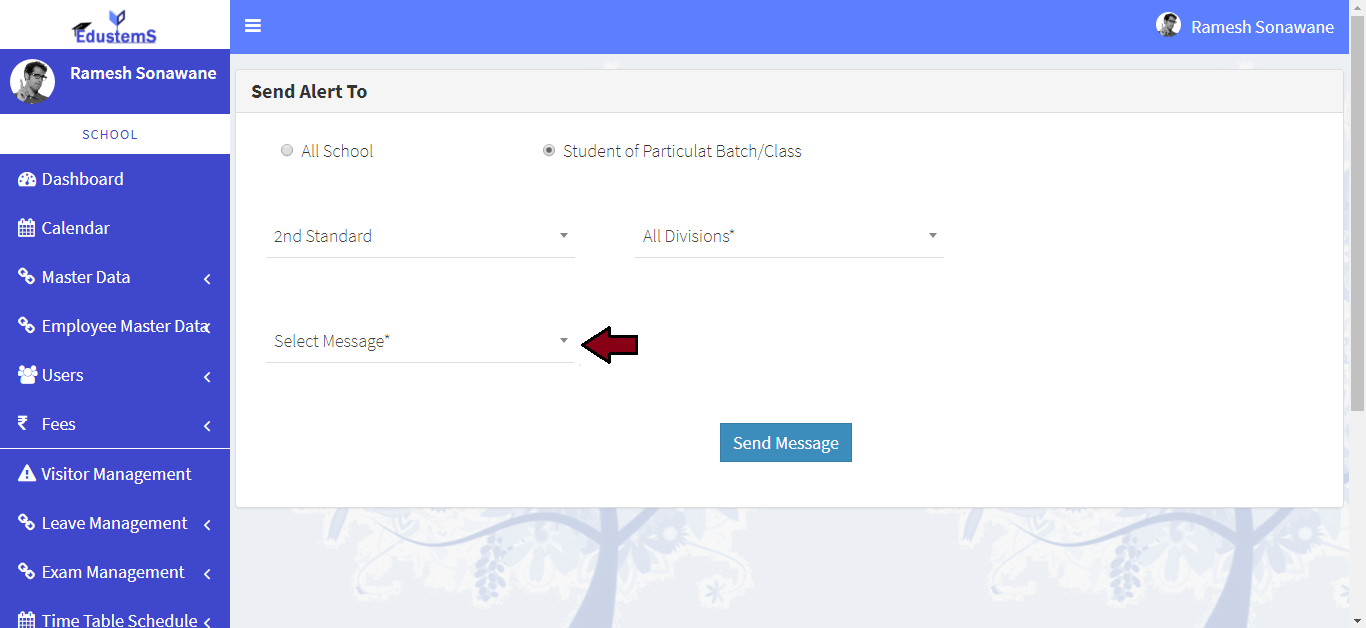
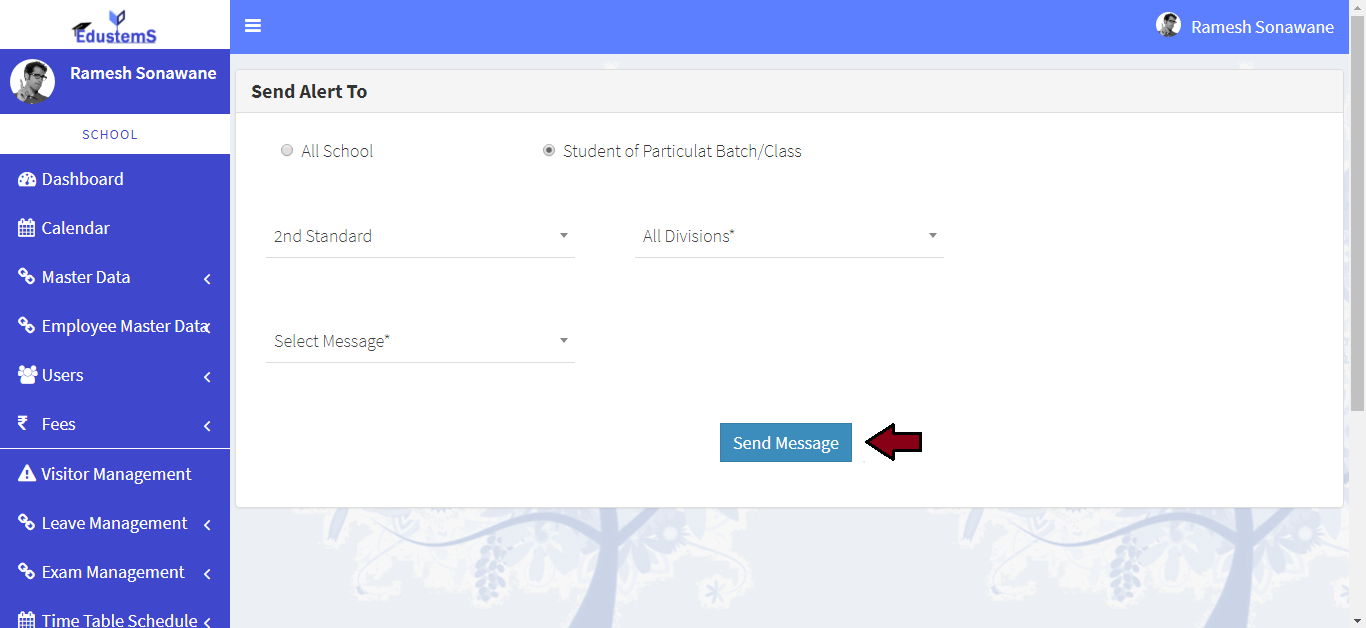
Learn how to send emergeny alerts
-
For send alert. Click on Emergenc Alerts link from left navigation Panel.
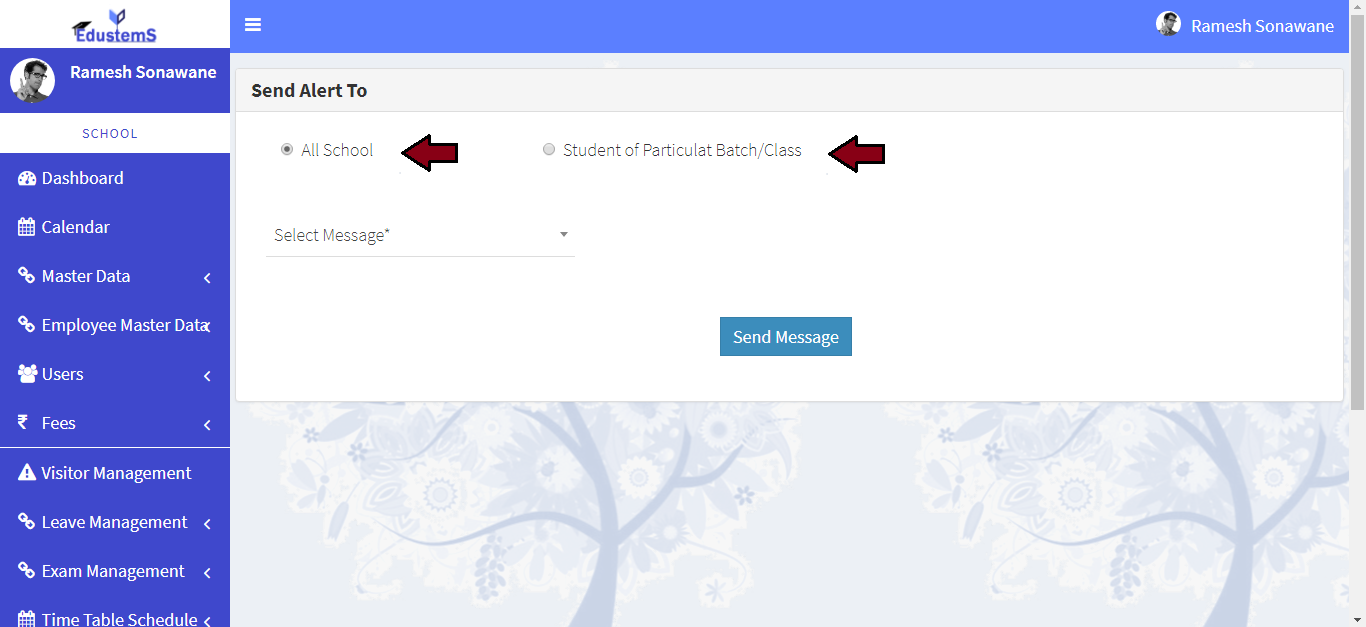
-
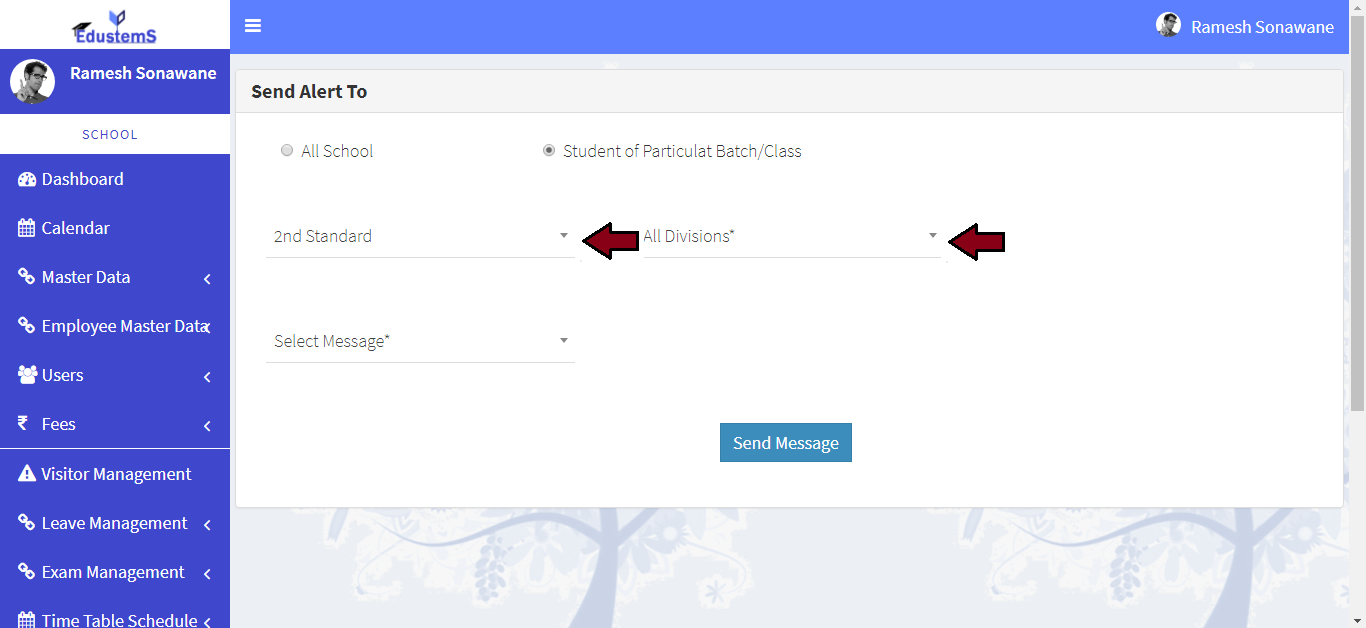
Please choose to whom you want to send an alert
-
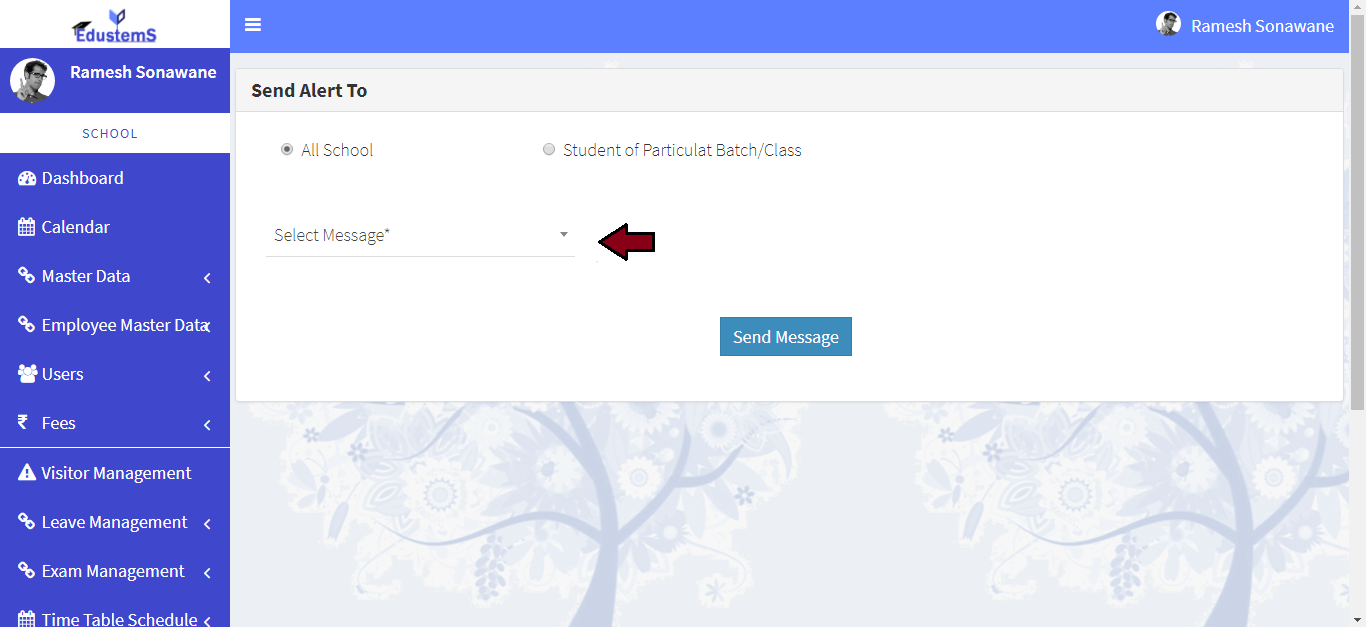
If you choose All School then select message
-
If you choose Student For Particular Batch/Class then select Batch and Division
-
Please select the message you want to send
-
Click on Send Message button